A pegboard organization kids room setup can run from a single afternoon project to a full wall installation, and the deciding factor is usually how much weight you need it to hold.
The real catch most parents miss is clearance: without lattice boards behind the pegboard, bolt heads bottom out against drywall and the whole grid weakens.
That 2-inch screw depth is what separates a climbing wall that stays put from one that pulls loose the first time a kid hangs on it.
[link-whisper-related-posts]1. Pegboard Climbing Wall

A pegboard climbing wall turns dead vertical space into something kids actually use.
We like the 4′ x 4′ size because it fits a standard stud bay without cutting into the next room’s wall, and one piece from the hardware store covers it.
Lattice boards behind the pegboard keep the holds from bottoming out against drywall; three strips, one at the top, one at the bottom, and one 16 inches down from the top, give enough clearance for the bolts to seat.
Two people make the hang easier. These boards fight back when you try to solo them.
The holds bolt through the peg holes wherever you want them. Colorful ones help small kids spot their route, but the layout matters less than what sits underneath.
Soft mats or pillows on the floor are the one detail that keeps this from being a trip to urgent care. Every other climbing wall idea skips that part, and we think that is a mistake.
A 4′ x 4′ wall is not high, but a kid falling wrong from four feet still breaks a wrist. The mats cost less than the co-pay.
2. Pegboard Art Station

A pegboard over the desk turns the wall itself into the art station.
We like this setup because the same surface that holds the supplies also hangs the finished work: hooks keep scissors and markers within reach, bins corral the loose stuff, and the open grid means a kid can swap in a new painting without asking for tape or a thumbtack.
If the desk has no drawers, the pegboard becomes the drawer, vertically.
For the paper pieces, a magnet board keeps the drawing intact. No holes, no torn corners.
The magnet tiles also hold tools up and away, or down at working height, depending on what the kid is ready for.
Shelves on the same board give the 3-D crafts a stage: clay animals, cardboard structures, the odd glued-together box.
Color is worth thinking about. A bold ombre board or a pink panel that matches the wallpaper turns the storage into part of the room’s look rather than an afterthought.
The art supplies stay visible, which in our experience means they get used more, and the latest masterpiece gets the wall space it deserves instead of the fridge door.
3. Pegboard Wall for Storage

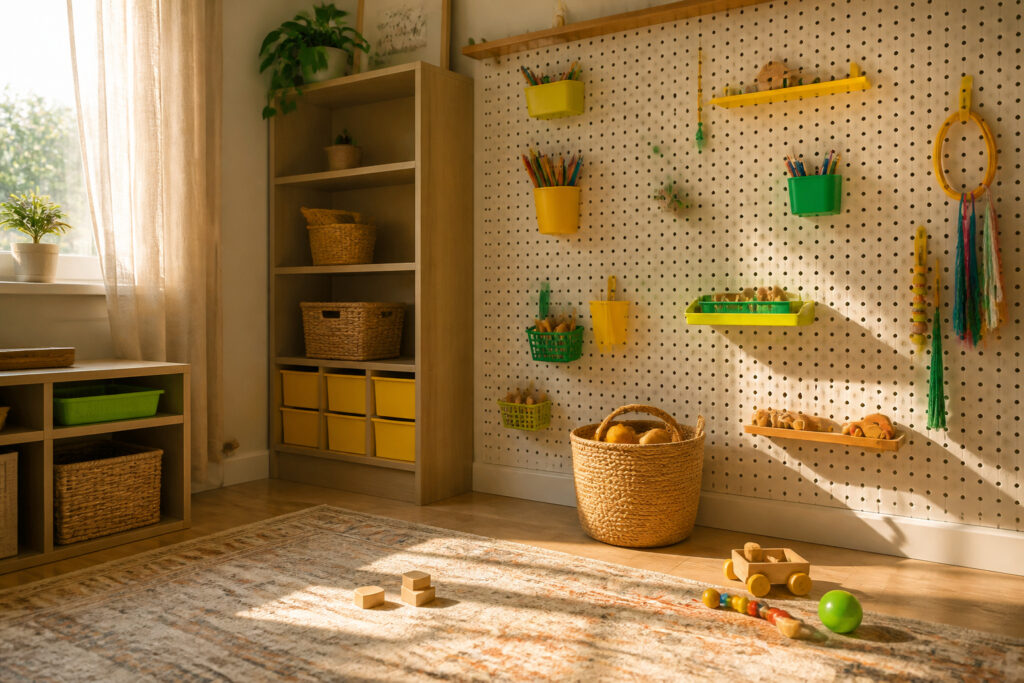
A full pegboard wall gives you vertical storage that keeps floor space open for play.
Shelves, ledges, and hooks move anywhere on the grid, so the same wall that holds diaper bags and board books now can later handle backpacks, art supplies, or hobby gear.
Paint it or color-block it if the raw board looks too utilitarian; a bold yellow panel over a desk doubles as décor.
The real advantage is how the configuration shifts without new holes in drywall. When your child drops dinosaurs for watercolors, you rearrange the hardware instead of replacing the system.
That adaptability matters in rentals and first homes where you want one solution to last through several phases, not one redesign per year.
4. Pegboard Reading Nook

A reading nook built on pegboard works because you are not locked into one layout as the child grows. Start with a sheet sized to the wall space you have, then add the shelf accessories instead of hooks.
We have seen setups that use simple ledges for books at a height a toddler can reach, with the same pegboard later reconfigured to hold rails and deeper shelves for school supplies.
The key difference from a hook-heavy wall is weight distribution. Ledges and shelves load the board differently than a backpack on a single peg.
Spread the brackets across several holes, and keep heavier books toward the lower third where the board meets the most support.
A whole pegboard wall gives more room to mix ledges with the occasional hook for a reading light or a fabric bin, but even a small board over a floor cushion gets the job done if you plan the bracket spacing before you load it.
5. Pegboard Bins for Supplies

Bins on a pegboard turn wall space into something a child can actually use.
We like the five-spot shelf that comes in pairs for coloring books or markers; the lip keeps crayons from rolling onto the floor when someone pulls the bin at an angle.
Paint bottles and glue fit too, though we would not trust them loose in a top row over carpet.
If the desk has no drawers, a pegboard with bins becomes the storage. The bins snap or hang onto standard pegboard hooks, so moving them takes seconds when the supplies change.
An organizing kit with matched bins and hooks keeps you from guessing what fits together.
For a kids’ space, a bold ombre or bright color on the board itself ties the room together without adding clutter.
A pink pegboard against patterned wallpaper works the same way: the storage reads as part of the design, not an afterthought.
The limit is weight. Heavy items in upper bins eventually stress the hooks.
Keep paints and bulk supplies on the bottom half, where a child can reach them anyway and a failure costs less.
6. Rotating Art Gallery

The fridge door fills up fast, and taping new drawings over old ones gets old for everyone. A pegboard mounted at kid height turns the problem into a rotating display.
We like a shallow shelf or ledge pegged across the lower half for three-dimensional stuff: the painted clay blob, the popsicle-stick house, anything too heavy for a pin.
For flat paper pieces, magnets beat pushpins every time; the artwork swaps out without a hole, and the same magnet tile that holds tonight’s sunset can hold tomorrow’s scribble.
One of us learned this after watching a kindergartener melt down over a punctured cat drawing. The tiles also keep scissors up and away from small hands, or at reachable level if your kids are ready.
A bold-colored board, maybe an ombre wash that picks up the room’s scheme, makes the gallery feel intentional rather than leftover. The whole setup stays under a weekend and a few dozen dollars in pegboard, paint, and hardware.
What You Need to Install It

You will need a drill, a drill bit, a level, a stud finder, and 2-inch drywall screws.
The pegboard itself is typically sold in 4-foot by 4-foot sheets, and you will want three lattice boards cut to match the width of your piece so the pegs can pass through without hitting the wall behind.
- Find the studs and mark them. They should sit every 16 inches, but walls are not always predictable, so verify with your stud finder and mark above where the top and bottom lattice boards will go.
- Mount the lattice boards horizontally. Place one just below your top mark, one just above your bottom mark, and the third in the middle, 16 inches below the top board. Level each one before fastening it.
- Hang the pegboard over the lattice boards and line it up so the peg holes align with your stud marks. Pre-drill, then drive three screws into each lattice board to anchor the pegboard and the lattice into the studs: start with one centered on the top board to hold everything in place, check that it is still level, then add one at each corner. Repeat with three screws on the middle board and three on the bottom board.
Two people make step 3 far less awkward, but if you are working alone, brace the bottom edge on a temporary ledger board or a stack of books while you drill that first center screw.
How to Paint and Personalize

Raw pegboard reads like a hardware store leftover, so paint it before you hang it. We learned that the hard way after bolting up a sheet in its factory brown and watching it fight every color in the room.
A gallon of interior latex in the wall color, or a bold yellow if you want it to read as intentional, covers the grid without clogging the holes. Let it dry overnight, then install.
Hook and shelf combinations turn the board into actual storage. We use bins for coloring books and loose supplies, a five-spot shelf for markers and glue bottles, and straight hooks for backpacks.
The mix matters more than the individual pieces; a wall of all hooks looks just as institutional as the raw board.
The real win is that the layout changes with the kid. One month ours held art supplies for a toddler who would not settle on a single medium.
Six months later the same holes carried ledges for a rock collection. You are not committing to a system, you are committing to a grid that accepts whatever the next interest becomes.
Why Vertical Storage Works in Small Rooms

Kids’ rooms swallow floor space faster than almost any other room in the house, and the smaller the room, the harder the hit.
A pegboard turns the one surface nobody walks on, the wall, into active storage without the footprint of a bookcase or toy chest.
In a shared room or an apartment bedroom where two kids split twelve by ten feet, keeping the floor clear changes whether they can actually play there.
We have seen rooms where every stuffed animal, art supply, and dress-up piece ended up in a bin on the floor because the closet rod was too high and the shelf too deep.
Pegboard fixes that by bringing the storage to the kid. Hooks at four feet hold yesterday’s costume; shelves at five hold the markers they reach for every afternoon.
Nothing sits on the carpet waiting to be stepped on or lost.
The principle runs through every idea we are about to show you. Vertical storage only works if the stuff on it stays usable, not just visible.
That means spacing hooks where small hands can reach, choosing shelves deep enough for a shoebox but not a microwave, and leaving gaps for the wall to breathe so the room does not feel like a warehouse.
Get that balance right and the floor stays open for the actual living.
Frequently Asked Questions
How do I install a pegboard in a kids’ room?
Find the studs, mount three lattice boards horizontally for clearance, then screw the pegboard through the lattice into the studs with 2-inch drywall screws.
Two people make the hang easier, but a temporary ledger board or stack of books can brace the bottom if you are working alone.
What can I store on a pegboard in a kids’ room?
Art supplies, books, toys, backpacks, and finished artwork all work.
Bins hold markers and glue bottles, ledges display books at toddler height, hooks keep costumes and bags off the floor, and magnet tiles show off flat pieces without punching holes in them.
What is the best way to organize a child’s room?
Use vertical storage that brings supplies to the kid instead of piling bins on the floor. Pegboard keeps the wall active, the floor clear for play, and the configuration changes without new holes in drywall when hobbies shift.
What are the disadvantages of a peg board system?
Weight limits matter: heavy items in upper bins stress hooks, and paints or bulk supplies should stay low. Raw board looks utilitarian unless you paint it, and a wall of only hooks still reads institutional rather than designed.
What are some fun and engaging ideas for a pegboard for kids?
A climbing wall with colorful holds and soft floor mats, a rotating art gallery with magnet tiles instead of pushpins, and a reading nook with adjustable ledges that start at toddler height and grow into school-age storage.
Each one turns the wall itself into something the child uses directly.
How do children learn by playing with pegboards?
Children can use pegboards with paint, yarn, beads, or nothing at all, so the same board becomes a different activity each time.