
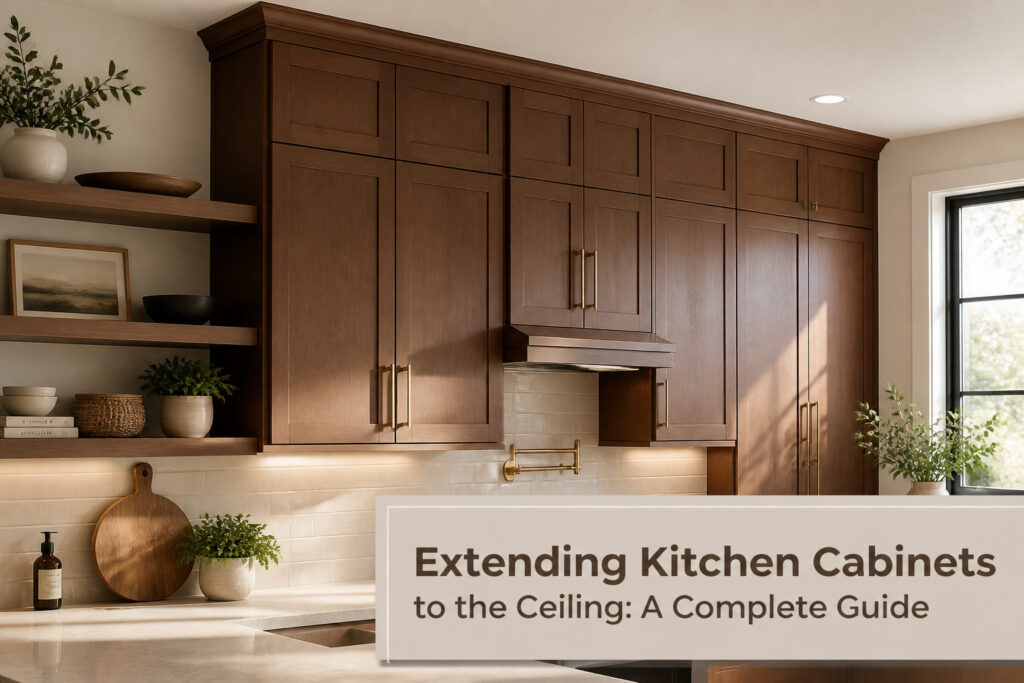
Extending kitchen cabinets to the ceiling means closing the empty gap above your upper boxes with built-in wood extensions, new doors, or crown molding. The condition that changes the work is the ceiling height, because 8 feet usually needs a single tall door while a 9-foot ceiling almost always wants two stacked doors to look right.
[link-whisper-related-posts]Measure the Gap
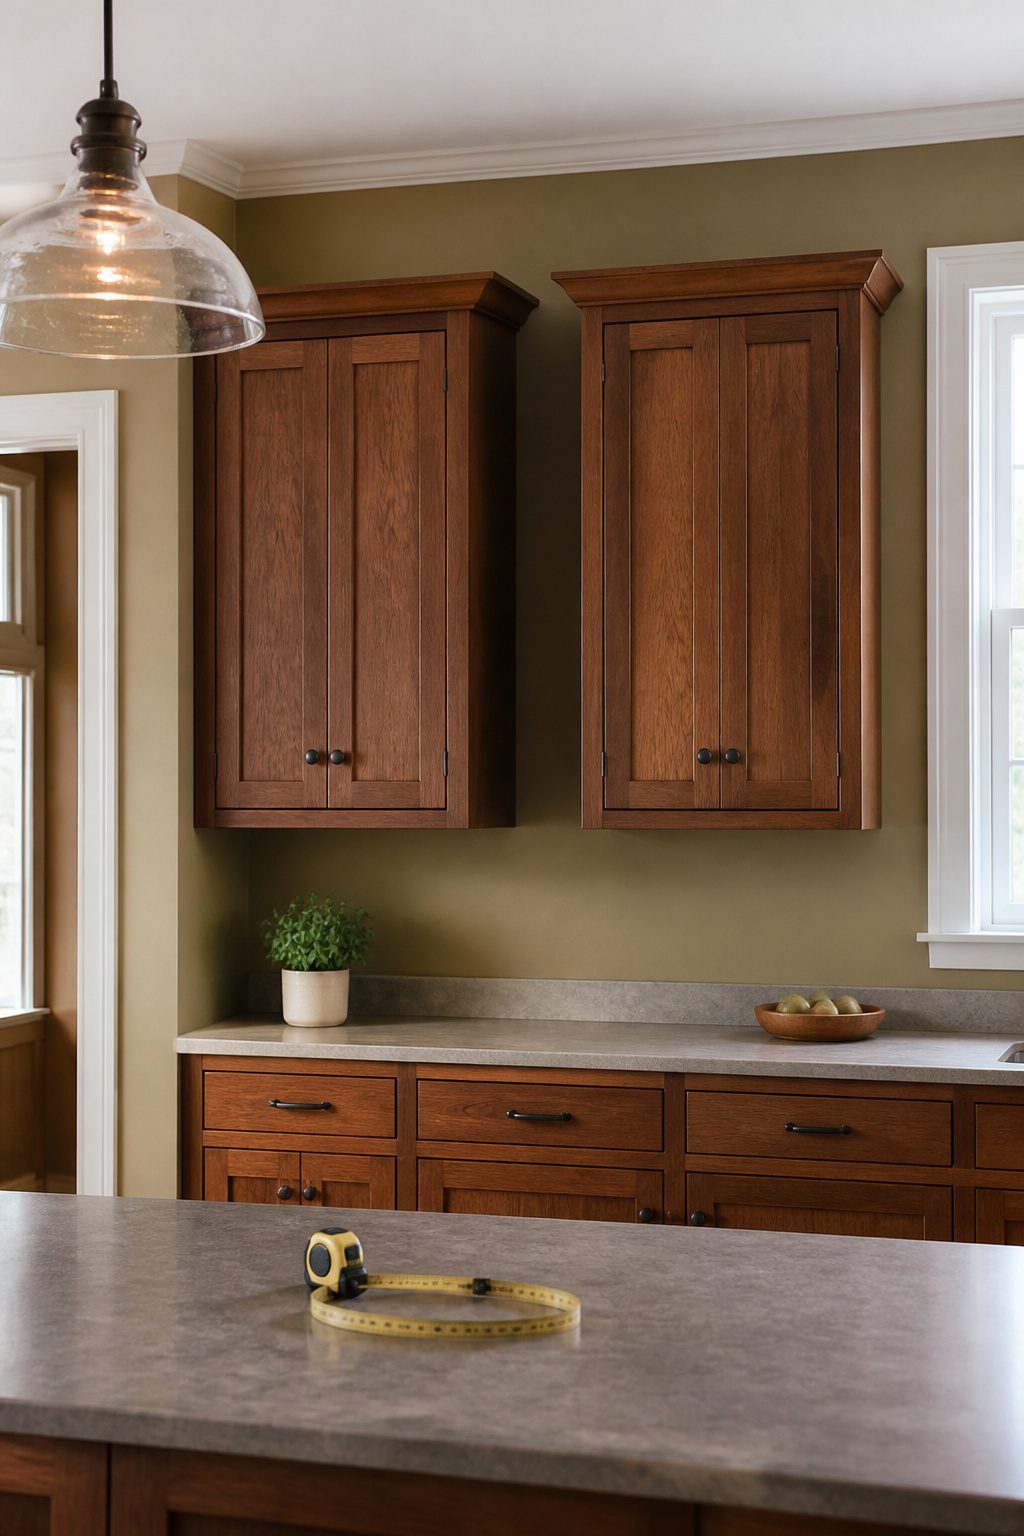
Most upper cabinets run 30 inches tall, which leaves a 12-inch gap under a standard 8-foot ceiling and about 24 inches under a 9-footer. That difference matters more than people expect. A single taller door can cover the whole run on 8-foot ceilings, but 9 feet usually wants two stacked doors to look proportioned right, and anything above that starts getting bulky and hard to reach.
Before you pull out the tape measure, check whether that space is open or boxed in by a soffit. Soffits often hide ductwork, wiring, or plumbing you cannot just bury inside a cabinet box. We have opened them to find HVAC lines running right where the extension would sit, and moving that work changes the project entirely. Measure height, width, and depth of the gap itself, but do not count the face frame or backing in your depth; those get added after. The number you need is the raw box-to-ceiling distance, because it decides whether you are filling a small space with crown molding or building real cabinet boxes to close a larger one.

COVER THAT GAP 】:The desktop extension panel helps you solve the problem of items falling from gaps. Suitable for the gap between the refrigerator and the desktop, the gap between the bathroom desktop and the wall, etc.
COVER GAPS: This bestselling stove gap covers is very easy to clean which keep the crumby cruddy grossness out of the gap between your stove and countertop, or any other appliances in your household.
Build the Extension Boxes
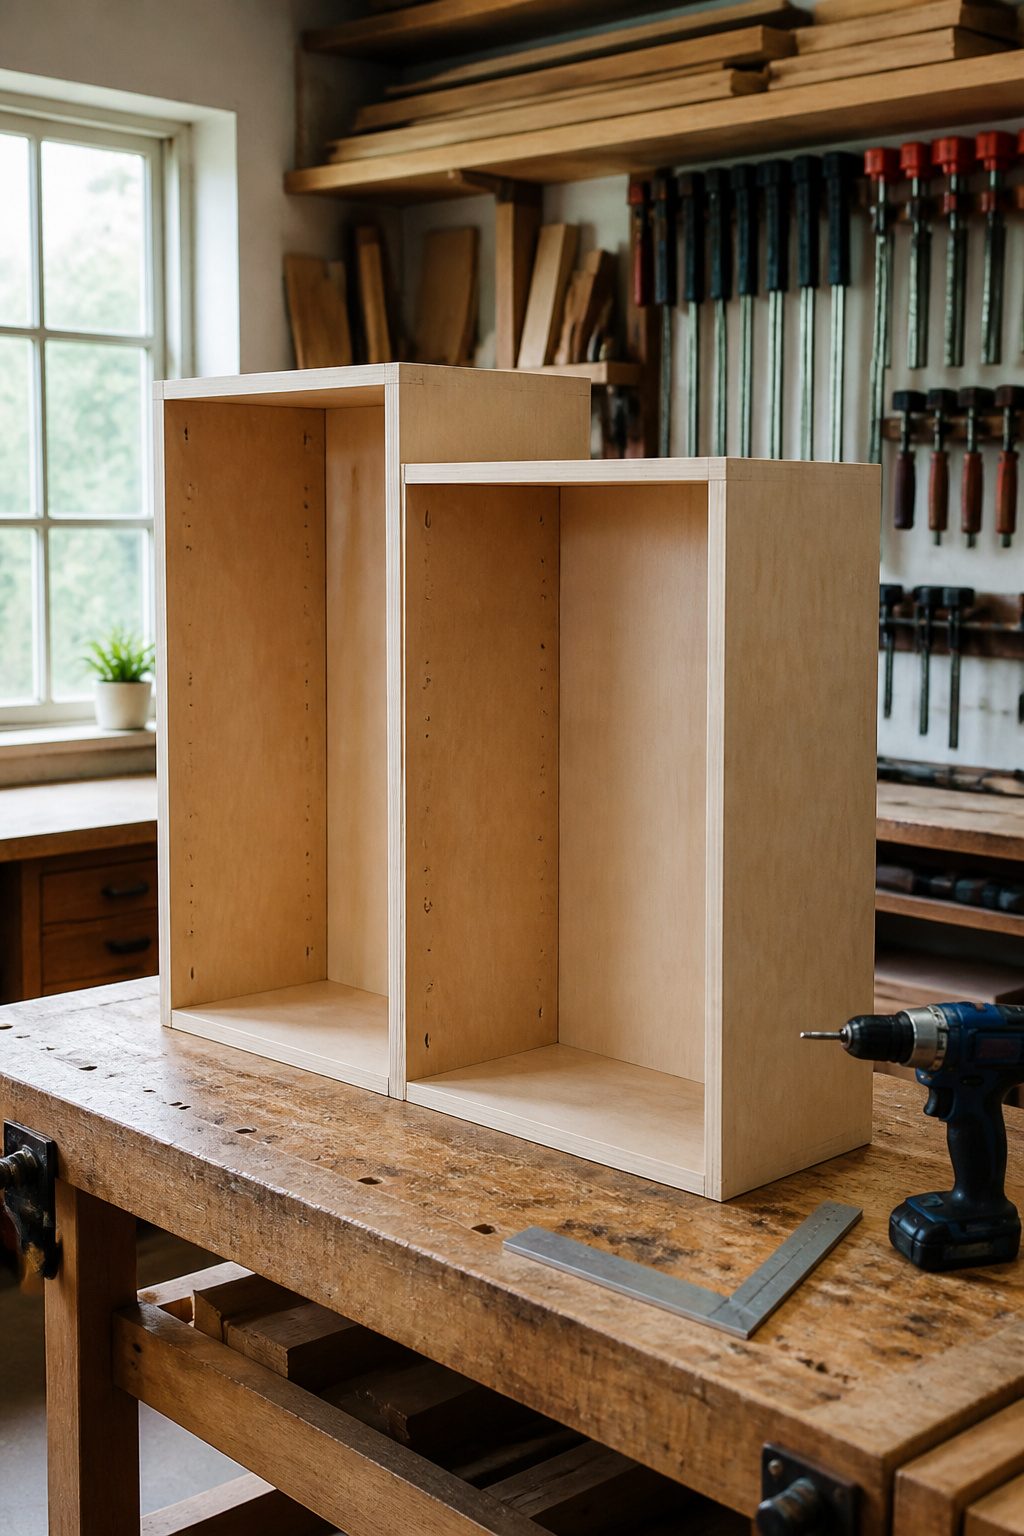
Plywood or MDF both work for the extension boxes, and we have built both ways. Plywood holds screws better if you are adding shelves inside the upper space; MDF machines cleaner if you need crisp edges to match a painted existing cabinet. Match the depth of your current boxes, not the depth including the face frame or the back panel, or the new piece will read as a bulky afterthought.
We build one box at a time and test it on top of the existing cabinet before cutting the next. A carpenter’s square is worth the pause; even a slight twist becomes obvious once the doors go on. Pilot holes keep the screw heads from blowing out the edge where two panels meet.
Pre-made boxes save a weekend if your kitchen uses a standard depth and a flat-panel or Shaker door. We have ordered them for rentals where the goal is clean and done. Custom builds win when the existing cabinets have an older face-frame style or any decorative edge that stock boxes will not line up with. The face frame and door style are what your eye reads, so spend your matching effort there, not on the box interior the crown molding will hide.
A cleat screwed to the wall studs carries the back of the box; the front lands on the existing cabinet top. We run screws down through the new box into the old one, plus nails through the back into studs. Clamps, not glue alone, while you check for square.

⭐【For New Installations & Replacement】 Designed for new cabinet builds or replacement of worn sliding door rollers, this hardware is perfect for DIY home projects, including sliding cabinet doors, wardrobe doors, and closet systems.


Bypass cabinet door hardware kit for 2 doors
Install Blocking
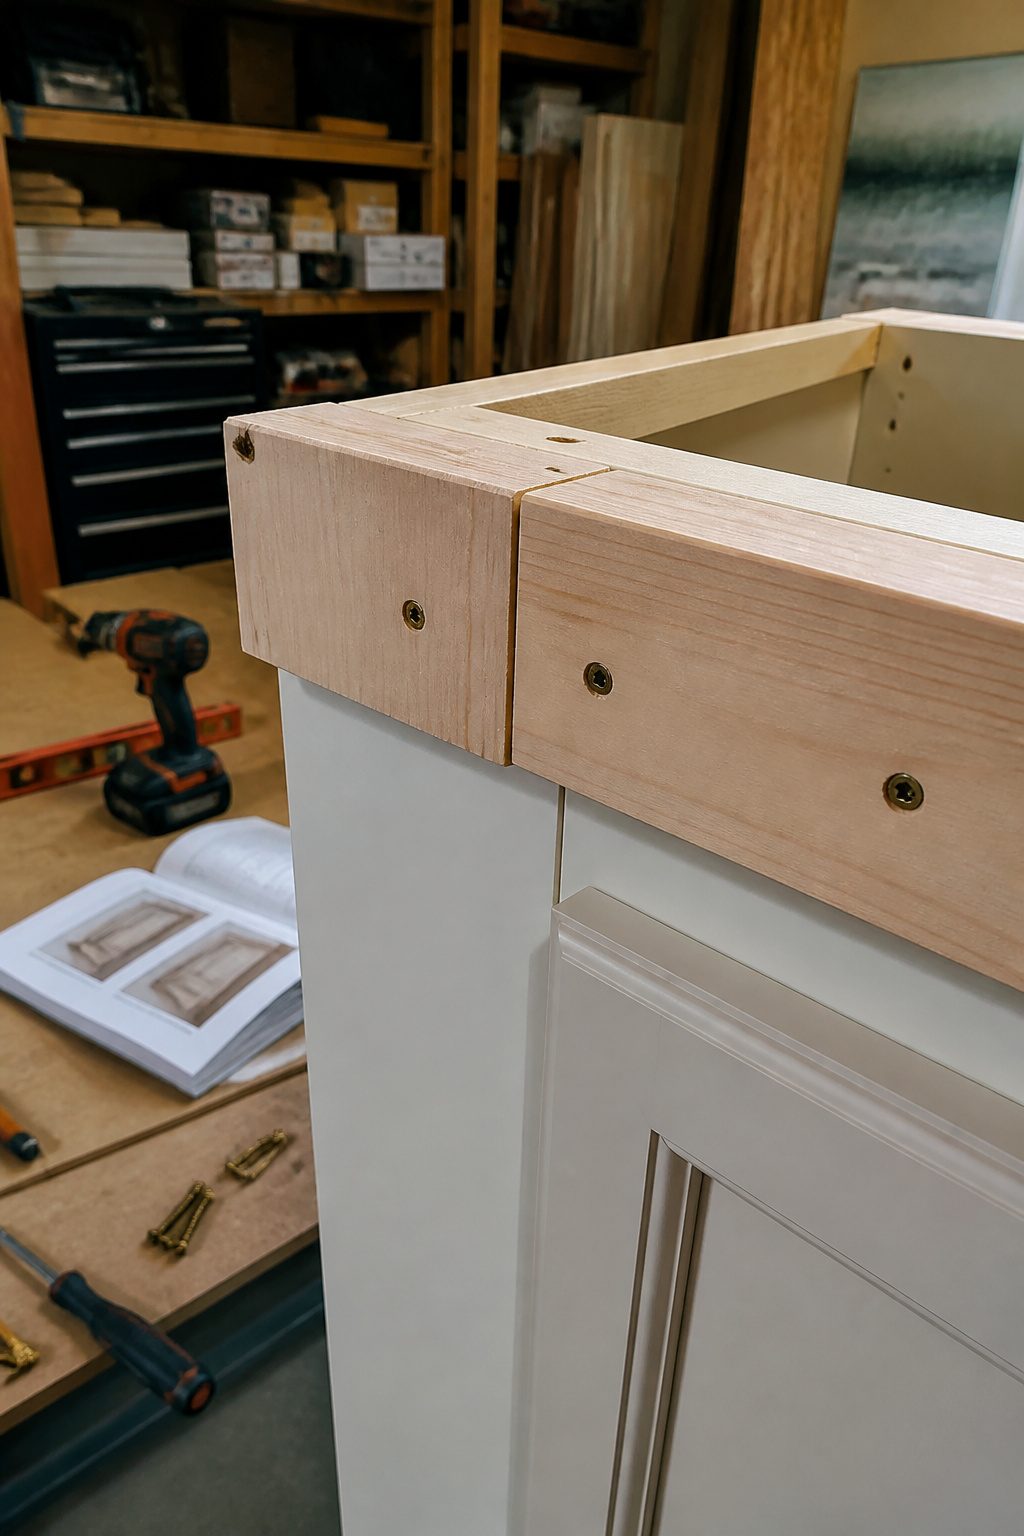
We cut 2×2 blocks to different lengths depending on where they sit. For the front ends of the cabinets, we use shorter 4-inch pieces. For the sides, we go with 10-inch blocks. The longer pieces save screws and feel simpler than stacking two small blocks together.
We drive 2-inch screws through the 2×2 into the cabinet tops. Before you commit, check that those 2-inch screws will not punch through your cabinet material. In a tight 6-inch gap, a right-angle driving bit keeps your knuckles clear.
Ceiling blocking needs to line up dead plumb with the cabinet blocking below. We use a scrap 2×4 cut perfectly square, pressed against the back of the cabinet block with a speed square riding alongside it. That gives a straight visual line up to where the ceiling 2×2 needs to land.
Anchor every ceiling block to a stud or joist. Drywall alone will not carry the weight you are about to add. A stud finder locates the beams; mark them before you lift anything overhead. If your cabinet frames feel wobbly or the wall behind them seems soft, stop and reinforce now. The extension box you build later is only as solid as what it screws into.

【Wallpaper Borders】90" x 3.1", Thickness: 0.3". Can be cut and spliced to the length you need.

High-Quality Flexible PVC with Self-Adhesive: The wall molding trim made from premium flexible PVC, this crown molding trim offers a smooth surface with properties. The self-adhesive backing ensures easy application and long-lasting adhesion without fading or deformation over time.

Size and Quantity: each package includes 4 pre-cut crown molding pieces, totaling 94.5 inches/ 2.4 meters in length; Measuring about 23.62 inches long each, these pieces are engineered to meet your design needs while maximizing usability and minimizing waste
Attach the Extension Boxes
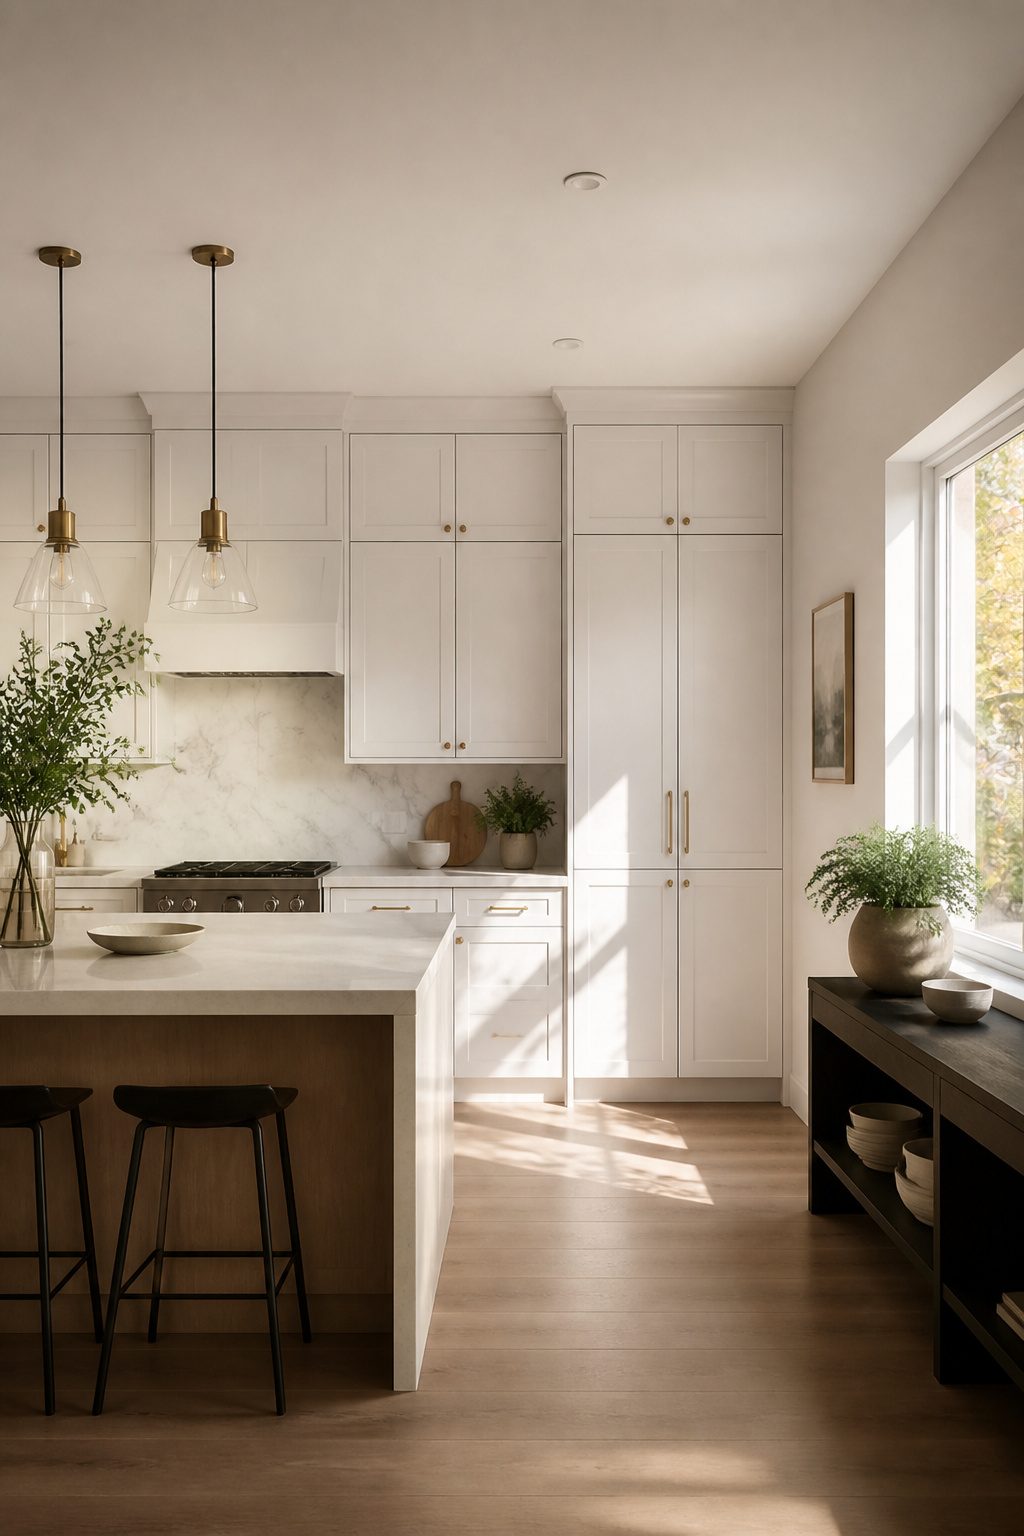
Set the box on top of the existing cabinet and screw through the back directly into wall studs; that carries the weight. We also run a few brad nails down through the new box into the old cabinet top, which locks the faces together so the seam stays tight when you open the door below.
Before anything is permanent, check alignment. Walls are rarely square, and the ceiling line can drift half an inch across a run of cabinets. We hold a level against the front face and check the side reveal at both ends. If the box tilts, shim behind it or trim the bottom edge before fastening. A gap that looks minor at eye level turns into a shadow line you will notice every morning.
For extra insurance against wobble, add blocking. A 2×2 screwed to the cabinet top and another to the ceiling gives you a solid ledge to catch the box. We have used 2" screws for this, though you will want to verify they will not punch through your cabinet bottoms. In a tight six-inch gap, a right-angle driver saves your knuckles. The blocking also helps when the ceiling is not flat: you can plane the top block to follow the contour while the box stays level.

【Check Your Dimension】For proper installation, the dimension of the fixed wooden base plate is 19.5''W x 22.5''D. The actual width of the pull out drawers for cabinets is 17 inches. Our cabinet pull out shelves fit standard sizes and please confirm the size you require

CLASSIC SHAKER STYLE WITH PREMIUM FINISH: Enhance your kitchen remodel with our timeless white shaker base cabinet. The cabinet door is expertly crafted from High-Density Fiberboard (HDF) and features a flawless, multi-layered solid color painted finish. This engineered HDF surface guarantees a smooth, crack-resistant appearance that perfectly matches modern, minimalist, or farmhouse home decors.

Material. The pieces of front, side and back panel is made from solid rubber wood, the bottem panel is made from plywood
Add Crown Molding
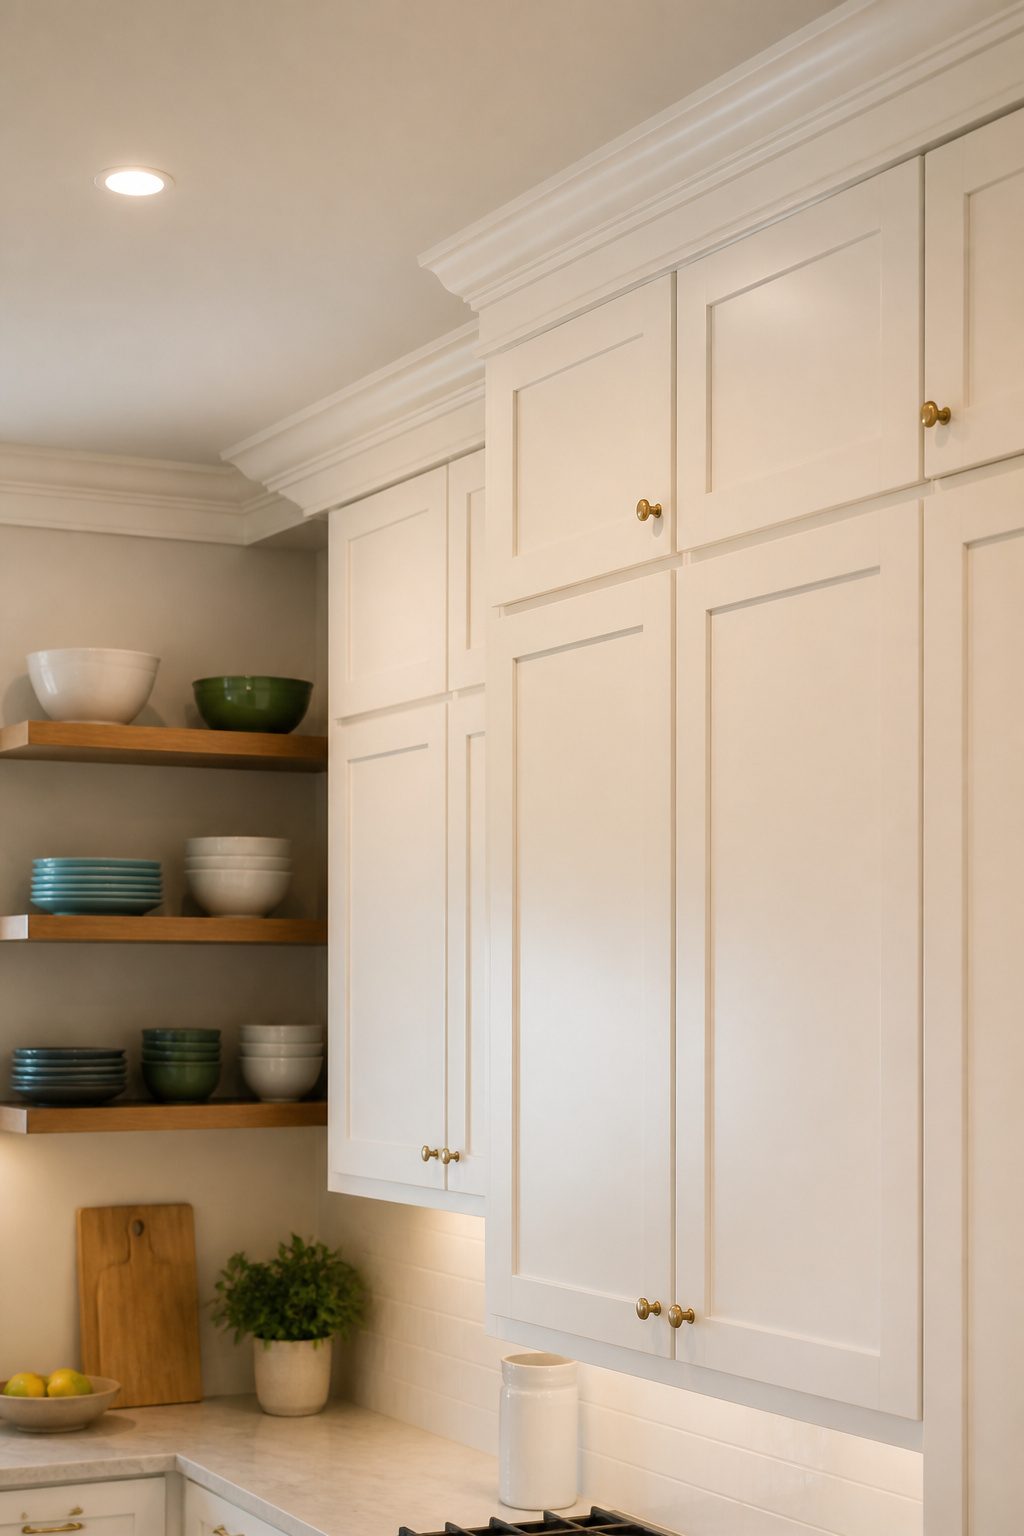
We picked up 4 1/2-inch primed MDF crown molding at Home Depot for this last step, and it turned out to be the move that pulled the whole project together. The gap between your cabinet tops and the ceiling is rarely uniform; ours varied by nearly half an inch from one end of the run to the other. Crown molding bridges those irregularities without you having to fight the ceiling into perfect flatness. The angled profile catches light and shadow so your eye reads a clean line even where the fit is forgiving.
We cut the pieces with a compound miter saw, coping the inside corners the way you would for baseboard. The MDF is light enough that construction adhesive and a brad nailer held it fine; we did not need to hunt for studs in the ceiling. Paint it the same color as the cabinet boxes and the molding disappears into the architecture, which is exactly what you want. Leave it white against painted cabinets and it starts looking like an afterthought. We learned that on a bathroom vanity years ago, and the kitchen was our chance to do it right.

Stylish Striped Design: The fully frosted striped pattern gives this window privacy film a sleek, built-in blinds look, perfect for adding a modern touch to glass doors or windows. The stripes can run vertically or horizontally to suit your décor

Modern rustic style: The tier curtain is perfect for the modern rustic style that's trending now, making it ideal for kitchens, bathrooms, basements, RVs, and even bedrooms.

No More Things Falling Under the Sofa: These under sofa blocker keep pet and toys out from under the sofa. No need to bend over or kneel down to find and clean under furniture!
Finish and Paint
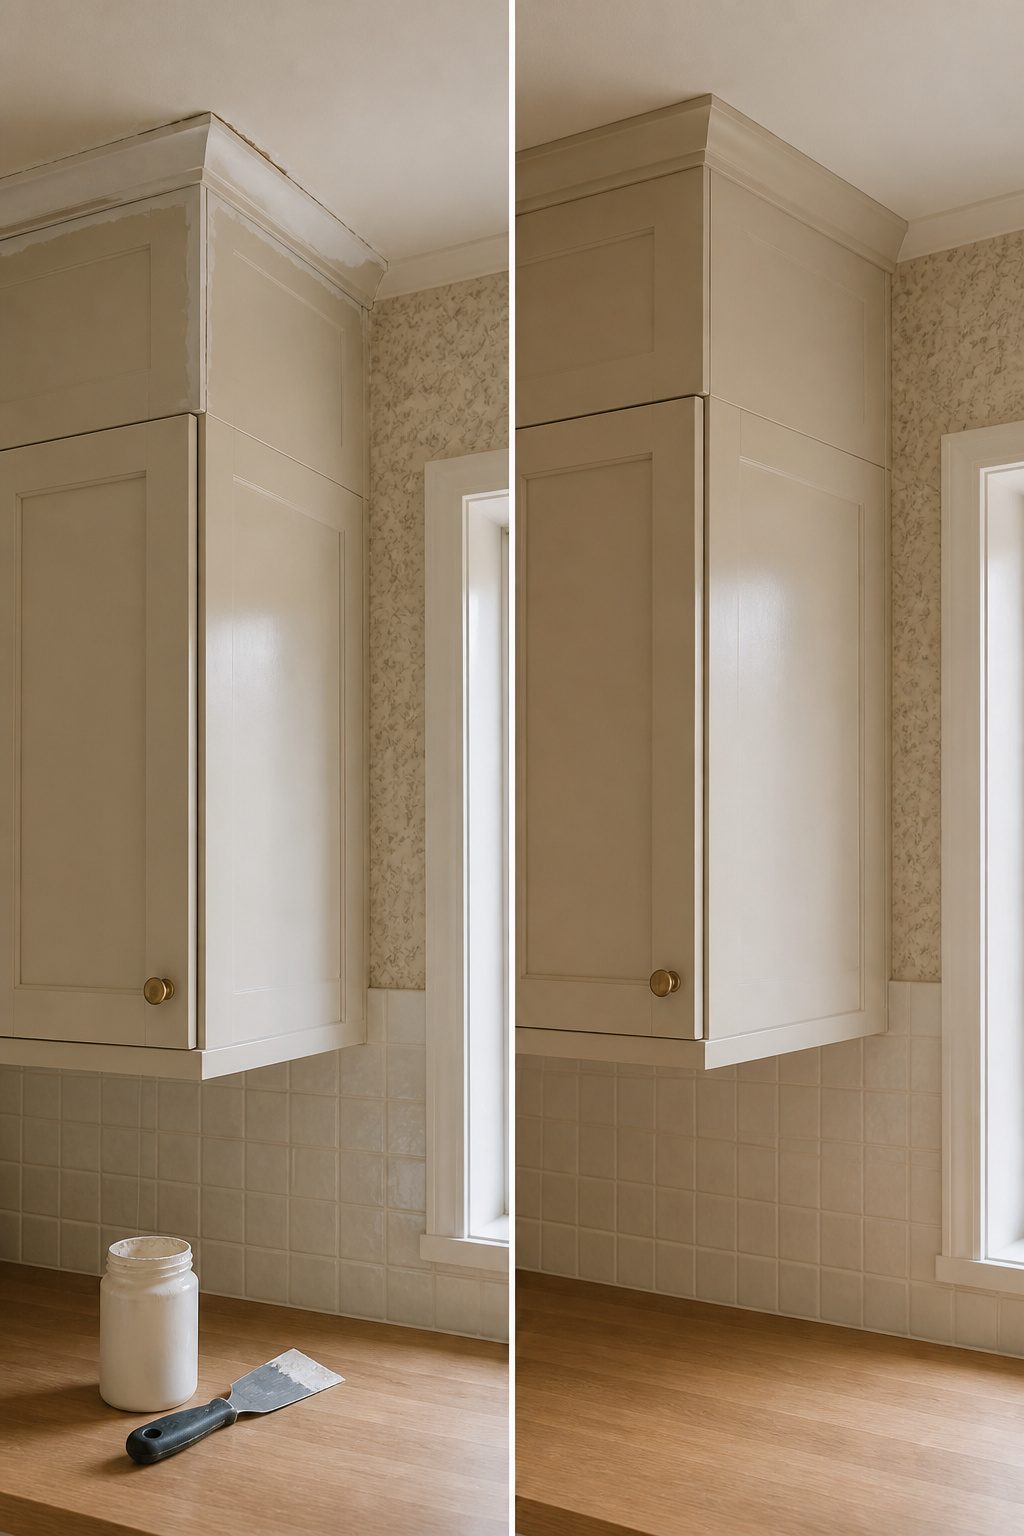
Nail holes in the extension boards and any new trim get wood filler, pressed in with a putty knife and sanded flush once it dries. The trick is removing every trace outside the hole itself; leftover filler leaves a weird texture spot that reads through paint like a scar. Seams between trim pieces, inside corners, and where the extension meets the crown all get paintable caulk instead. Wood filler cracks as cabinets settle and seasons change. Caulk flexes.
Raw wood needs primer before color goes on. Pre-primed boards skip that step, but any exposed cuts or added trim, like fluted pieces under the crown, get a coat. Thin and even, because drips dry as ridges you will notice every morning.
Matching existing cabinets is where weekend projects usually show their age. Factory finishes, especially urethane trim enamels like Sherwin-Williams Urethane Trim Enamel in Shiitake SW 9173, are built to cure hard and level flat. That self-leveling quality is nearly impossible to reproduce with a brush on a Saturday. Aged cabinets have also shifted color from light and grease; what reads as cream under the kitchen fluorescents is often something else entirely. We have had better luck taking a drawer front to the paint counter for matching rather than trusting memory. If the match is not perfect, the eye goes straight to the band of new paint at ceiling height. Sometimes the better play is accepting a close tone and letting the crown molding break the line.

✔️COVER LARGE GAPS (8–17 cm / 3–6.7 in) – Designed to cover larger gaps than most standard gap fillers (non-foldable). Helps prevent items from falling into gaps...
Open Shelving
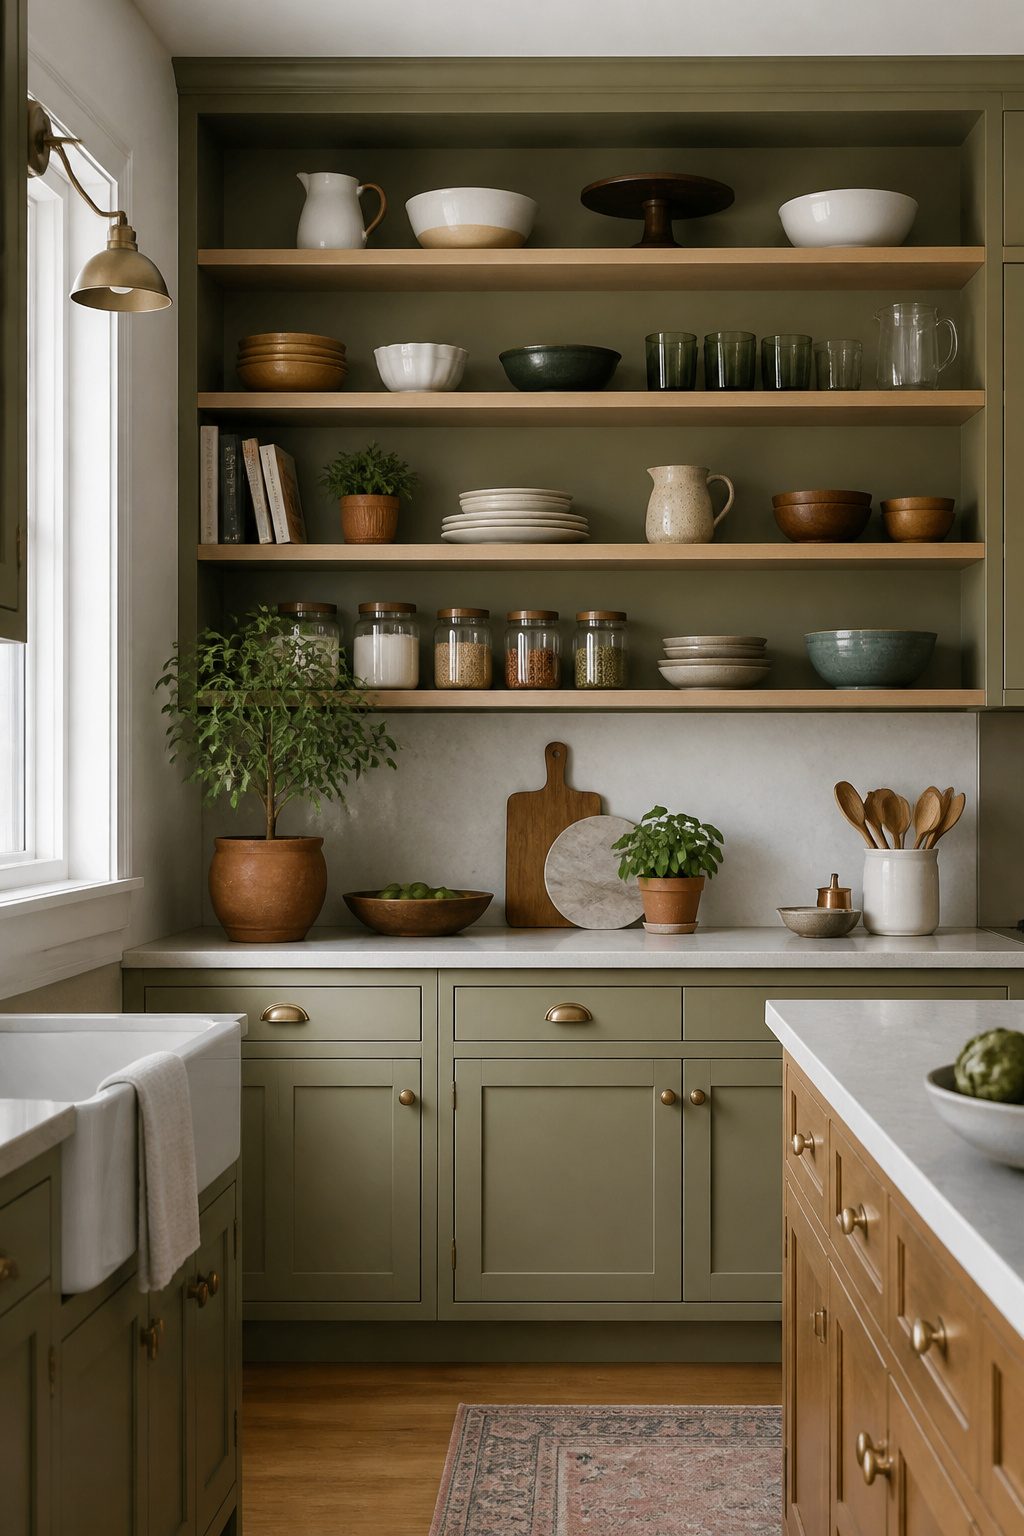
Open shelving is the simplest way to fill that gap above your cabinets, and we have used it in two kitchens now with mixed results. You gain instant access to whatever you store there, no step stool required for the front row at least, which sounds small until you are grabbing the same spice tin three times a week. The catch is everything sits out in the open and collects dust, so the items you store had better be ones you actually use or ones you do not mind wiping down. We tried stacking everyday plates up there once and gave up after a month; the dust film was constant and the plates needed a rinse before every meal. Display pieces work better, or the kind of bowls and baskets you want to look at anyway. Styling discipline matters more than with any closed option. If your upper shelf turns into a graveyard for vases you never liked, you will see the mistake every morning with your coffee. For renters, this is the least permanent route, usually just a bracket and board affair you can patch over later.

【A Small & Cute Addition】The very first thing we’d like to share with you is that the size of this buffet cabinet is some kind of small, whose size is 42 x 13 x 24.5 (L x W x H). If you happen to have limited floor space while needing extra storage space, this little and cute bar cabinet would be an ideal choice for you. Still, the middle shelf could be adjusted in three positions for flexibility.

【Easy to Assemble】Our locking storage cabinet come with detailed instructions and all the mounting hardware. You can complete the assembly work within 20 mines by following the instructions, suitable for use in tool rooms, homes, offices, garages, schools, shops, and warehouses.
𝐈𝐌𝐏𝐎𝐑𝐓𝐀𝐍𝐓 𝐍𝐎𝐓𝐄: Our great-valued package includes: 2 x 8212560 Dishwasher Black Side Cabinet Brackets with 4 x Black Screws; 2 x 8269145 Dishwasher Silver Upper Brackets with 2 x Silver Screws. Please carefully check the size & part number of your OE parts before purchasing. You can send us your dishwasher model number, we will help you confirm the compatibility! Don't hesitate to contact us if you have any concerns with your purchase, we will be here to help.
Glass Front Cabinets
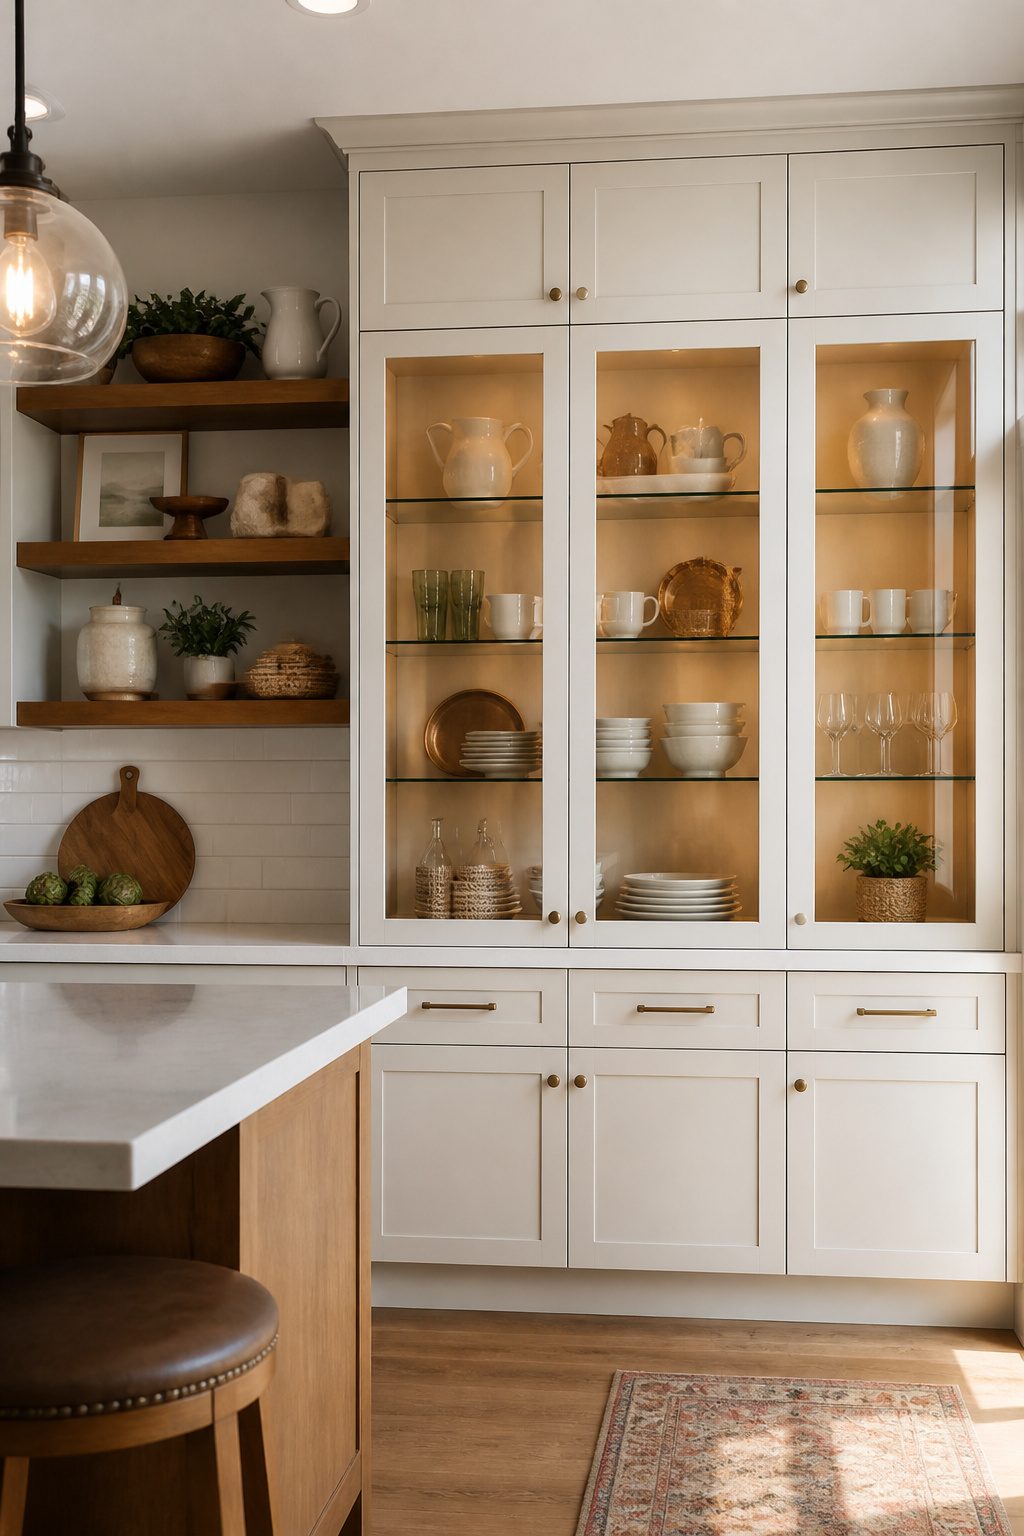
Glass front cabinets give the whole wall a more finished-off look than solid doors when you extend kitchen cabinets to ceiling height, but you will need to keep the contents styled and tidy because everything inside stays visible. That extra polish costs more: the glass itself adds to the door price, and if you are working with stock cabinets that run $5,000 to $15,000 for a full kitchen, upgrading to glass fronts pushes you toward semi-custom territory at $15,000 to $30,000. We would not do glass without lighting inside. In-cabinet wiring brightens whatever you put on display and keeps the upper reaches from turning into dark corners after sundown. One commenter who had built and remodeled more than a dozen homes put it plainly: add the doors, add the lights, wire them to a switch. We agree. If your budget is tight and your dishes are not display-worthy, skip the glass and put that money toward the extension boxes or crown molding instead.

【Beautiful Design】The beautiful design of the wall trim makes your home no longer monotonous. The crown molding gives an elegant look.
Product Size: our flexible decorative strips are 1.8 inches wide, 0.24 inches thick, and 13.1 feet long; Made of PVC material, it has an elegant three-dimensional embossed pattern; The appropriate length and width make the lines suitable for various decorative occasions, and the sufficient thickness makes the lines more three-dimensional and lifelike

Generous Coverage: 14 pcs of molding trim, each 3.9 ft, totaling 55 ft. Solves the common issue of insufficient quantity for full-room projects. Achieve a consistent look across your home without extra orders
Closed Cabinets
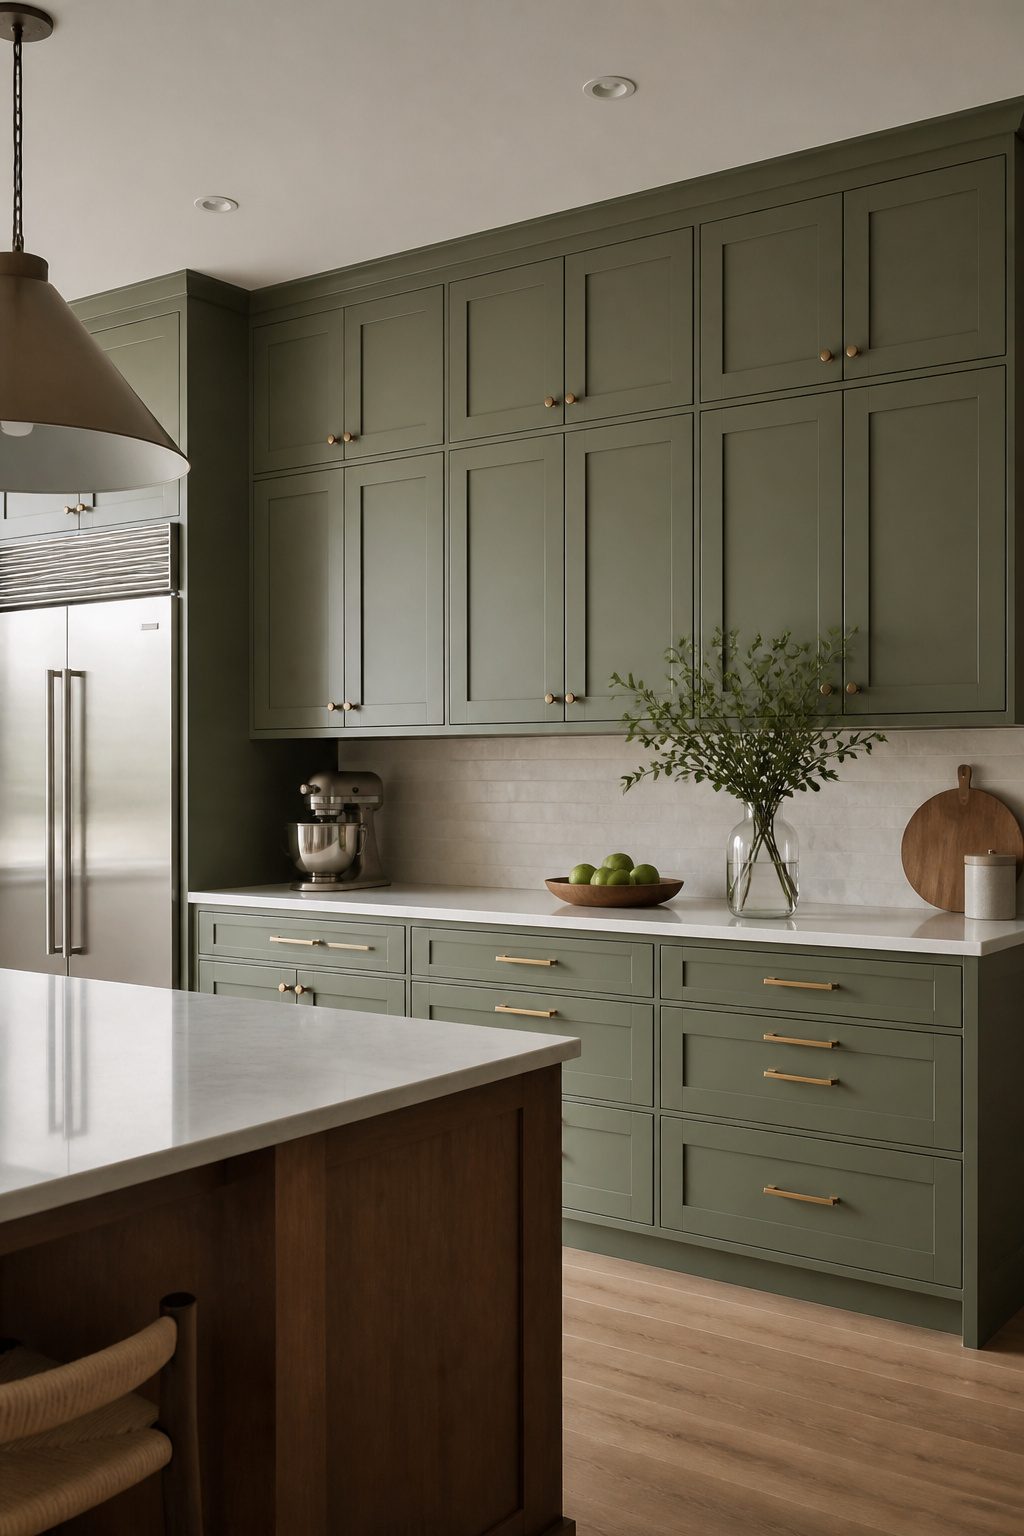
Closed cabinet extensions are the simplest way to make your upper cabinets meet the ceiling, and they hide everything behind a matching door. We like this route when the goal is clean sightlines, not display space. The top shelf sits about 18 inches above your existing cabinet crown, which puts it out of easy reach but reserve that shelf for items you pull out less than once a month: holiday platters, backstock pantry goods, the stand mixer you only run at Thanksgiving. Keep the heavy stuff at counter height; a full stockpot overhead is a hazard waiting to happen. You will need a folding step stool somewhere nearby, maybe on a pantry hook or the side of the island, because you will use it. The faces cost extra compared to open shelving, though you can keep that down with stock doors in a close-enough finish. Group what goes up there in clear labeled bins so you can read contents from the floor without hauling the step stool out every time you wonder what is up there.
✅ Fits Standard RTA Cabinets – Designed for Ready-to-Assemble cabinets; measure internal frame width (not external) to ensure proper fit.

Material. The pieces of front, side and back panel is made from solid rubber wood, the bottem panel is made from plywood

Solid hickory craftsmanship - Made from the finest solid hickory wood, this cabinet boasts durability and strength. The natural variations in the wood grain add a touch of rustic charm to any room.
Stacked Cabinets
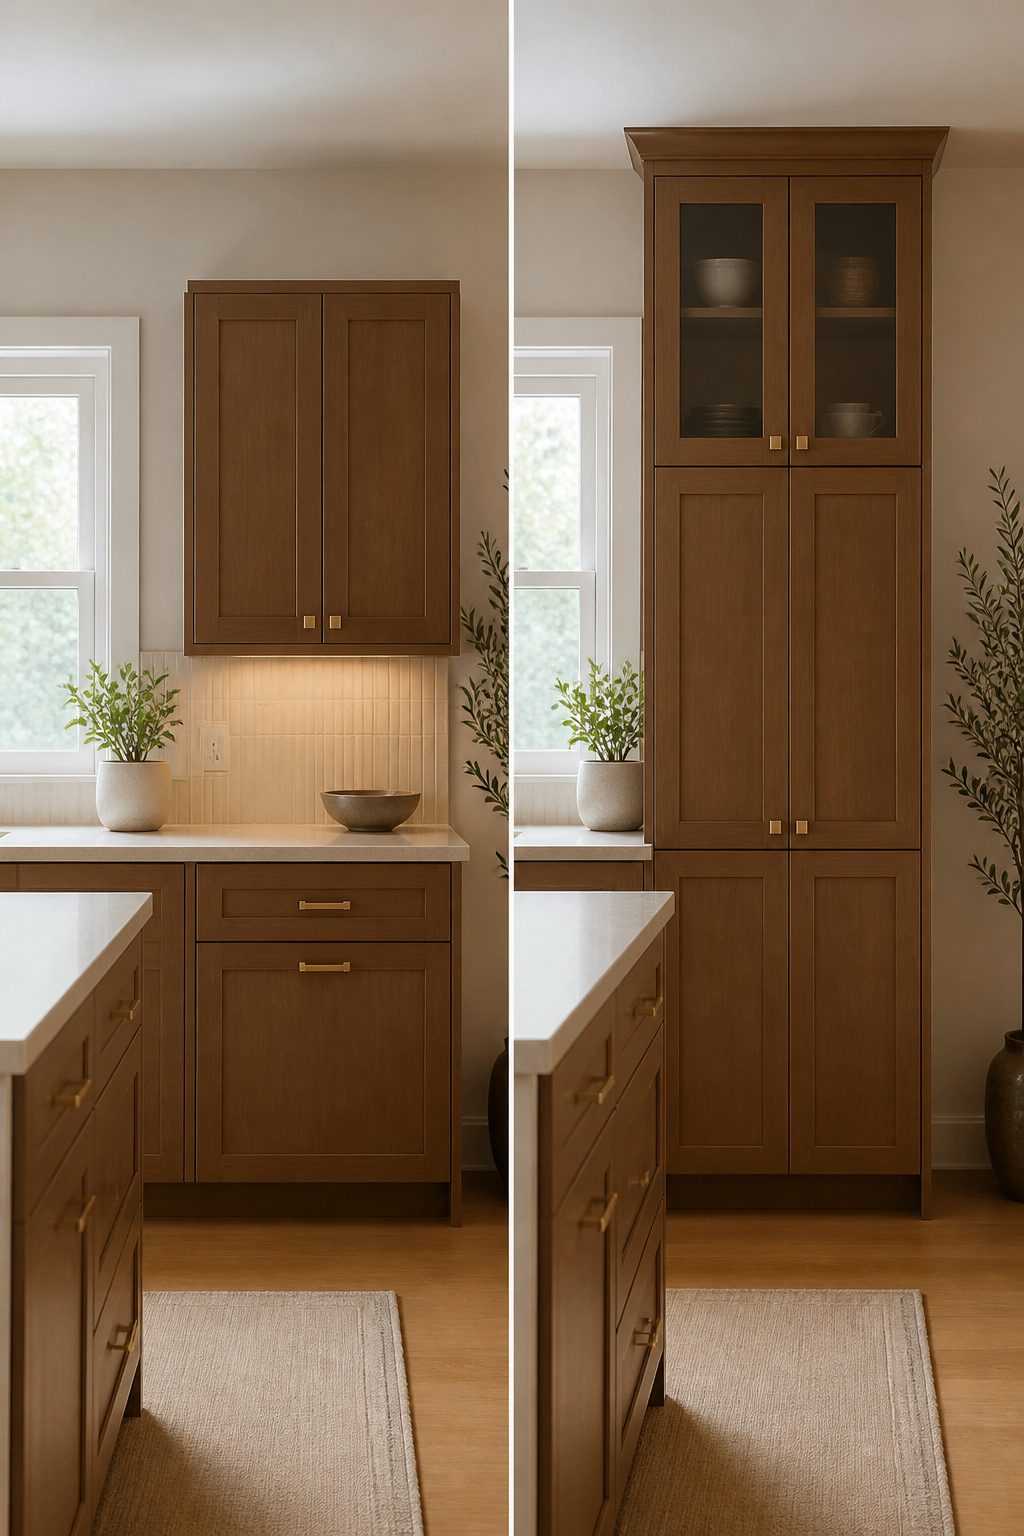
With a 9-foot ceiling, the two-door stacked approach is usually what looks right: a standard-height door below and a shorter one above it. The shorter top door should sit at roughly one-third the height of the lower, not half and half. We have seen the even split go wrong in photos where the cabinets look squat and the wall above them still reads as empty space. The 1:2 ratio keeps the eye moving upward and matches the proportions you see in older homes with original stacked uppers.
Glass fronts on those top cabinets help, because a solid slab of painted wood twelve inches tall and seven feet off the floor just looks like a rectangle someone forgot. The glass breaks the mass and gives you a reason to store the cake plates or the good pitchers up there where you will actually see them. In a Craftsman-era kitchen, this stacked arrangement fits the house rather than fighting it; in a newer build with 9-foot ceilings, the same logic applies, though the style of the door might change.
Where this goes wrong is when the ceiling is really pushing 10 feet or more. At that point the stacked pair starts to look bulky, and the top door becomes hard to reach without a step stool every time you need a mixing bowl. We would skip the stacked approach for anything over 9 feet and look at other options instead.
![Orzly Glass Screen Protectors Compatible with Nintendo Switch - Premium Tempered Glass Screen Protector Twin Pack [2X Screen Guards - 0.24mm] for 6.2 Inch Tablet Screen on Nintendo Switch Console](https://m.media-amazon.com/images/I/51aZMisaGfL._SL500_.jpg)
Tempered Glass construction for enhanced impact resistance, plus effectively resists scratches up to 9H (harder than a knife)

Package Includes: Our package includes 2 panels, each measuring 42 inches Wide by 54 inches long, designed to perfectly fit your small‑size window space. Ideal for small spaces requiring blackout environment, such as cabinet, basement, bathroom and garage.

Size and Installation: Each package includes 2 pieces short curtains(30" W x 30" L), featuring a 1.5 inch header in the top for a nice look. Installation is straightforward by using the built-in rod pocket or your own clip rings
Single Door Extension
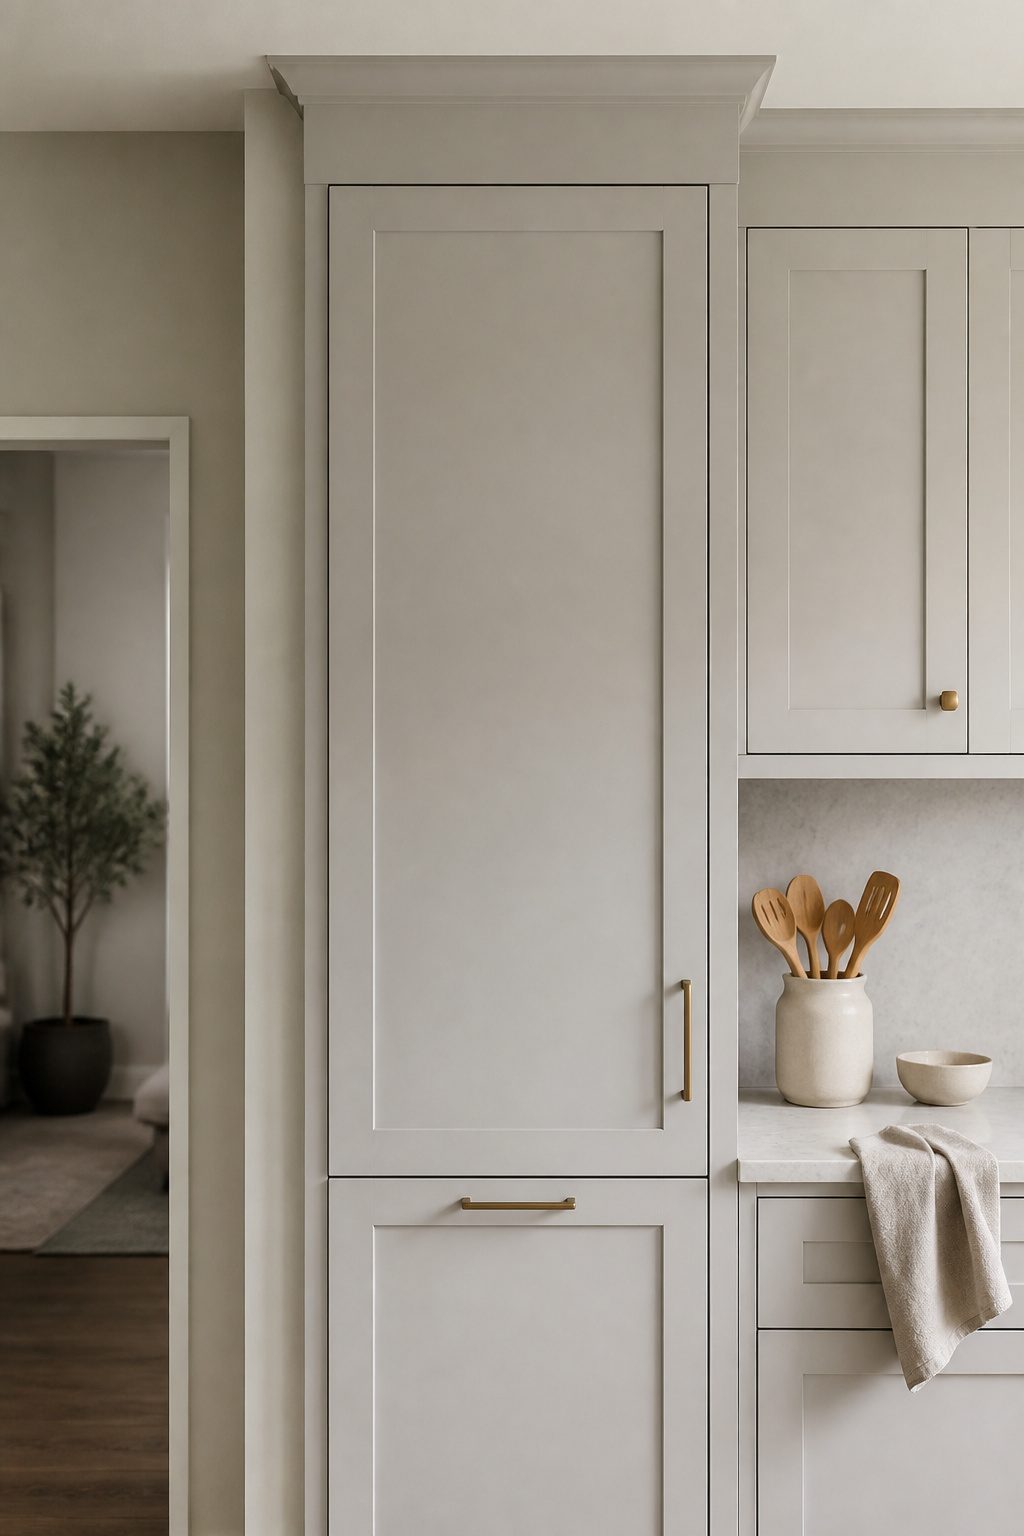
For an 8-foot ceiling, a single door extension is usually the cleaner play. One new door covers both the original cabinet and the added box above it, which means you are aligning one slab of painted MDF or hardwood instead of wrestling two separate doors into the same plane. We have seen the math go sideways on this: one door, one set of hinges, one chance for the reveal to drift.
The catch is what fits behind that tall door. A single extension on an 8-foot run leaves you roughly 12 to 18 inches of new depth above the old cabinet box, depending on your soffit situation. That is enough for a tray of holiday mugs or the stand mixer you drag out twice a year, but not for a full dinner-plate stack. We treat this space as overflow storage, not primary storage.
Hardware matters more than people expect. A 42-inch door wants a soft-close hinge rated for the weight; the cheap contractor-grade pair from the big-box store will sag inside two years. We spend the extra on a three-hinge set with a 110-degree opening angle, because a door this tall needs to swing clear of your nose when you are reaching for the roasting pan you stored up there. Skip the pull and use a lip or touch-latch if you want the wall to read as one continuous plane; the seam where old cabinet meets new will still need caulk and paint, but at least your eye will not stop on a chrome knob.
What This Costs
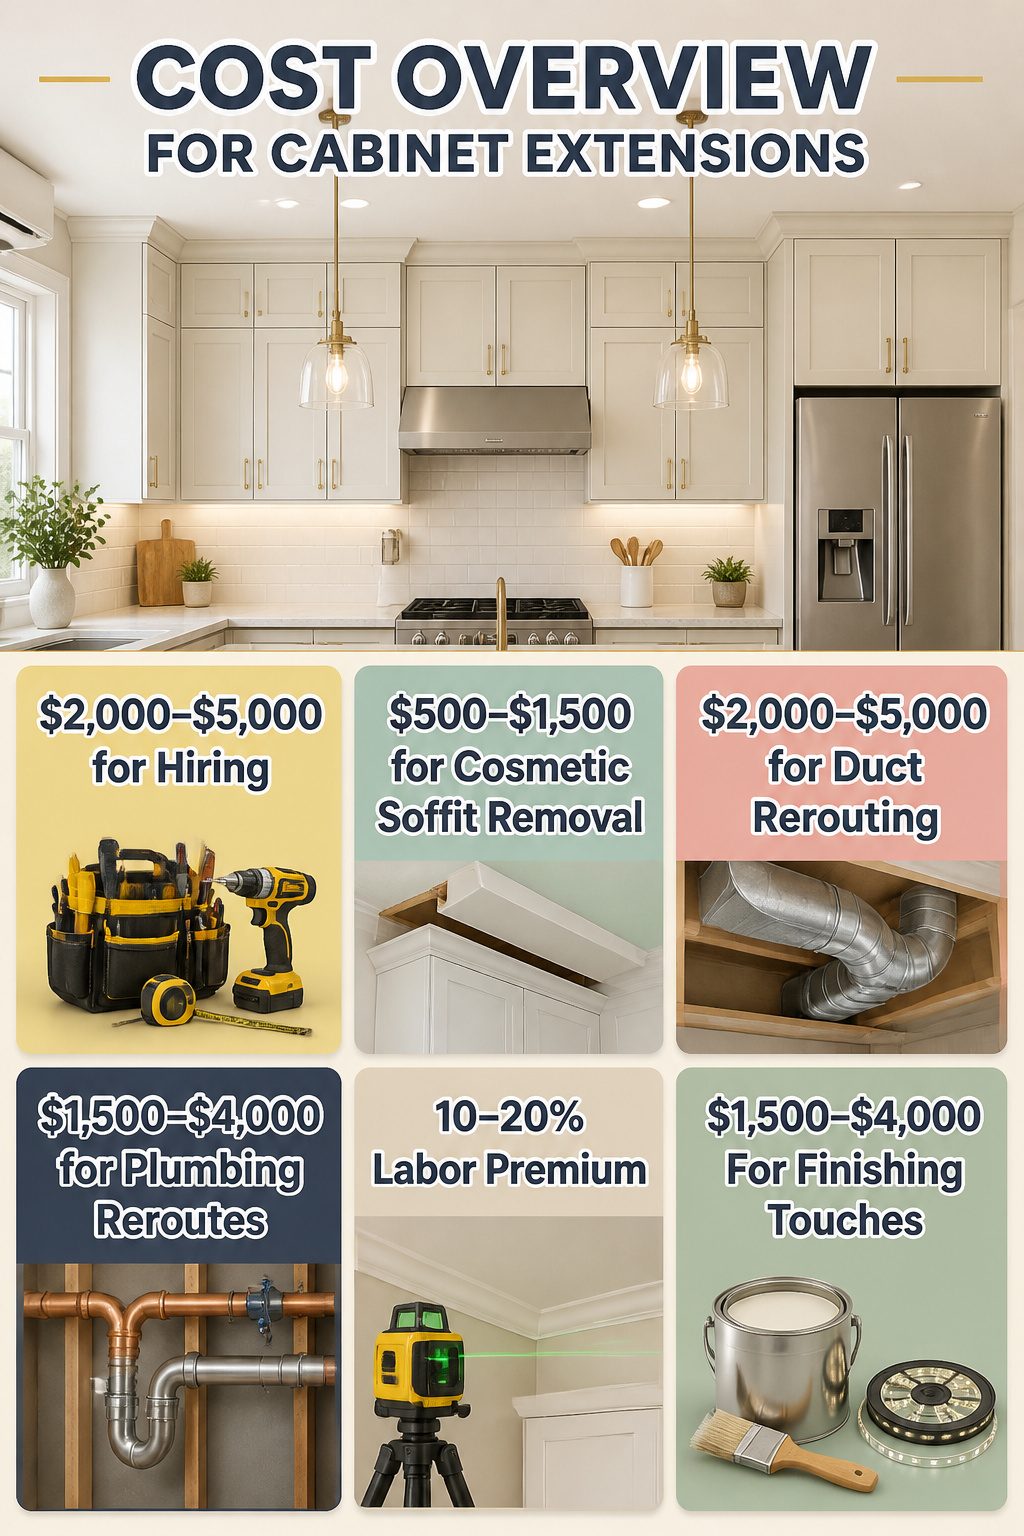
Extending kitchen cabinets to the ceiling runs $2,000–$5,000 if you hire out, and that figure jumps fast once soffits enter the picture. A cosmetic soffit, the kind hiding nothing but dead air, typically costs $500–$1,500 to remove. But if your soffit is swallowing an HVAC trunk line, rerouting that ductwork runs $2,000–$5,000 more. Plumbing reroutes land at $1,500–$4,000, and a structural beam needing an engineer’s stamp can pile on another $5,000. We have seen kitchens where the soffit check ate the entire cabinet budget before a single new box went up.
Doing the work yourself shifts the math entirely. A simple facing, just skinning the gap with painted panels, runs about $2–$3 per square foot in materials. Add cabinet doors and you are looking at roughly $40–$50 per door for a standard 24-inch width, plus paint at $25–$35 per gallon if you cannot match your existing color from leftovers. For a few hundred dollars and a weekend, you get the look.
Where DIY saves money versus creating expensive fixes comes down to ceiling flatness and cabinet alignment. Contractors charge a 10–20% labor premium for ceiling-height runs because ceilings are never level; every cabinet needs scribing, and the crown or trim work multiplies. A homeowner who skips the laser level and assumes the ceiling is flat ends up with gaps that caulk cannot hide. Painting, finish carpentry, and moving under-cabinet lighting to the new height add $1,500–$4,000 even in professional jobs, so budget for them whether you hire or not.
Tools You Need
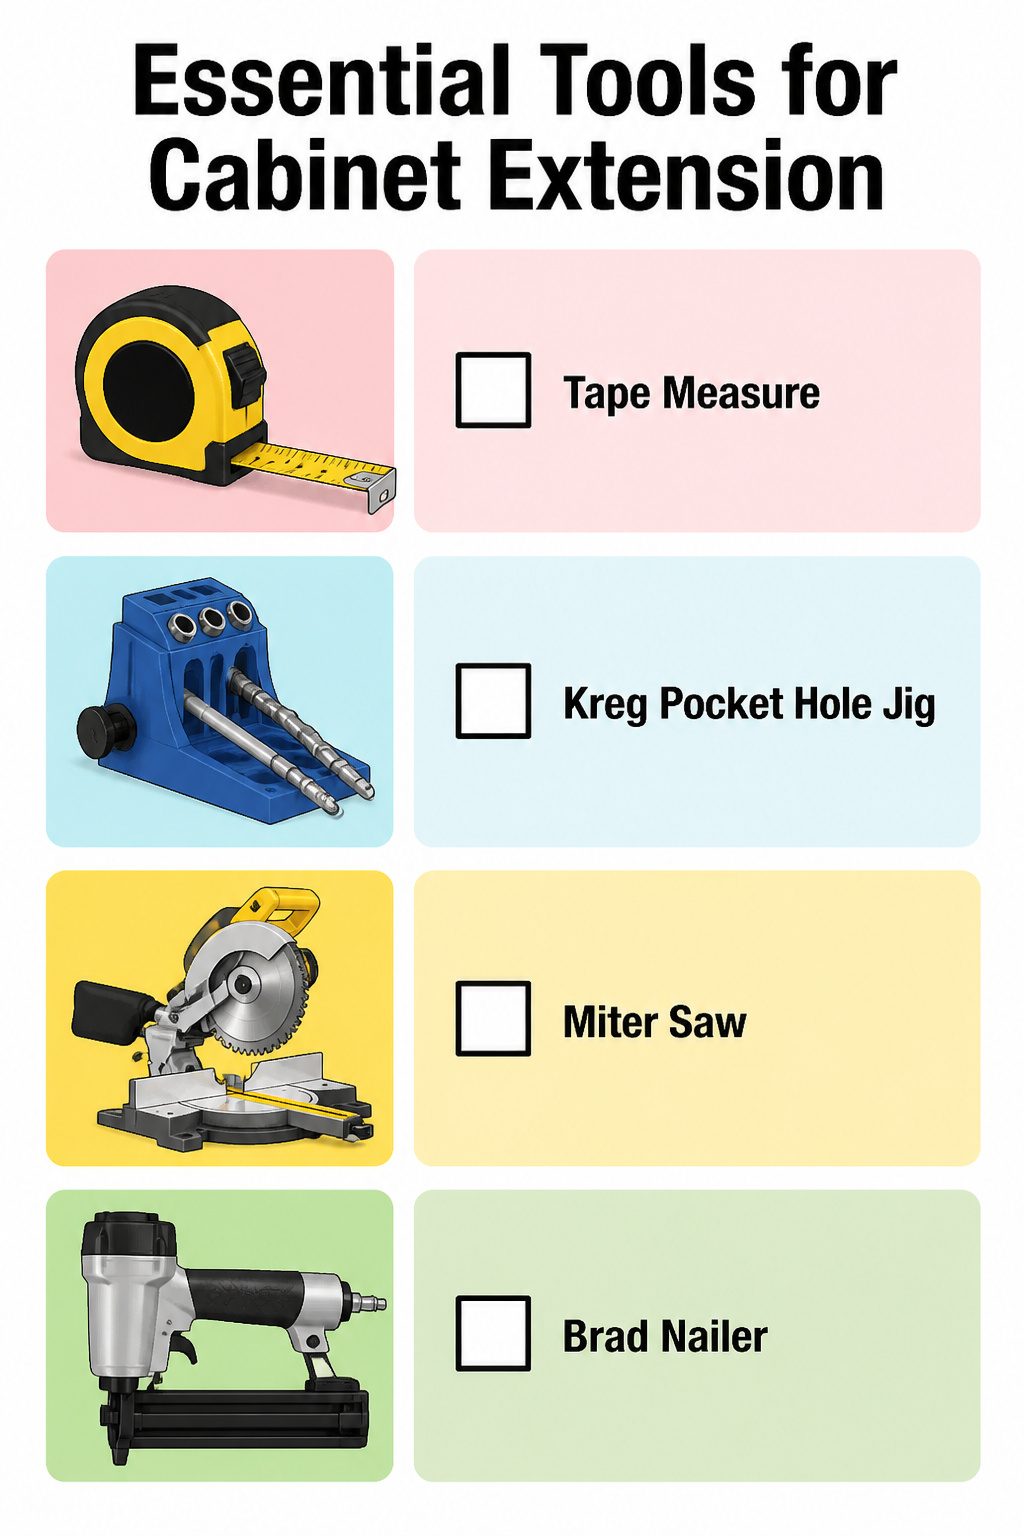
You do not need every tool in a cabinet shop for this job. What you need is a short list that matches the cuts and joints you will actually make.
- Tape measure: Buy one you trust. Every cut in this project starts with a number you wrote down yourself, and a stretched tape or a borrowed one with a bent hook will cost you a board.
- Kreg pocket hole jig: Worth owning if you build boxes more than once a year. It drills the angled holes that let you screw the extension sides to the top and bottom without showing metal on the face. One source noted to place the holes on the outside faces so the wall or a skin panel hides them.
- Miter saw: Borrow if you must, but you need it for the crown molding cuts. A 4 1/2" primed MDF crown sits at an angle against both the ceiling and the extension box; the miter saw makes the compound cuts that fit those two planes at once.
- Brad nailer with 1 1/4" and 3/4" nails: The 1 1/4" length secures crown molding through the extension boards and into ceiling joists or blocking. The 3/4" nails pin the 1/8" hardboard skin panels without blowing through. A pneumatic gun is faster; a battery one saves hauling the compressor up the ladder. Either way, this is the tool that moves the project from clamped-and-waiting to done-and-painted in an afternoon.
Ceiling Height and What Changes
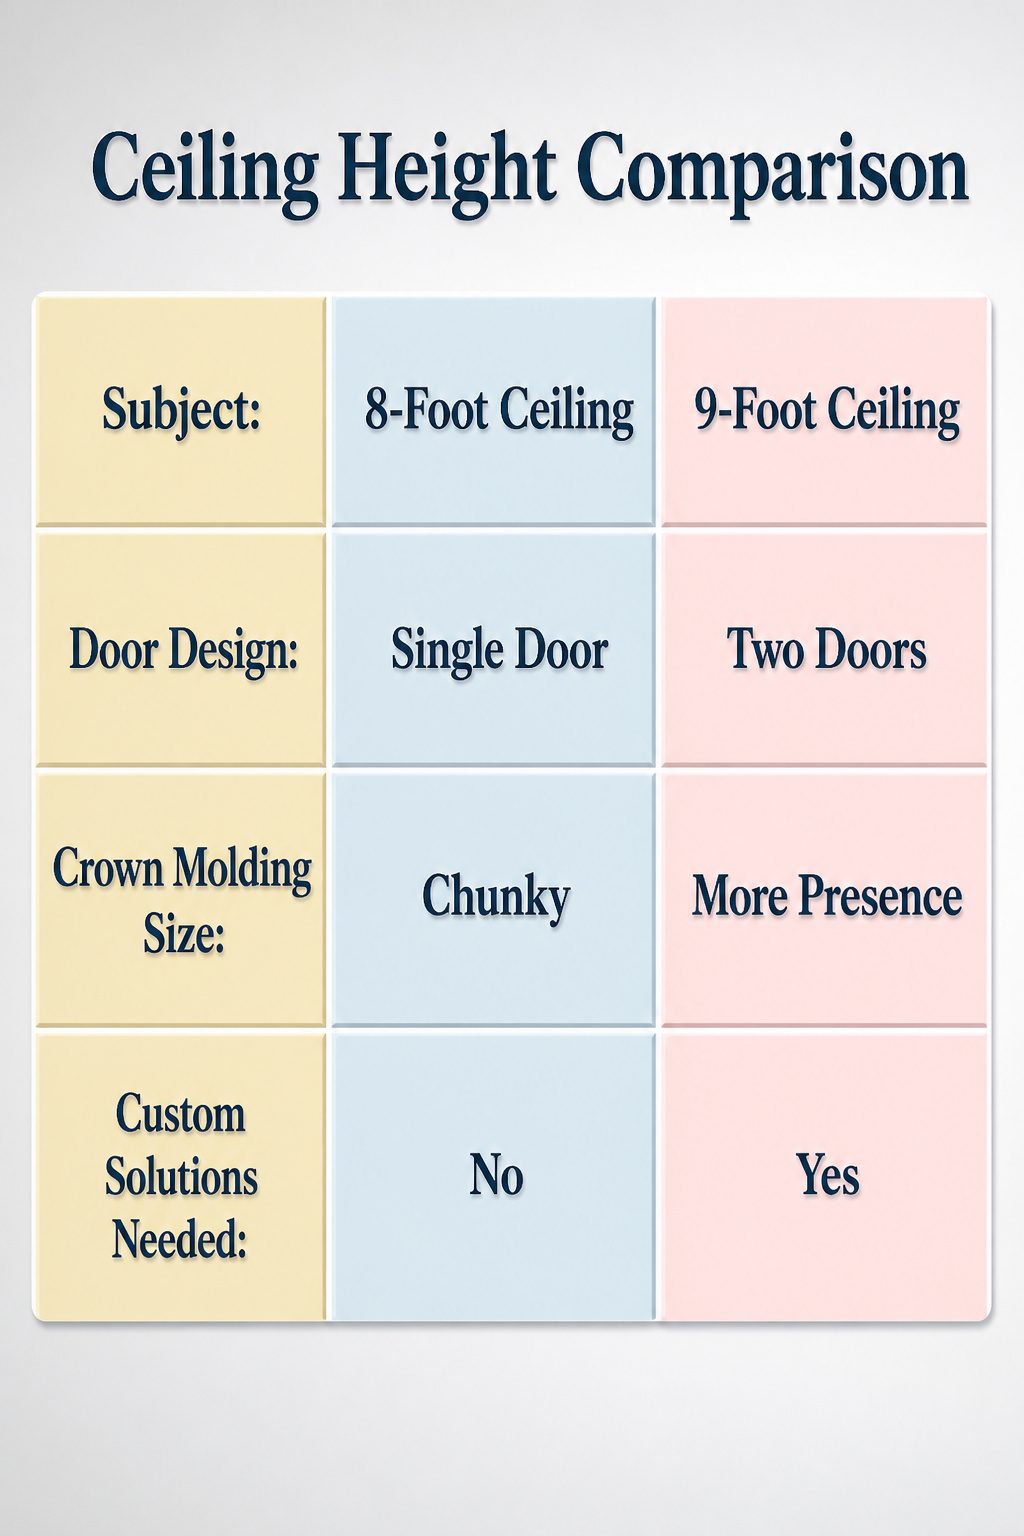
An 8-foot ceiling gives you one clean shot: a single taller door that covers both the original cabinet and the extension in one piece. The proportions stay simple, and you avoid a horizontal seam right at eye level. At 9 feet, you will almost always want two doors stacked, with the shorter door on top and the taller one below. The split looks better proportionally, and you are not wrestling with a door tall enough to feel like a refrigerator panel.
The scale of your crown molding has to shift with the height too. On an 8-foot ceiling, a chunky molding can eat the whole extension and make the cabinet feel top-heavy. On 9 feet, you have room for something with more presence, but the molding still needs to relate to the door split, not float above it like an afterthought.
Sloped or coffered ceilings break every rule. A slope means each extension box is a different height, measured and cut individually to follow the angle. Coffered ceilings need custom solutions that work around the beams or recesses, and there is no stock answer for either. If your ceiling is not flat and level across the run, budget for the extra time that custom fitting demands.
Lighting After You Extend
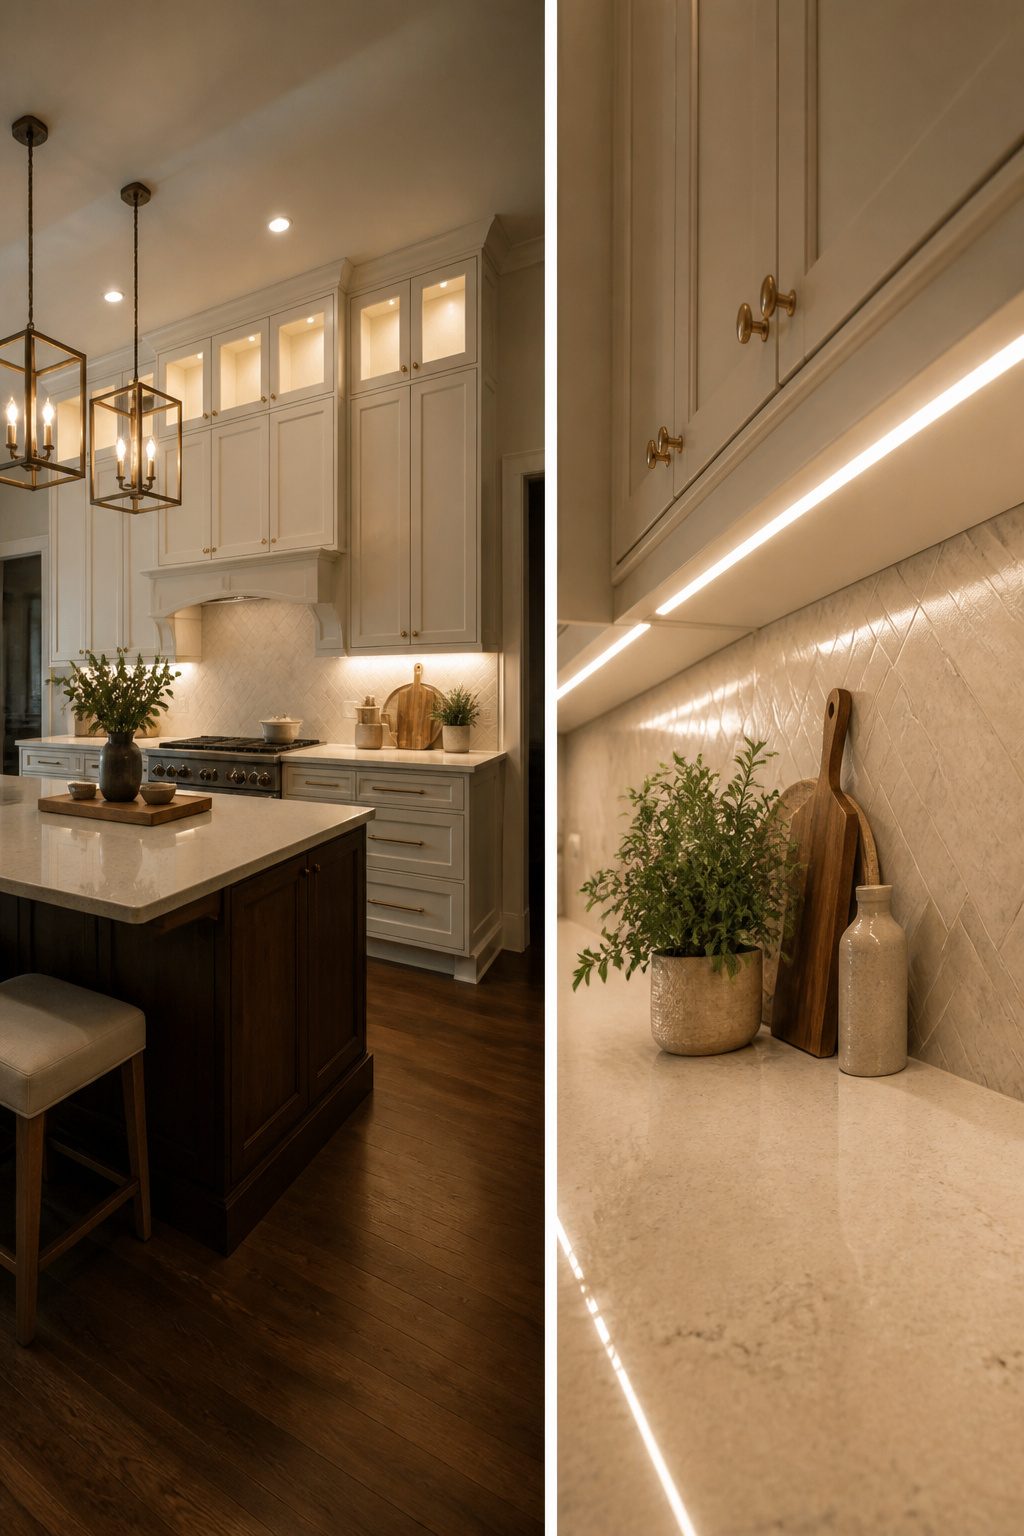
Extending cabinets to the ceiling steals one light source you probably never counted on. That strip of wall above standard cabinets bounces daylight back into the room. Once you box it in with a soffit or extension, the kitchen goes darker in the corners unless you replace what you lost.
We always tell people to budget for under-cabinet lighting at the new height, not reuse whatever they had. The work surfaces need direct light now that reflected light is gone. Contractors price this as a separate line, and running it at ceiling height adds 10 to 20% to the install labor over standard cabinet height. Across a whole kitchen, lighting work can run $1,500 to $4,000 on top of the cabinet job.
If you are adding glass fronts anywhere, in-cabinet lighting is what makes them worth having. Without it, you are looking at shadowed dishes behind dusty glass. A small LED strip inside each upper cabinet turns the contents into something you actually want to display. Skip it and you have just created a maintenance headache with no payoff.
Frequently Asked Questions
How do I extend kitchen cabinets up to the ceiling?
Start by checking what is inside any soffit above your cabinets, because ductwork or plumbing hidden there can reroute your entire project. Measure the raw box-to-ceiling distance at multiple points to catch level variation, then choose between stacked cabinets or a single taller door based on your ceiling height. An 8-foot ceiling usually takes one door covering both existing cabinet and extension; 9 feet calls for two stacked doors with the shorter one on top.
Will extending cabinets to the ceiling make a small kitchen feel smaller?
Usually it does the opposite. Tall cabinetry pulls the eye upward, which makes the ceiling feel higher and the room feel taller. The article notes that cabinets flush to the ceiling unify the design and create a cleaner, more open look than the broken horizontal line standard cabinets leave behind.
Can I just add a cabinet on top of my existing uppers?
Sometimes, if your existing cabinets are still solid and you can match the door style, wood tone, and hardware closely enough. Even small mismatches show at the seam, though, so many homeowners get a cleaner result by replacing the uppers and ordering the extension as one matched set. Pre-made boxes work for standard depths and flat-panel or Shaker doors; custom builds win when your existing cabinets have an older face-frame style or decorative edge.
What is the cost of extending kitchen cabinets to the ceiling?
Hiring out runs $2,000–$5,000 for a straightforward job, and soffits can push that fast: a cosmetic soffit costs $500–$1,500 to remove, but HVAC reroutes add $2,000–$5,000 and plumbing reroutes $1,500–$4,000. DIY with simple facing panels runs about $2–$3 per square foot in materials, while adding doors lands around $40–$50 per standard 24-inch door plus paint. Lighting and finish carpentry add $1,500–$4,000 whether you hire or not.