DIY Halloween decorations run from twenty-minute setups to weekend builds that need overnight drying between coats. What decides which project fits your schedule is usually not the skill involved but the waiting: cheesecloth ghosts need three sessions across two days, puff paint spiderwebs need a full forty-eight hours to cure, and paper mache taught us the hard way that soggy centers add a full day. Our $8 porch ghost, built from dollar-store cheesecloth and a bent wire hanger, only worked because we planned the timeline before we started.
[link-whisper-related-posts]1. Cheesecloth Ghost
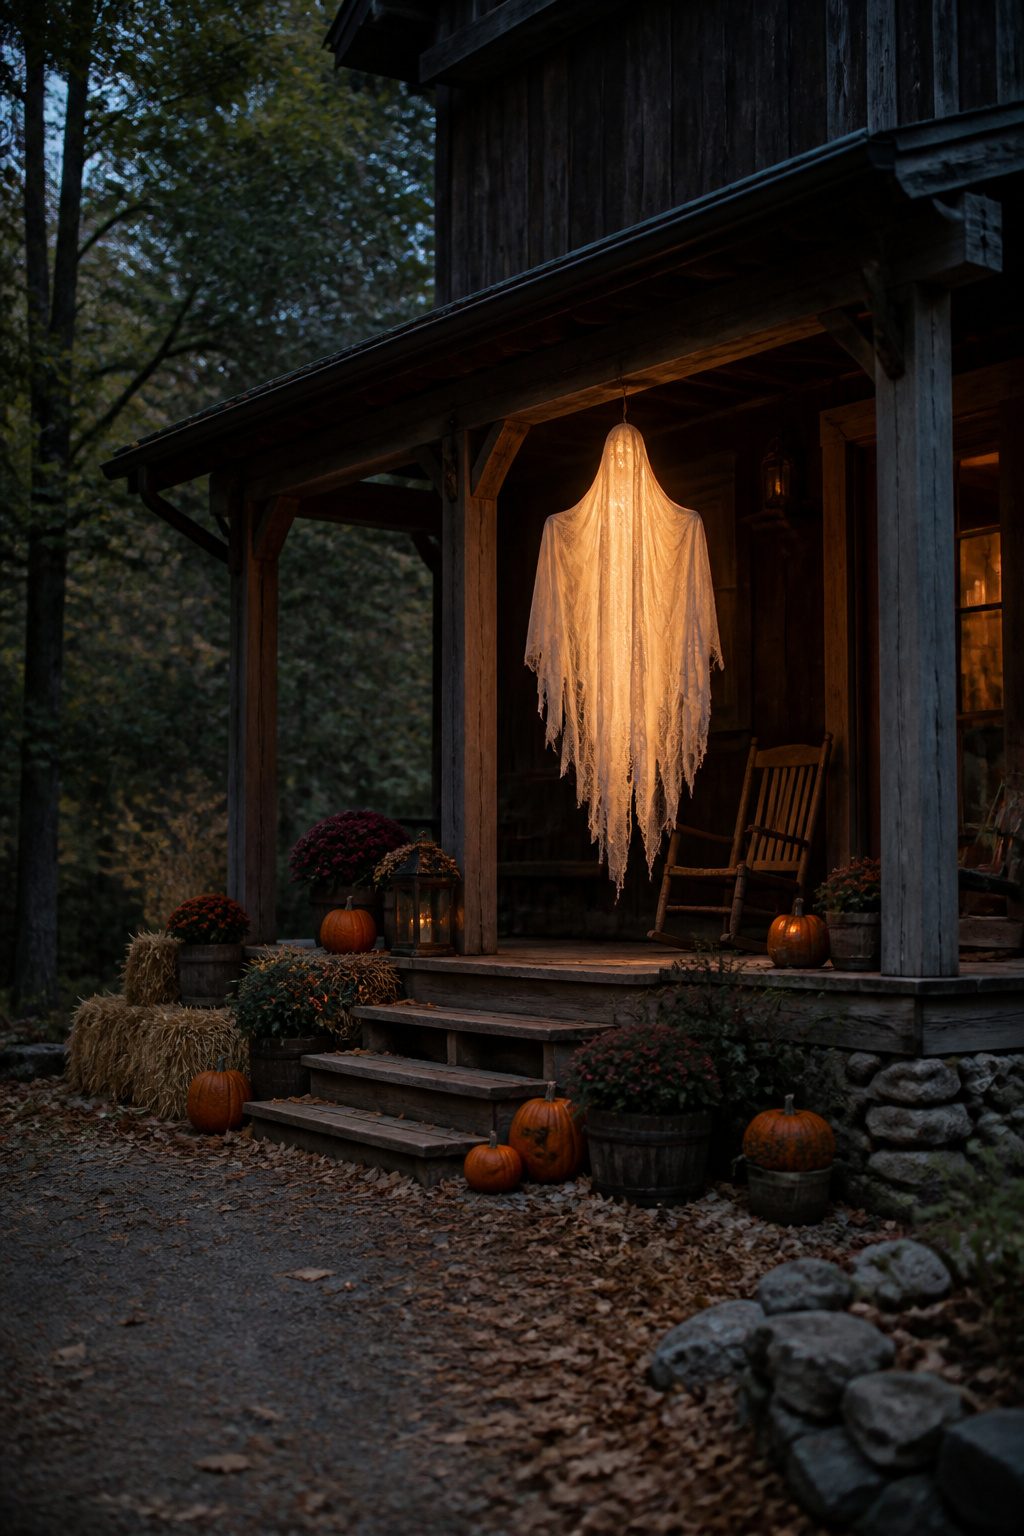
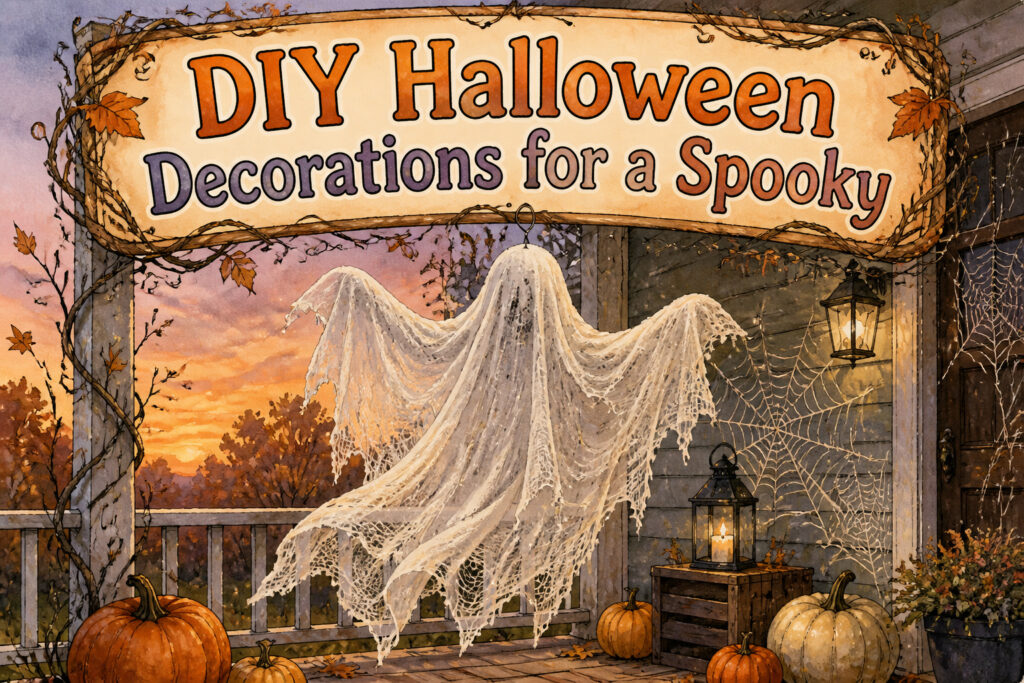
Cheesecloth ghosts work because the fabric is thin enough to read as translucent but heavy enough to hold a shape once stiffened. We built ours for about $8 in dollar-store materials: two packs of cheesecloth, a bottle of white glue thinned with water, and a wire hanger we bent into a rounded shoulder form. The foam ball for the head came from the craft aisle there too.
Fabric stiffener is the cleaner option if you can find it, but the glue wash sets up nearly the same and costs half as much. Drape the cheesecloth in layers, let each one dry before adding the next, and expect to wait overnight between coats. That patience is the whole project, really. Puff paint spiderwebs need 48 hours to cure fully, and this ghost asks for a similar timeline, just spread across three lighter sessions instead of one long wait.
We hung ours from the porch beam so the light behind it caught the gaps in the drape. From the sidewalk at night it looked like a figure dissolving, which was the idea.

Eye-catching Appearance: The ghost light cover is designed with a classic ghost lantern pattern, with a ghostly face, and the light at night will illuminate the scary eyes and mouth on the lampshade. As a classic symbol of Halloween, the ghost lampshade adds a festive atmosphere

Complete 2 Pack DIY Halloween Ghost Kit: This diy ghost kit includes spooky ghost hats x2, balls x2, pins x5, upgraded 102x82in cloth covers x2, remote-controlled string lights x2, Remote Control x1, installation manual x1, a bundle of zip ties, Several Emoticon Stickers, and 6 ground anchors for easy setup.

Eye-catching Appearance: ghost light cover is designed with a classic ghost lantern pattern, with a ghostly face, and the light at night will illuminate the scary eyes and mouth on the lampshade. As a classic symbol of Halloween, the ghost lampshade adds a festive atmosphere
2. Paper Mache Pumpkins
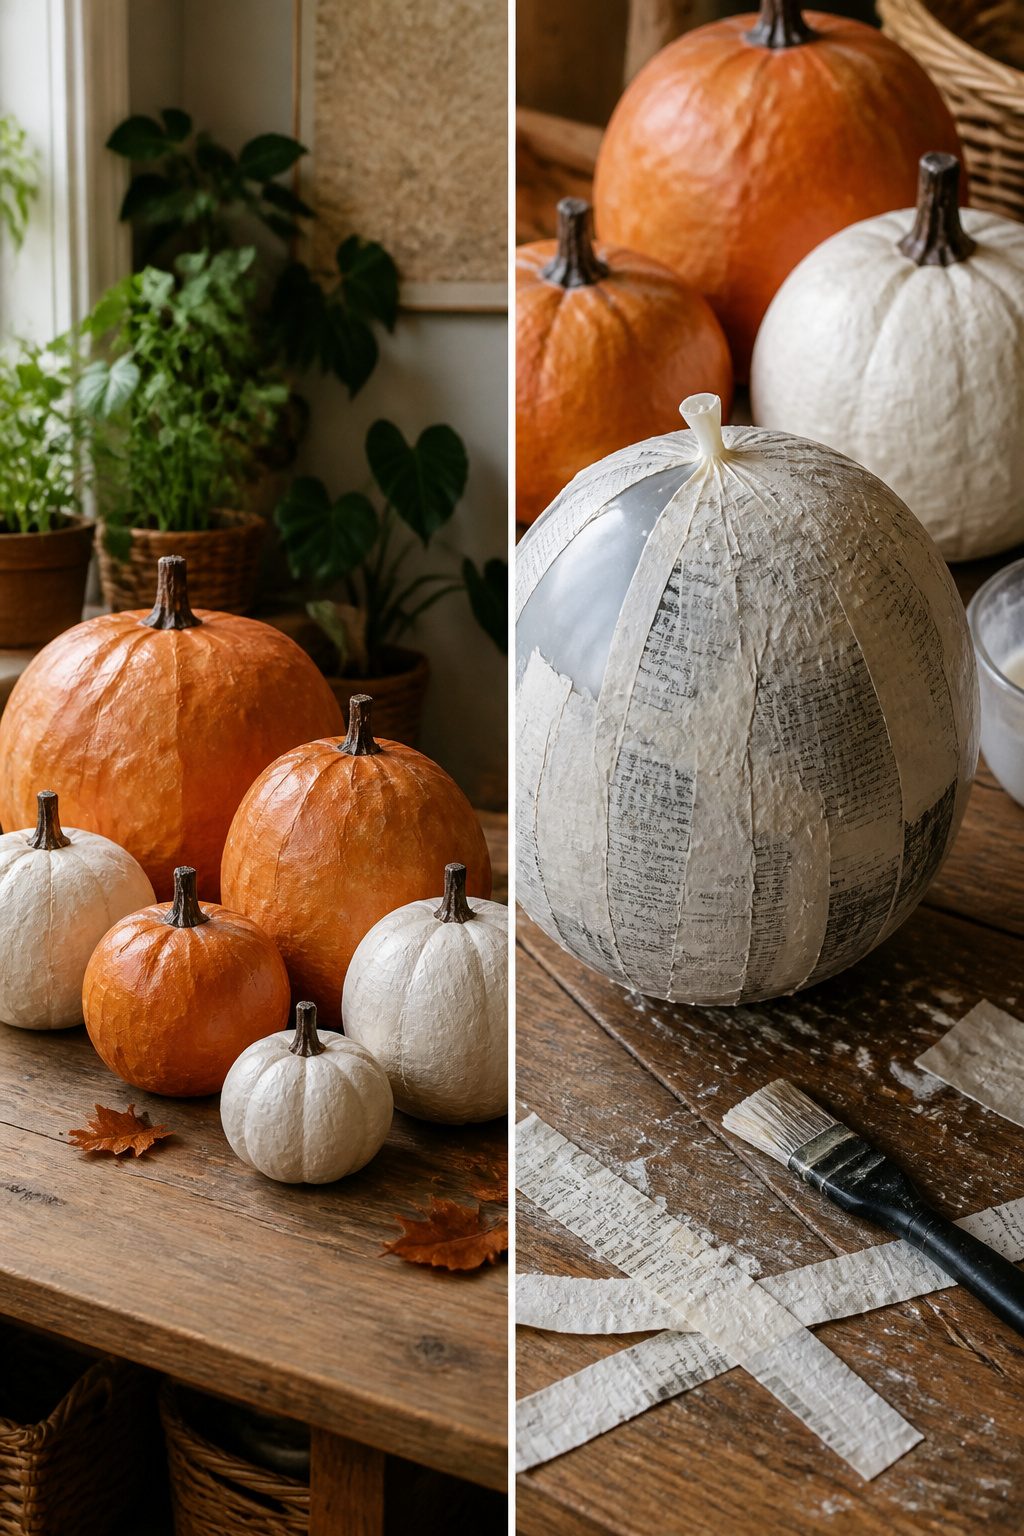
Paper mache pumpkins are one of the projects backed by four sources, and we can see why: they cost next to nothing and they never rot. We start with newspaper strips layered over a balloon or a plastic form, using a simple flour paste. The paste should feel like thin pancake batter, not soup. On our first attempt we made it too wet, and that added a full day of drying time while the strips stayed soggy in the center. The second attempt took about half a Sunday paper and a small bottle of acrylic paint, all told maybe six or seven dollars. Once the shell is hard and the balloon is removed, we paint with whatever colors we have on hand. Orange and black are traditional, but a matte white pumpkin with a real stem glued on top looks sharper on a mantel than we expected. Let it dry completely before stacking or storing; damp paper mache grows mold in a closet faster than you’d think.

POUR-ON APPLICATION FOR FULL FABRIC SATURATION: Liquid formula is designed to be poured, dipped, or brushed onto fabric for complete saturation and even stiffening. Ideal for shaping and draping projects that require hands-on control.

CONTROLLED SPRAY APPLICATION Convenient pump spray delivers an even, controlled application to help minimize mess and prevent overuse. Designed for easy coverage on fabric projects of all sizes. To prevent clogs, soak the pump in warm water between uses.

VERSATILE SIZE - This unique fabric stiffening glue comes in a 16 oz size - making this a must-have part of your fabric crafting projects!
3. Spider Garland
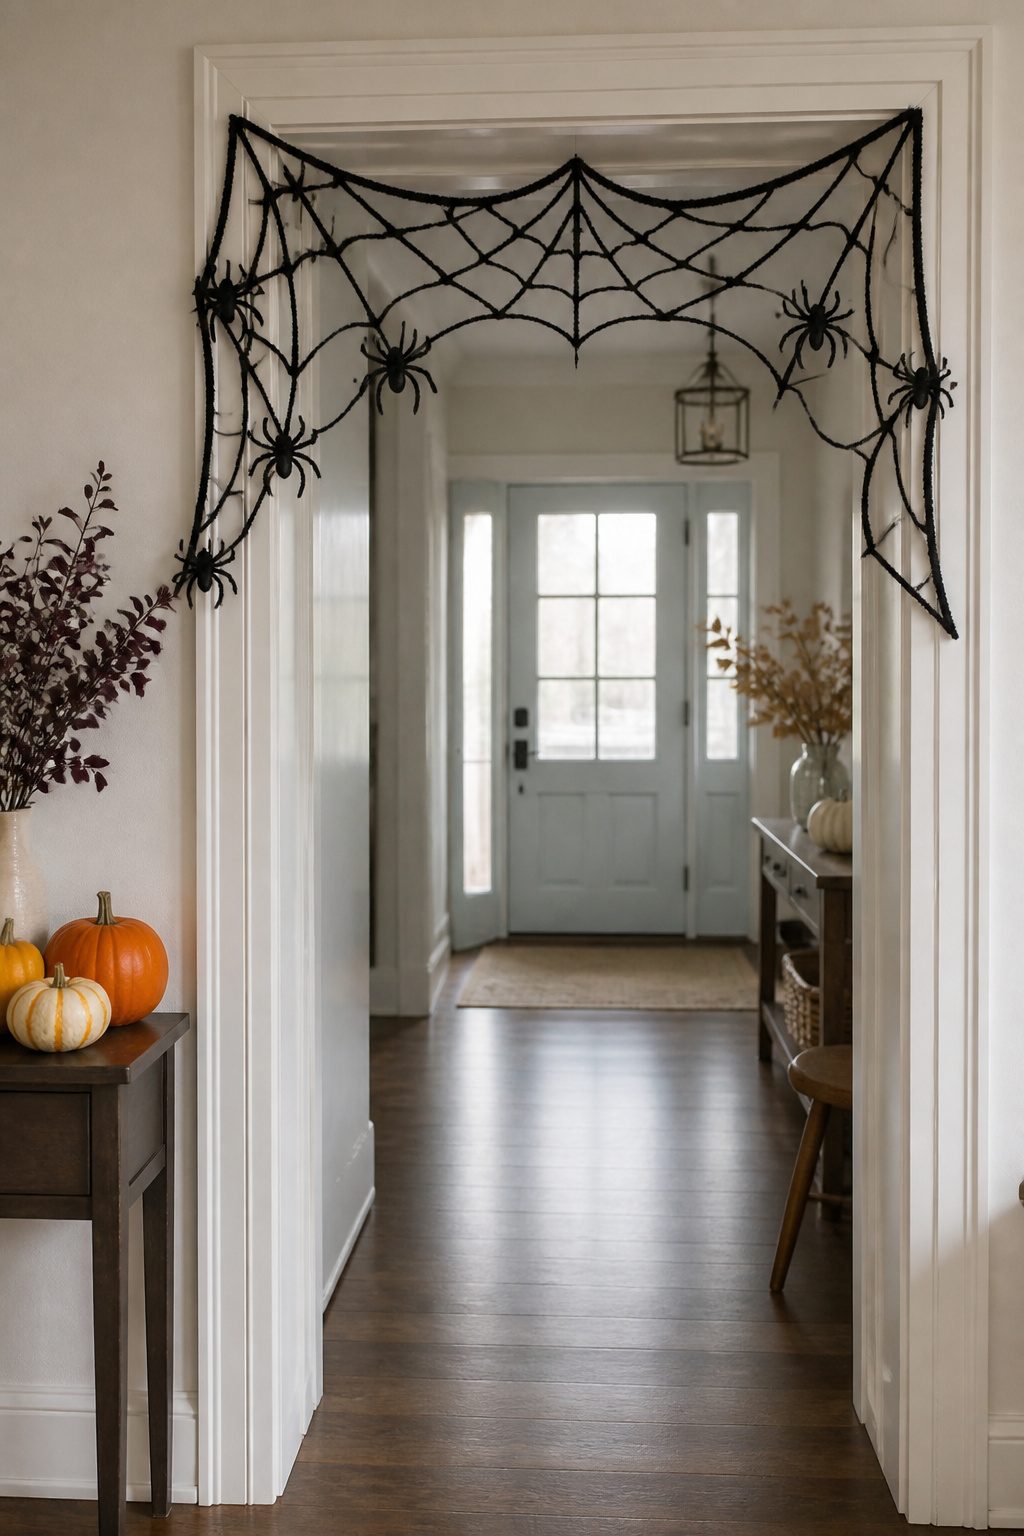
We wanted a spider garland that looked dimensional without the bulk of foam cutouts, so we started with a printout of a spiderweb as our guide and painted streaks of puff paint right over it. Let it dry for at least 48 hours before you peel it up; we tried rushing one batch at 24 hours and the legs tore clean off. Once the paint is fully cured, the web is flexible enough to thread onto fishing line and string across a doorway or mantel. The assembly is family-friendly work kids can handle, since the waiting and the mess are already done.

DIMENSIONS: Large decorative pumpkin measures 7 inches in height and 10 inches in width and depth, perfect for seasonal displays (17.78 x 25.4 cm)

Soft Material: the Halloween craft kit is made of foam materials, which is non-toxic and odorless, soft and smooth materials very great for your crafts

Halloween Paper Mache- Pack of 6 Paper Mache Jack O' Lantern Pumpkins - Small Papier Mache Carved Face Pumpkins for Halloween DIY Craft Projects and Decorations
4. Floating Witch Hat Luminaries
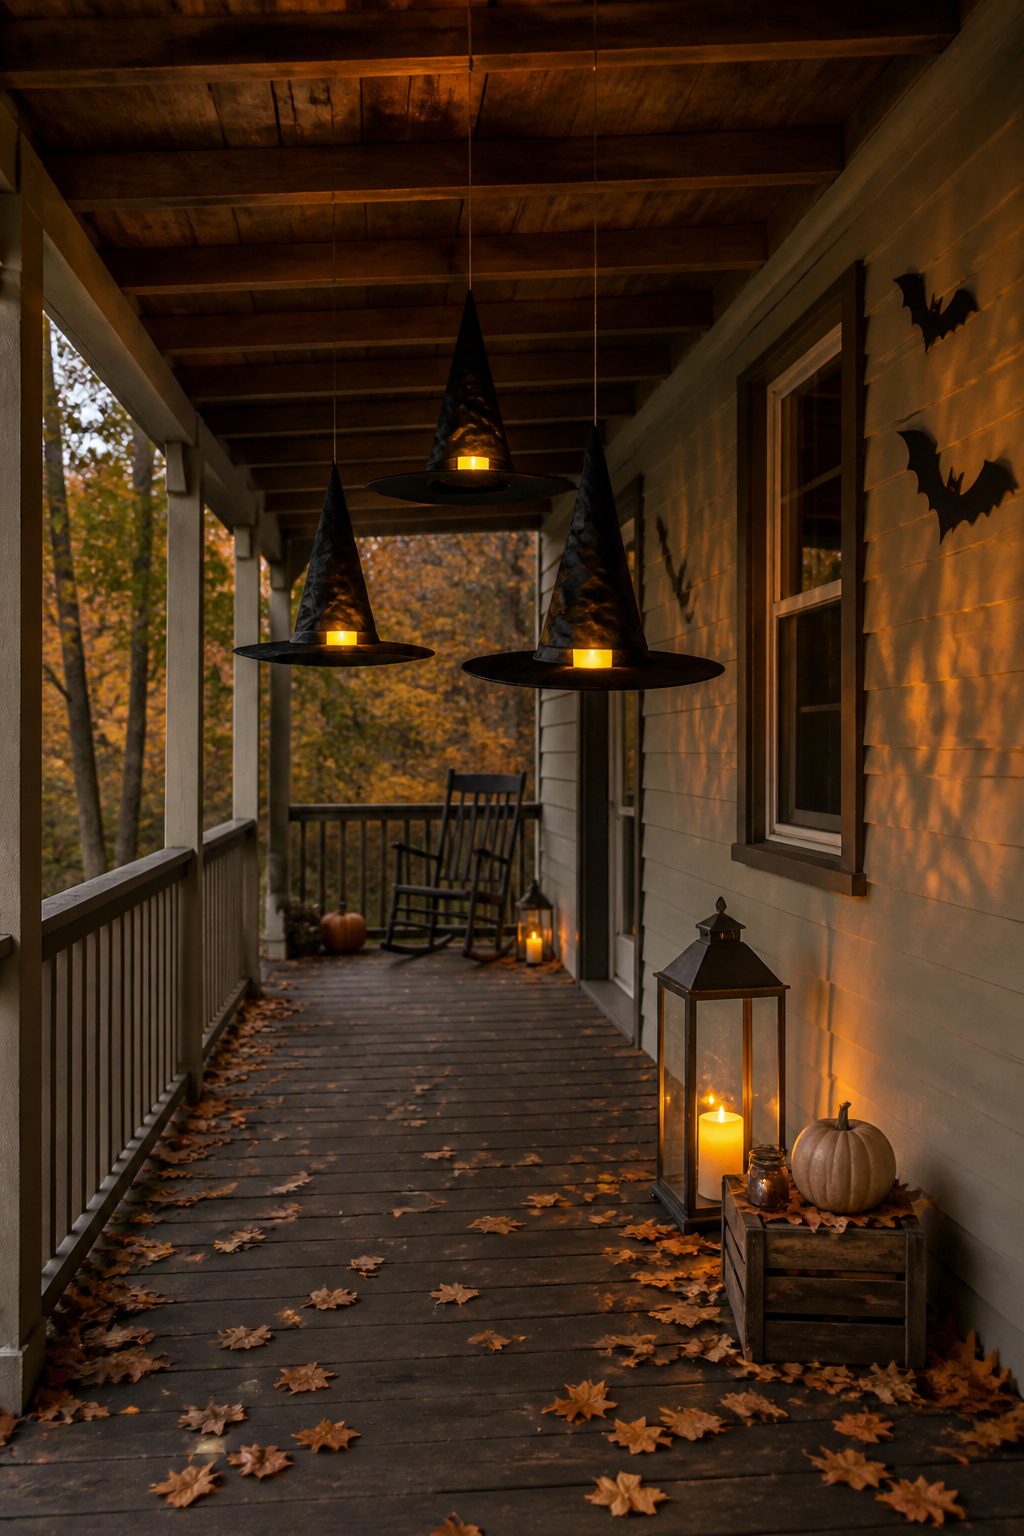
We hung three witch hats from the porch ceiling at staggered heights so they looked like they were drifting, not lined up like a store display. Fishing line does the trick if you knot it to the hat’s tip and run it up to a screw eye in the beam above. The trick is weighting the brims so they don’t spin and show the string. We taped a few washers to the inside rim of each one, just enough to keep the brim pointing down.
Battery tea lights sit on the brims instead of inside, which keeps the glow soft and stops the hat from tipping. We used the kind with a warm yellow flicker, not the cool white ones, because cool white reads office park, not haunted. The whole setup takes maybe twenty minutes once you find the ceiling spots, and the hats store flat afterward if you don’t glue the weights in place.

Permanent & Machine Washable Fabric Paint: Dries flexible and durable for long-lasting designs on T-shirts, clothing, and other fabric projects.

40 VIBRANT COLORS FOR YOUR CREATIVE NEEDS: Magicfly Fabric Painting Set features 40 must-have colors for your creative needs. From drawing, doodling, customizing t-shirts to all kinds of diy projects, you can make your perfect color combinations.

3-D EFFECT: Bright colors with cool finishes. Paint will remain vibrant and puffy once dry adding a cool characteristic to your creations.
5. Pumpkin Topiary
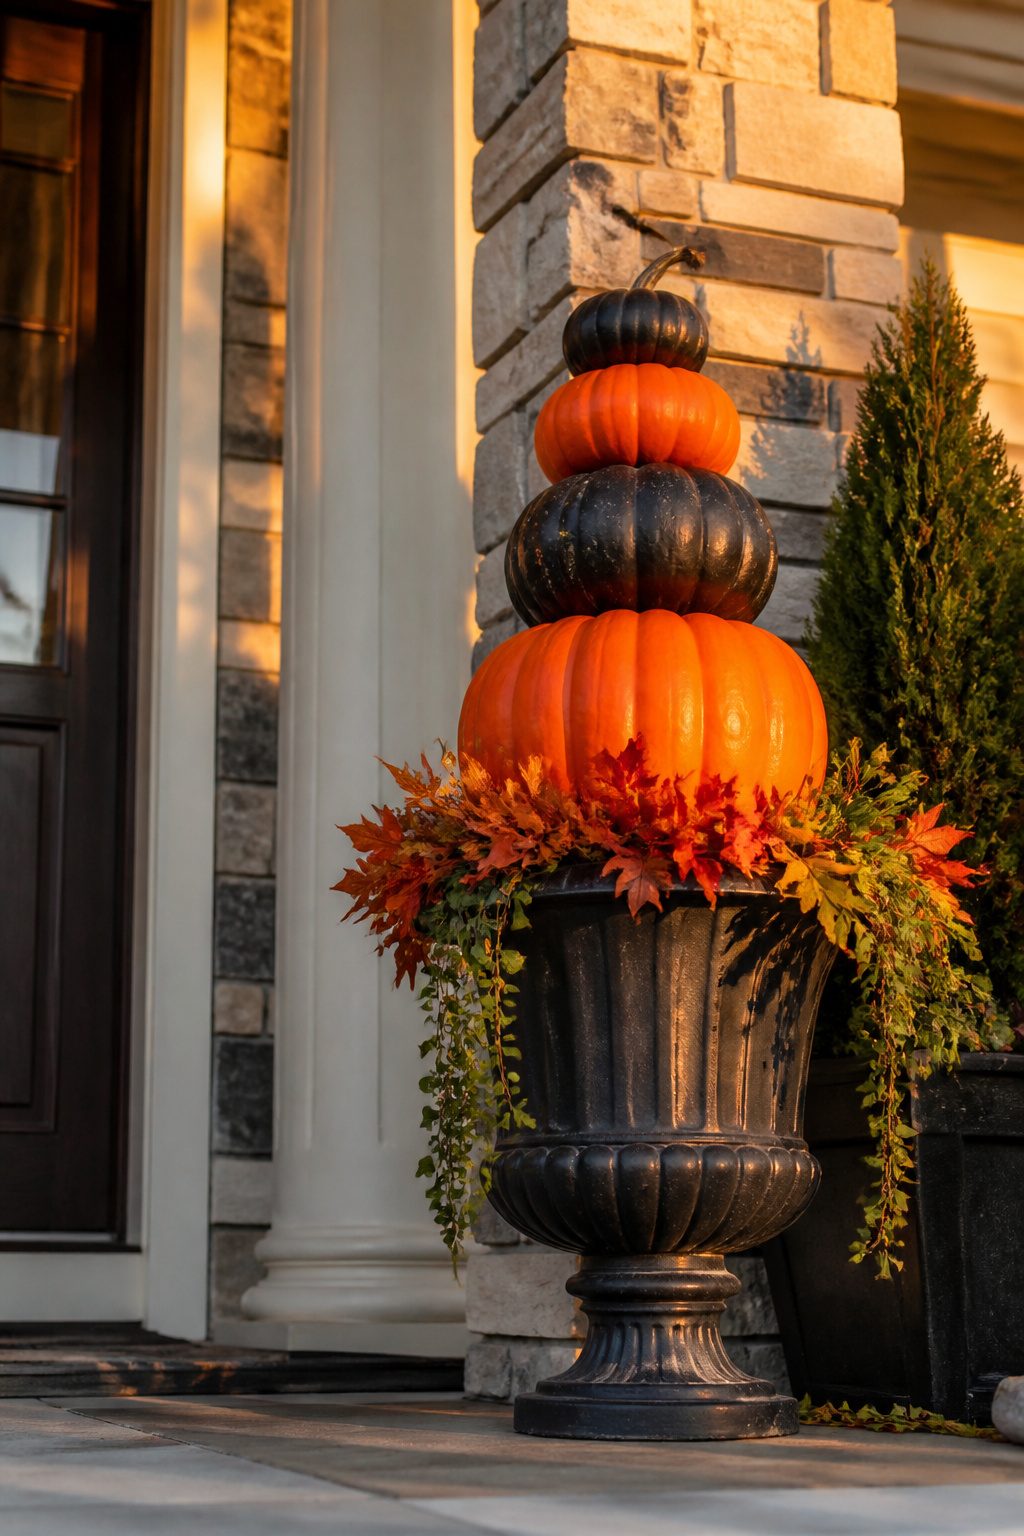
Stacked pumpkins in a planter, each one smaller than the last, make a vertical display that sits on a front porch greeting kids who walk up to the door. We tried real pumpkins first. By mid-October squirrels had taken bites from every one, so we switched to faux foam pumpkins and never looked back. A basic planter from the hardware store ran us about twelve dollars, and the foam pumpkins stacked easily with a wooden dowel through the centers to keep them straight. Let the dowel run two inches into the base pumpkin and an inch into each one above or the stack leans the first windy night. We painted ours matte black one year and left them orange the next; both read from the sidewalk. The whole setup stores flat in a bin and comes back out in ten minutes.

Floating Ghosts Halloween Decor: Classic floating ghost design with expressive black spooky face cutouts. Welcome neighbors and trick-or-treaters with these ghost decorations that add a charmingly eerie touch to your home. NOTE: This ghost light cover is directly draped over the lamp, and only spherical porch lights can perfectly display the ghost effect!

Halloween ghosts string lights: 8.5Ft Outdoor Halloween string lights with 14 mini incandescent bulbs (4 spare) and 10 white ghost lights, Each bulbs 0.84W, halloween ghost decorations string lights glow warm, creating an enchanting ambiance that is perfect for Halloween gatherings party decor

Halloween Decor: Our ghost decorations adds a whimsical touch to any indoor space, making it an eye-catching centerpiece that enhances your Halloween decor and brings smiles to your guests
6. DIY Mummy Decor
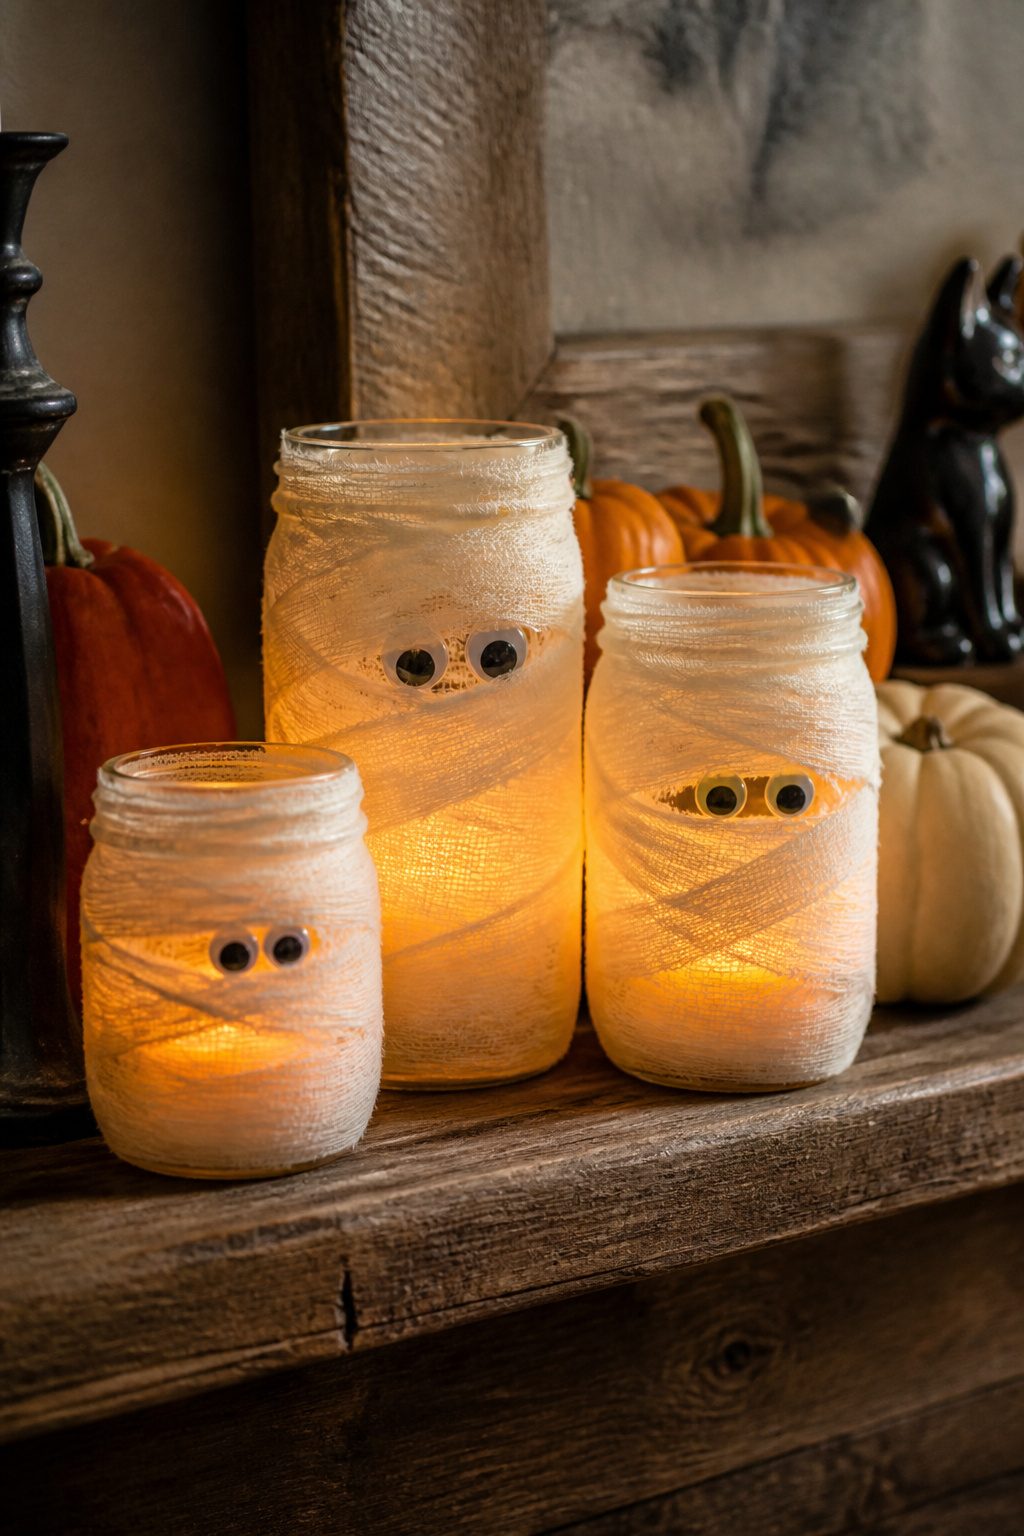
Glass jars and pillar candles wrapped in gauze strips pass for convincing mummies with almost no effort. We cut medical gauze into uneven widths, roughly two to four inches, and let our eight-year-old wind them around the shapes while one of us ran the hot glue gun. Keep the glue on your end, not theirs; the gauze only needs a dot every few wraps to stay put, and the loose ends look better than factory edges. A pair of toy eyes peeking through the bandages shifts the look from haunted house to hallway-friendly. The whole batch took about forty minutes from unroll to mantel, and they sat there through the whole season without shedding lint the way cheesecloth ghosts tend to.


POUR-ON APPLICATION FOR FULL FABRIC SATURATION: Liquid formula is designed to be poured, dipped, or brushed onto fabric for complete saturation and even stiffening. Ideal for shaping and draping projects that require hands-on control.

Reduces stretch when stitchings on knits or fabric bias
7. Skull Decorations
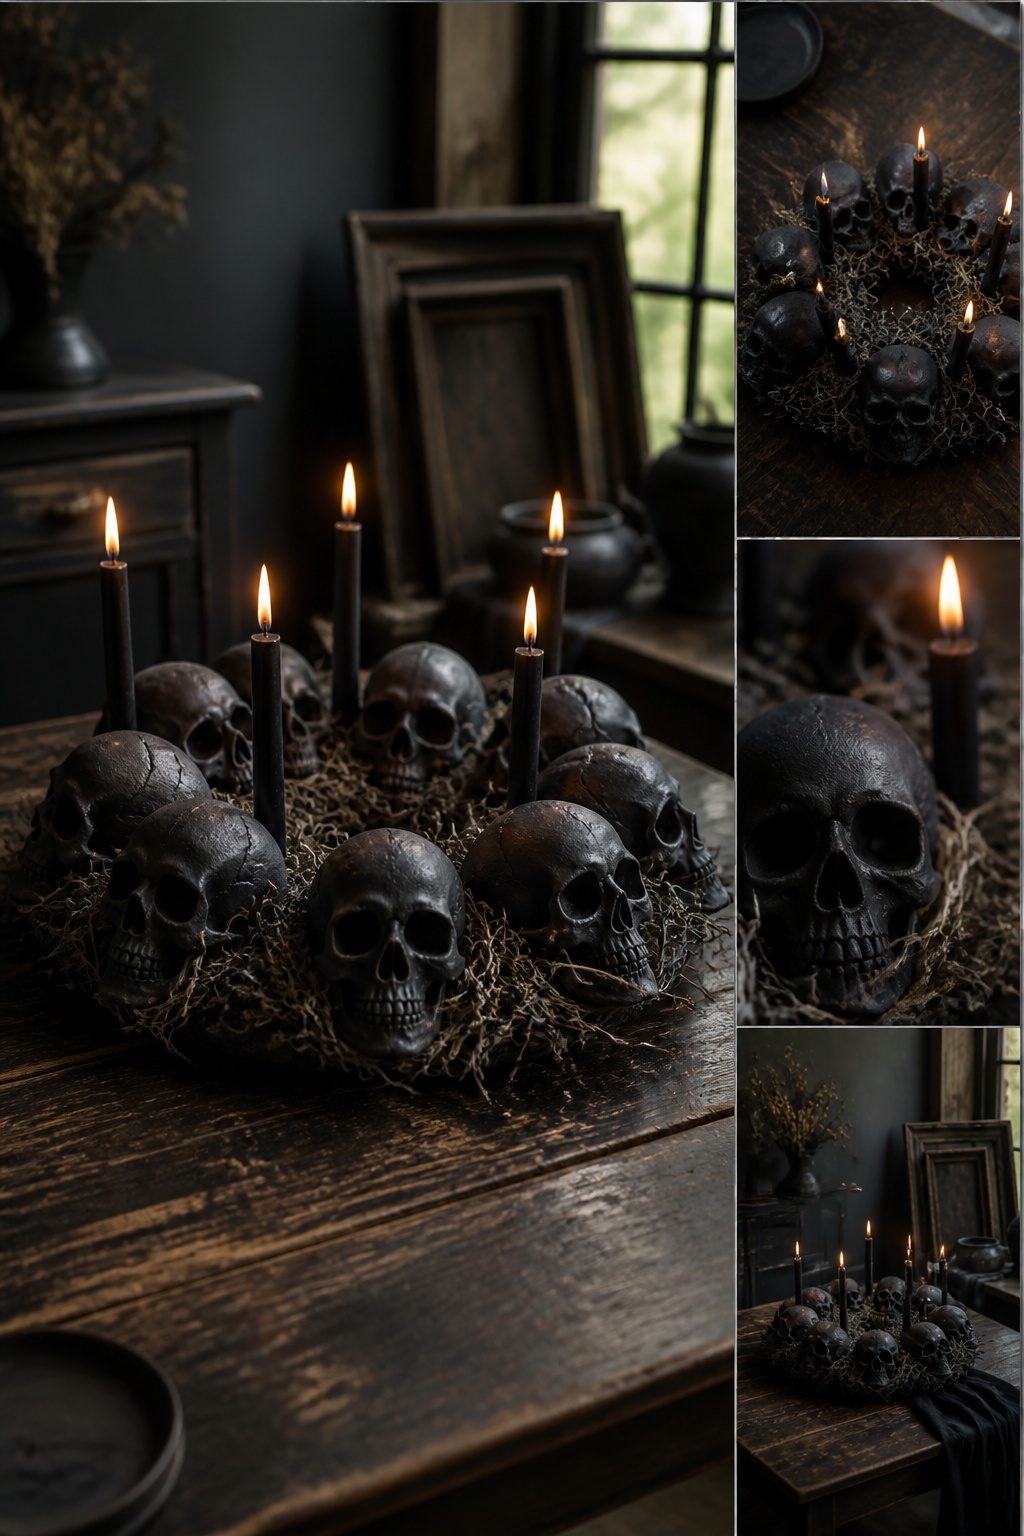
Skull decorations start cheap and get interesting fast once you stop treating the plastic ones as finished objects. We pick up foam skulls at the dollar store or the seasonal aisle at Walmart, usually two for a dollar in September, and the first thing we do is rough up the factory gloss with fine sandpaper so paint has something to grip. Charcoal paint over the whole piece turns it into a vase with a hole cut in the top; white stems against that dark base reads as intentional rather than sloppy. For something sharper, jeweled skulls take hot glue and rhinestones from the craft drawer, no technique beyond patience.
The centerpiece we actually keep on the table uses a wreath ring as the base, packed with Spanish moss and three skull heads, with taper candles set in among them. The moss hides the mechanics, the candles give it height, and the whole thing reads as far more expensive than it is. We paid maybe four dollars for the skulls, three for the moss, and used a wire wreath form we already had; the candles were leftovers from last winter. A comparable pre-made centerpiece runs thirty to fifty dollars online, and ours packs flat into a shoebox come November.
Just because you’re going for scary doesn’t mean you have to sacrifice aesthetic.
What that means in practice: the gap between "looks store-bought" and "costs store prices" is wider for skull projects than almost anything else we build for Halloween.

Paper Mache Pumpkins Bulk: you will receive 12 pieces paper mache pumpkins with face, ample quantity to fulfill your creative needs and replacements; Each unfinished paper mini pumpkin measures 2-1/8" H x 2-7/16" Dia, suitable for your fall DIY craft projects and Halloween decorations

Ideal Size 6-pack Set: 12 sets Halloween DIY painting craft project includes 6 paper mache ghosts and 6 jack-o-lantern pumpkins, ideal matching quantity for group DIY projects; Ghost size: 3.3×3×3 inch, Pumpkin size: 2×2×2.4 inch, suitable mini size for tabletop decor, hanging ornaments and adults' handheld crafts, easy to store and carry without occupying much space

Ideal Size 6-pack Set: 6 sets Halloween DIY painting craft project includes 3 paper mache ghosts and 3 jack-o-lantern pumpkins, ideal matching quantity for group DIY projects; Ghost size: 3.3×3×3 inch, Pumpkin size: 2×2×2.4 inch, suitable mini size for tabletop decor, hanging ornaments and adults' handheld crafts, easy to store and carry without occupying much space
8. Halloween Wreaths
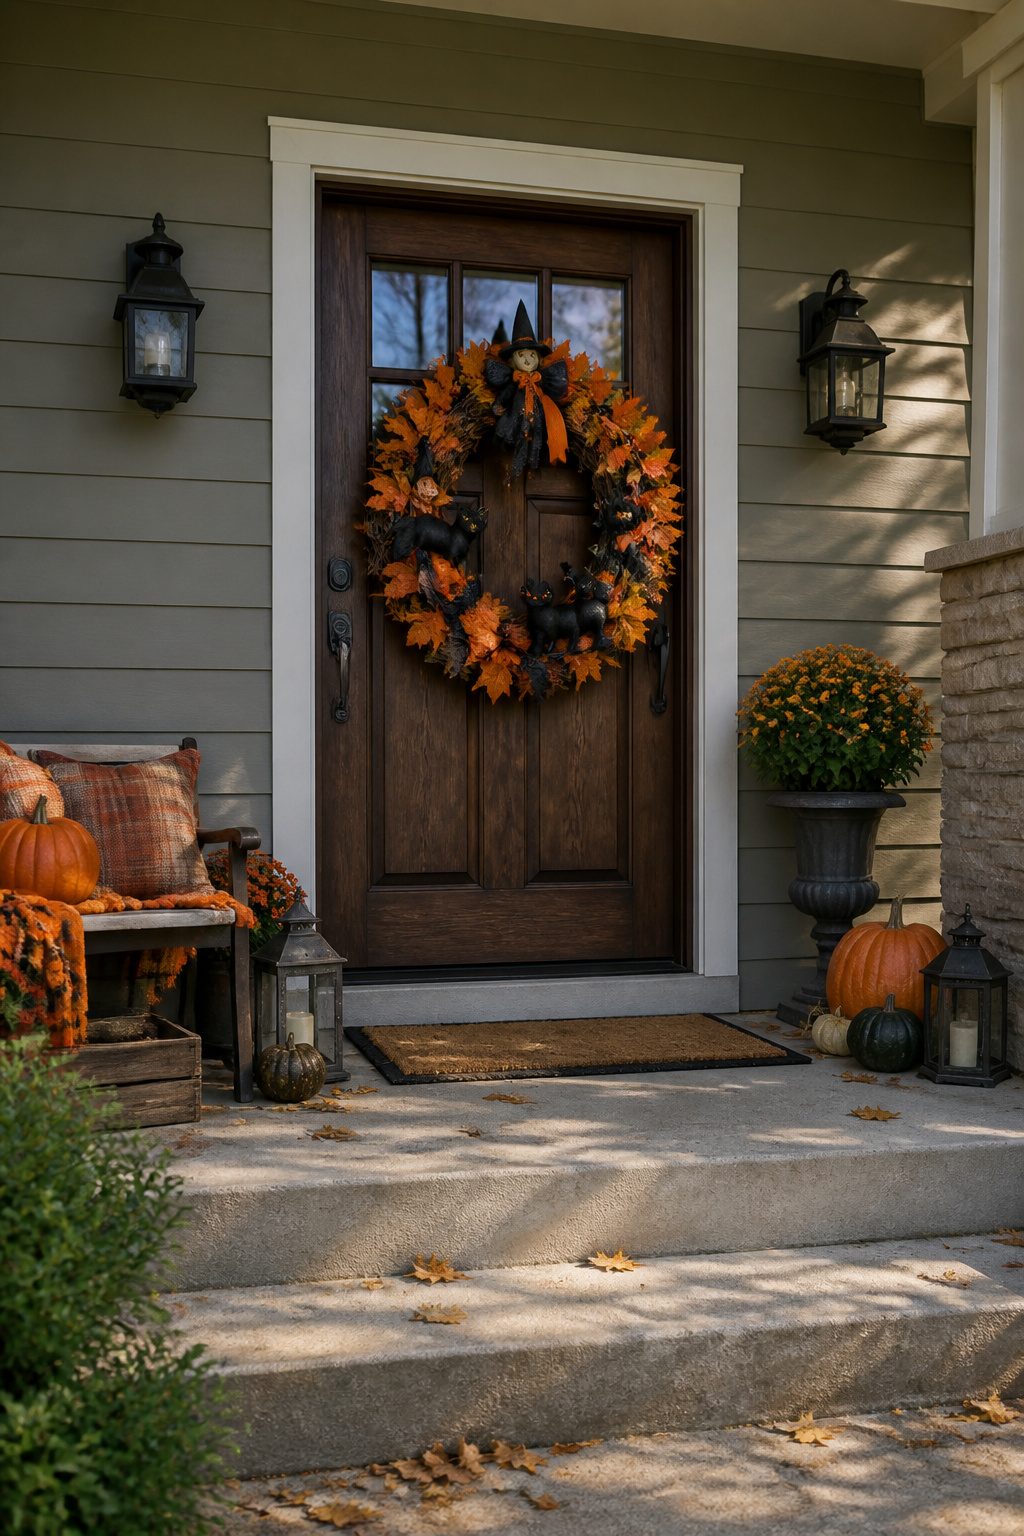
A grapevine wreath base from the craft store runs about eight dollars and takes hot glue without complaint, which is why we keep reaching for it. We wired on faux maple leaves first, then looped orange and black ribbon through the vines so the wind would have to tear the whole wreath apart to strip it. Miniature figures, we learned the hard way, need more than glue: we tied a tiny witch and two black cats with clear fishing line to the inner branches, and only the wired pieces survived three weeks of Utah wind on our front door. The glued skull we added as an afterthought fell off twice before we drilled a small hole and lashed it on. If your door faces the weather, plan for tie-downs from the start; glue alone is for sheltered porches.
9. DIY Apothecary Jars
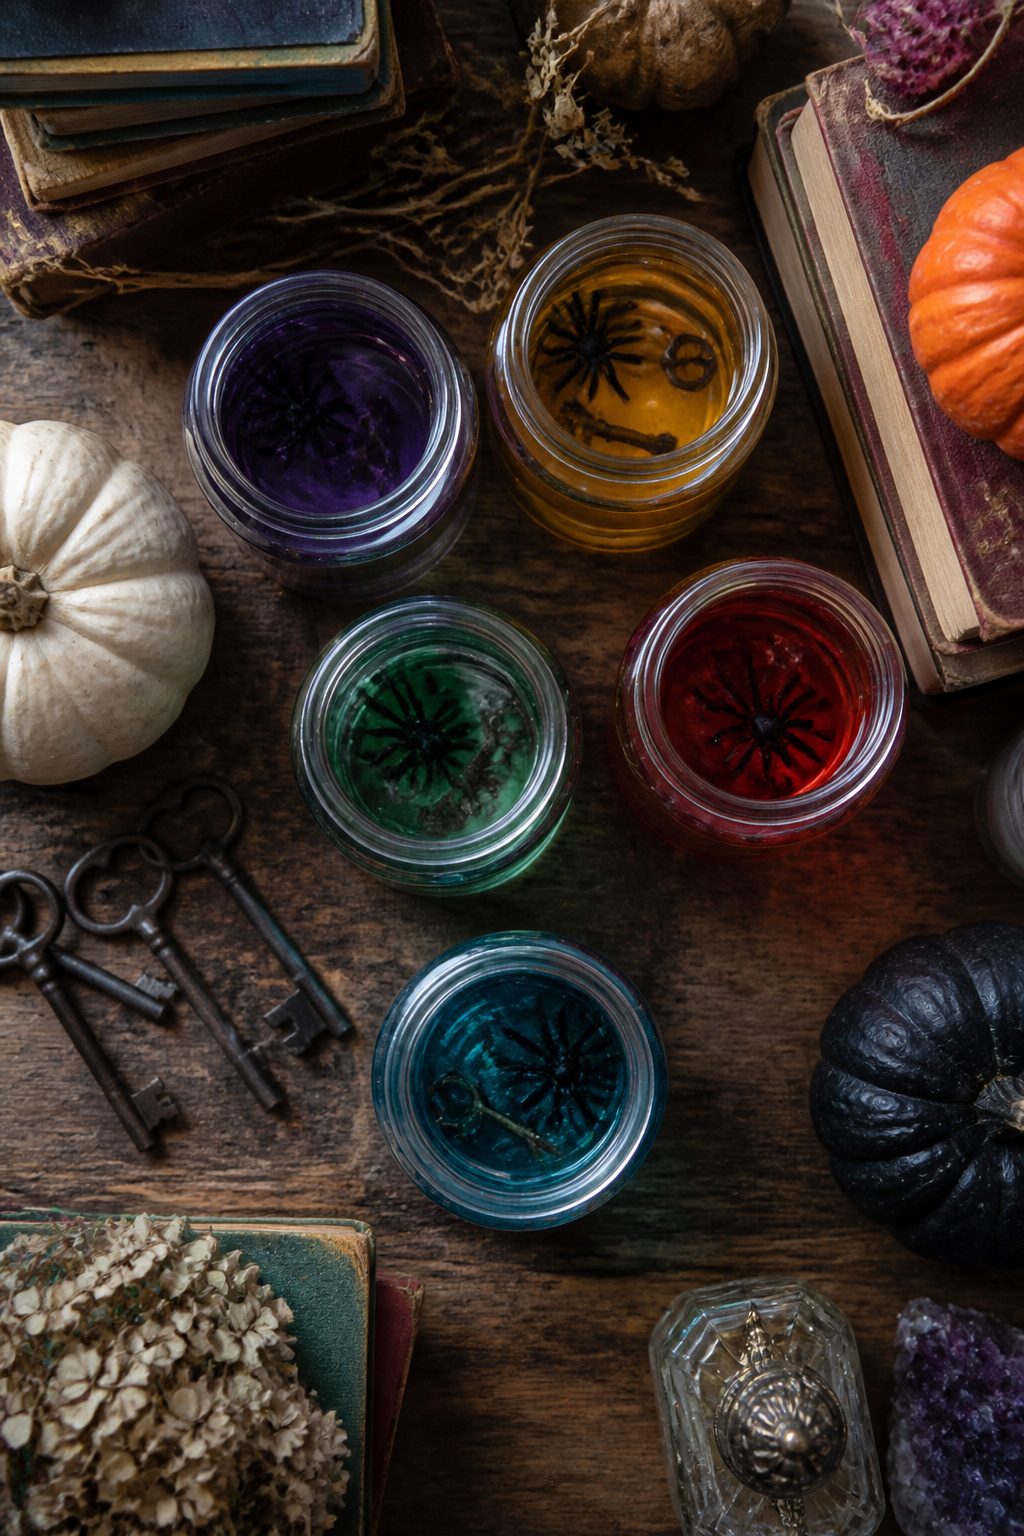
We pulled a case of mason jars from the basement for this one, the same ones we use for pickles in summer. Fill them halfway with water, add a few drops of food coloring until it looks like something a Victorian pharmacist might stock, and drop in whatever you have: plastic spiders, old keys, corked test tubes from the dollar store. The floating objects catch light from windows or candles in a way that reads as depth, not clutter.
For labels, we printed "Tincture of Nightshade" and similar names on regular paper, cut them out, and sealed them front and back with clear packing tape. The tape wrinkles slightly at the edges, which only helps the aged look. We skipped Mod Podge; tape is faster and peels clean in November.
If you want something that lights up, the jar lanterns in this year’s brief, Dracula, ghost, and jack o’ lantern faces painted on glass with battery tea lights behind them, use the same mason jar base and take about twenty extra minutes. We built both styles last October and the apothecary jars won for shelf presence; the lanterns worked better lining the walk to the door.

Package Includes: this halloween decorations set include 2 pieces of white fabric, 2 black witch hats, 2 transparent balls, 6 ghost stickers, 2 LED string lights, 2 tripods, 6 safety pins, 6 ground anchors, 1 sheet of creepy cheese cloth, and 12 halloween hanging bats

SPOOKY SEQUIN GHOST DESIGN — Features 10 adorable ghost-shaped lights covered in shimmering sequins that sparkle and glow with warm white LED light, adding a festive and whimsical Halloween touch to any space.

【Flying Ghost Value Packed】: This Halloween hanging ghost pack has two accent-size decorations: 32-inch witch hat ghost & 28-inch bow ghost. One classic solid fabric ghost with pointed black witch hat; the other sparkly glitter tulle ghost with sleek black bow. Both include mini witch cauldron accessories, forming an adorable boy-girl ghost duo. They add playful spooky charm to Halloween decor and build fun festive vibes for trick-or-treat nights.
10. Spooky Candle Holders
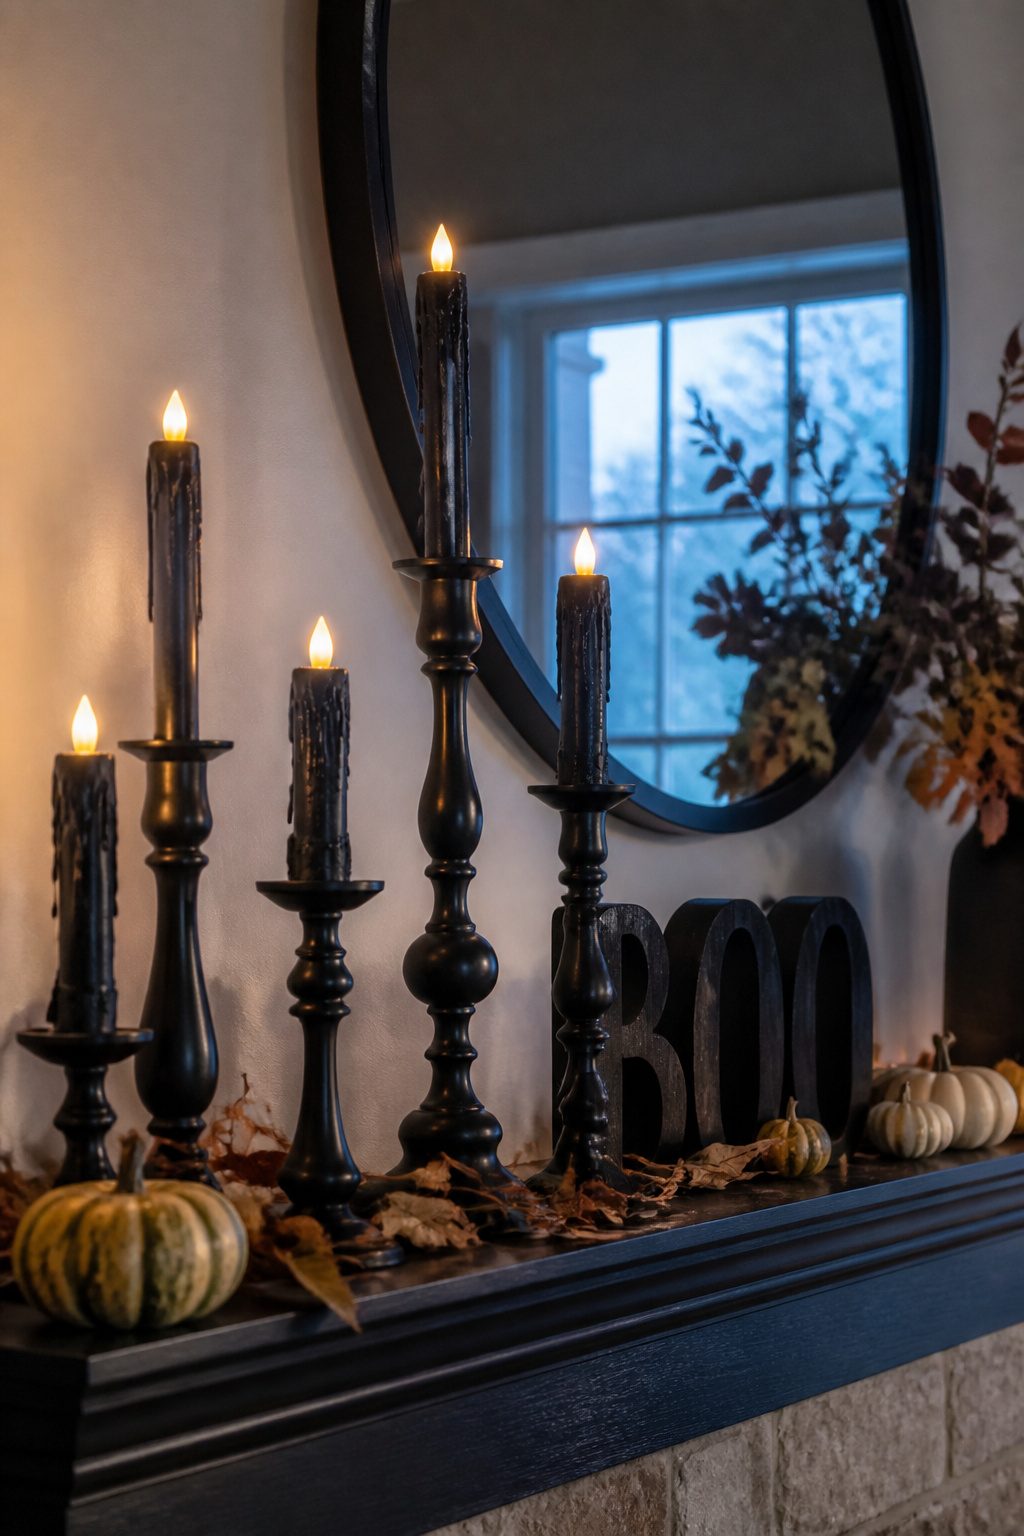
We keep a shoebox of plain glass candlesticks from estate sales, the kind nobody wants until October rolls around. Last year we tried the dripped-wax look for real, tilting white tapers over the holders until the wax ran down the sides like something out of a gothic novel. The effect was perfect for about twenty minutes. Then one of us reached across the mantel to adjust a wood letter "B" we had propped nearby, and a sleeve brushed the flame close enough to smell the scorch. We switched to battery candles that same night. The flicker is good enough now that you only notice the difference when you try to blow one out.
For the mantel setup, we paint the candlesticks flat black first, then group them with those wood letters, spelling "BOO" or "EEK" depending on what the thrift store has in stock. A paper wrap works too if you want something faster, a strip of black cardstock with a window cut out so the fake flame shows through. The whole arrangement stores in a grocery bag and sets up in five minutes, which matters when you are pulling decorations out the same afternoon the neighbor kids start ringing the doorbell.
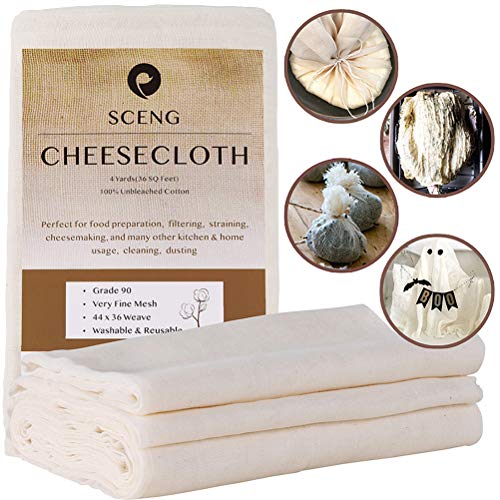
GRADE 90 CHEESECLOTH - 100% Grade 90 cheesecloth is much higher and better quality compared to lower grades such as Grade 50, and this cheesecloth can be washed and reused, unlike other cheesecloth brands and substitutes which just for one-time use

【𝐌𝐚𝐫𝐯𝐞𝐥𝐨𝐮𝐬 𝐂𝐡𝐞𝐞𝐬𝐞 𝐂𝐥𝐨𝐭𝐡 𝐟𝐨𝐫 𝐭𝐡𝐞 𝐏𝐫𝐢𝐜𝐞】The 20x20 inch large-size cheese cloth for straining is pre-cut so you don't have to cut it by hand again. And it is vacuum-packed, which saves a lot of space and EARTH-FRIENDLY, ensures cleanliness and freshness

The Stiffen-Quik formula dries clear so it won’t discolor your piece, and you can spray on more coats when you want a heavier shaping
11. Halloween Wall Art
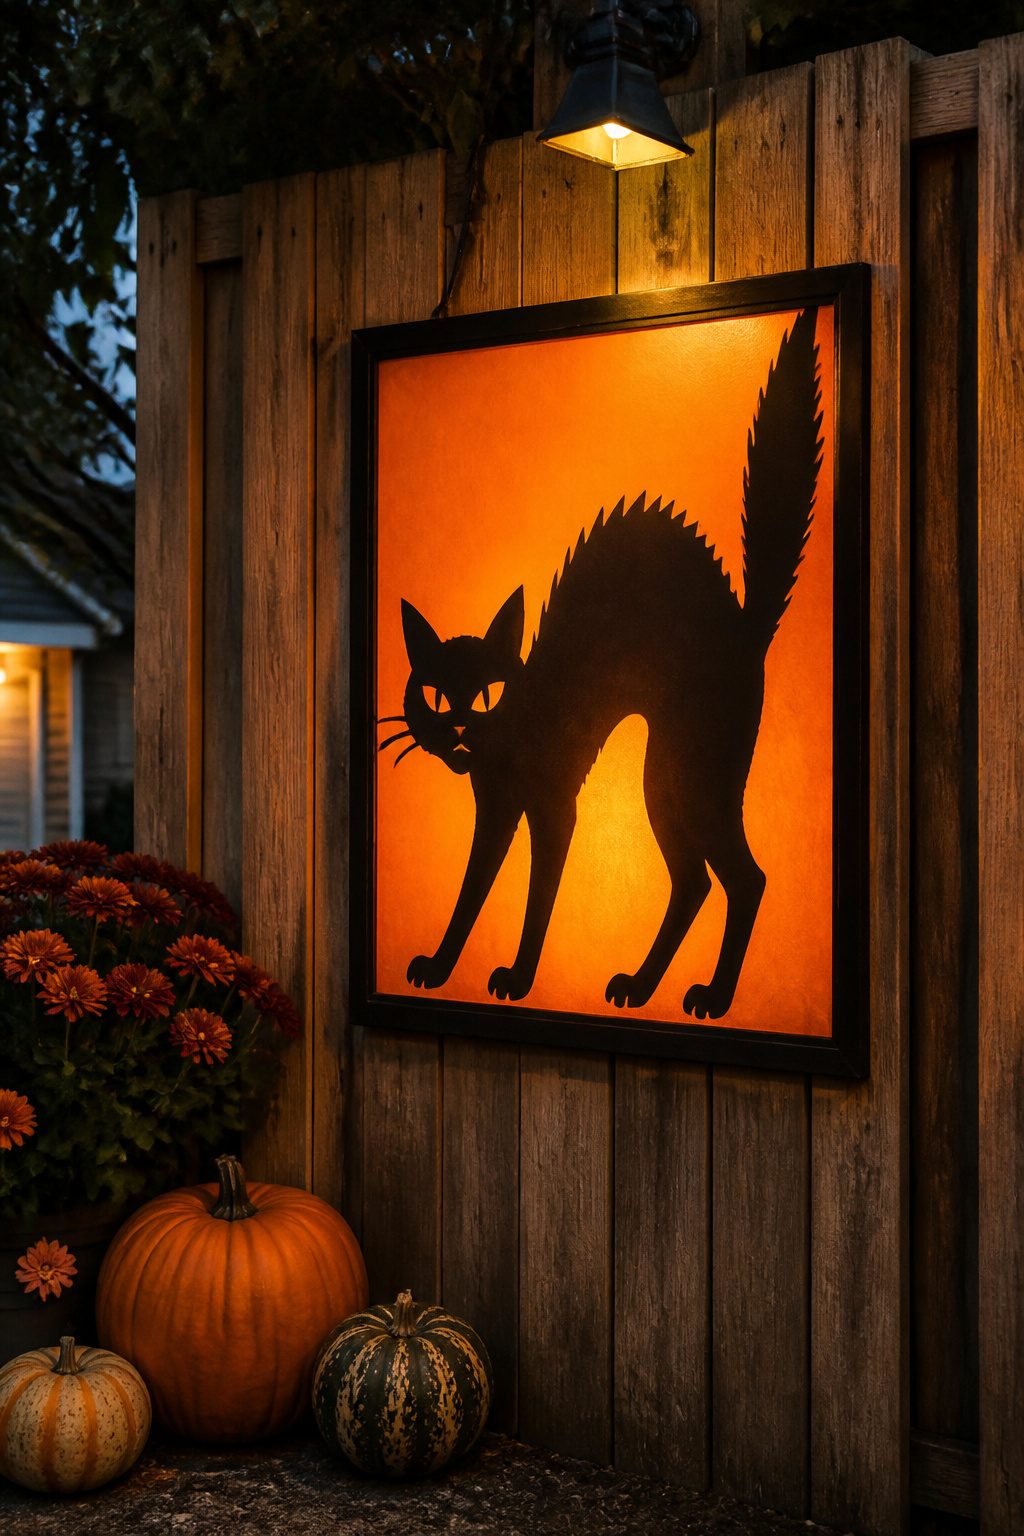
We wanted wall art that read from the sidewalk, not just the porch, so we started with a thrifted 16-by-20 frame and a sheet of black cardstock. The trick was the cutout itself: we freehanded a stretched cat silhouette with a craft knife, then backed the opening with orange tissue paper so the porch light behind it would glow. Hang it where the backlight hits, not where it faces the room, or the effect dies by noon.
The whole build took about forty minutes, including the time we spent taping the tissue flat after our first try wrinkled. A seasonal print from a big-box store runs about $15, and our version cost $4 for the frame plus $2 in paper and glue we already had. The difference is we can swap the silhouette in November instead of storing another rigid poster tube.
12. Halloween Village
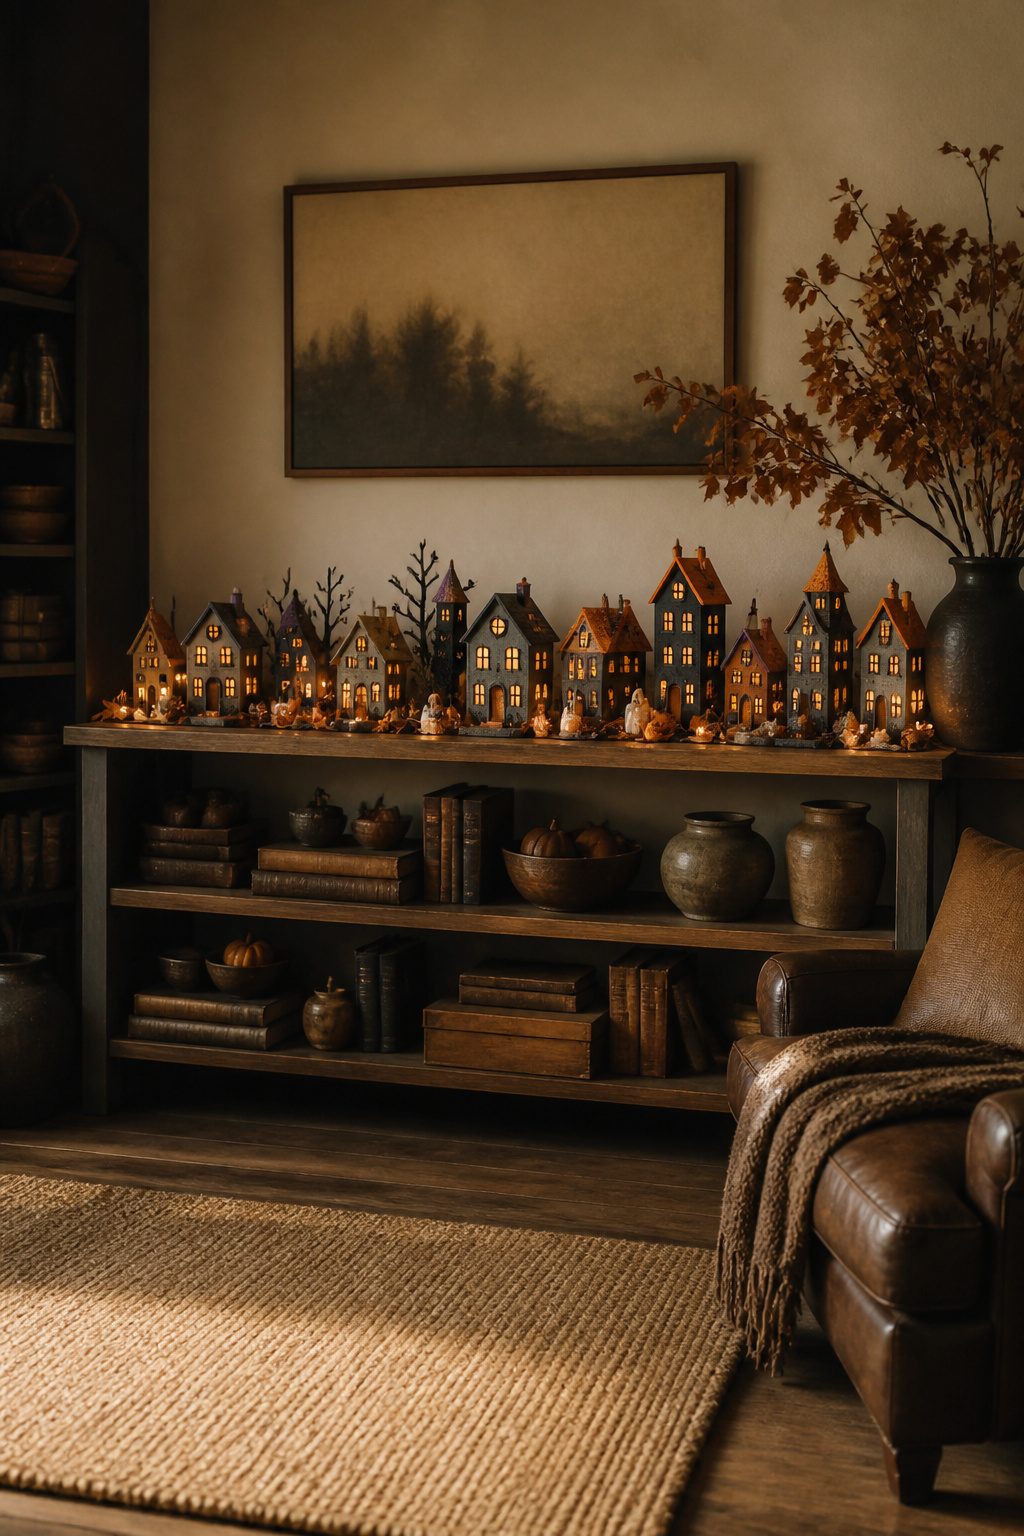
We started our Halloween village with one cardboard house template traced from a cereal box and a free printable roof pattern. That first weekend we cut three houses, scored the fold lines with a butter knife, and glued them together with a glue gun. By the second weekend we added a cardboard hill, a few twisted wire trees painted black, and six tiny figures we molded from polymer clay.
Battery-operated fairy lights cost us about eight dollars per string, while the plug-in village light sets started at thirty-five and needed outlets we did not have along that shelf. The battery strings tuck behind the houses and run on a timer, so the village glows from six to midnight without anyone remembering to flip a switch. We skipped the plug-in sets because renters move shelves, and a cord running down the wall is one more repair to patch later.
The whole village sits on a shelf we already owned, takes up about two feet of width, and packs flat into a shoebox come November first.
13. Mini Halloween Worlds
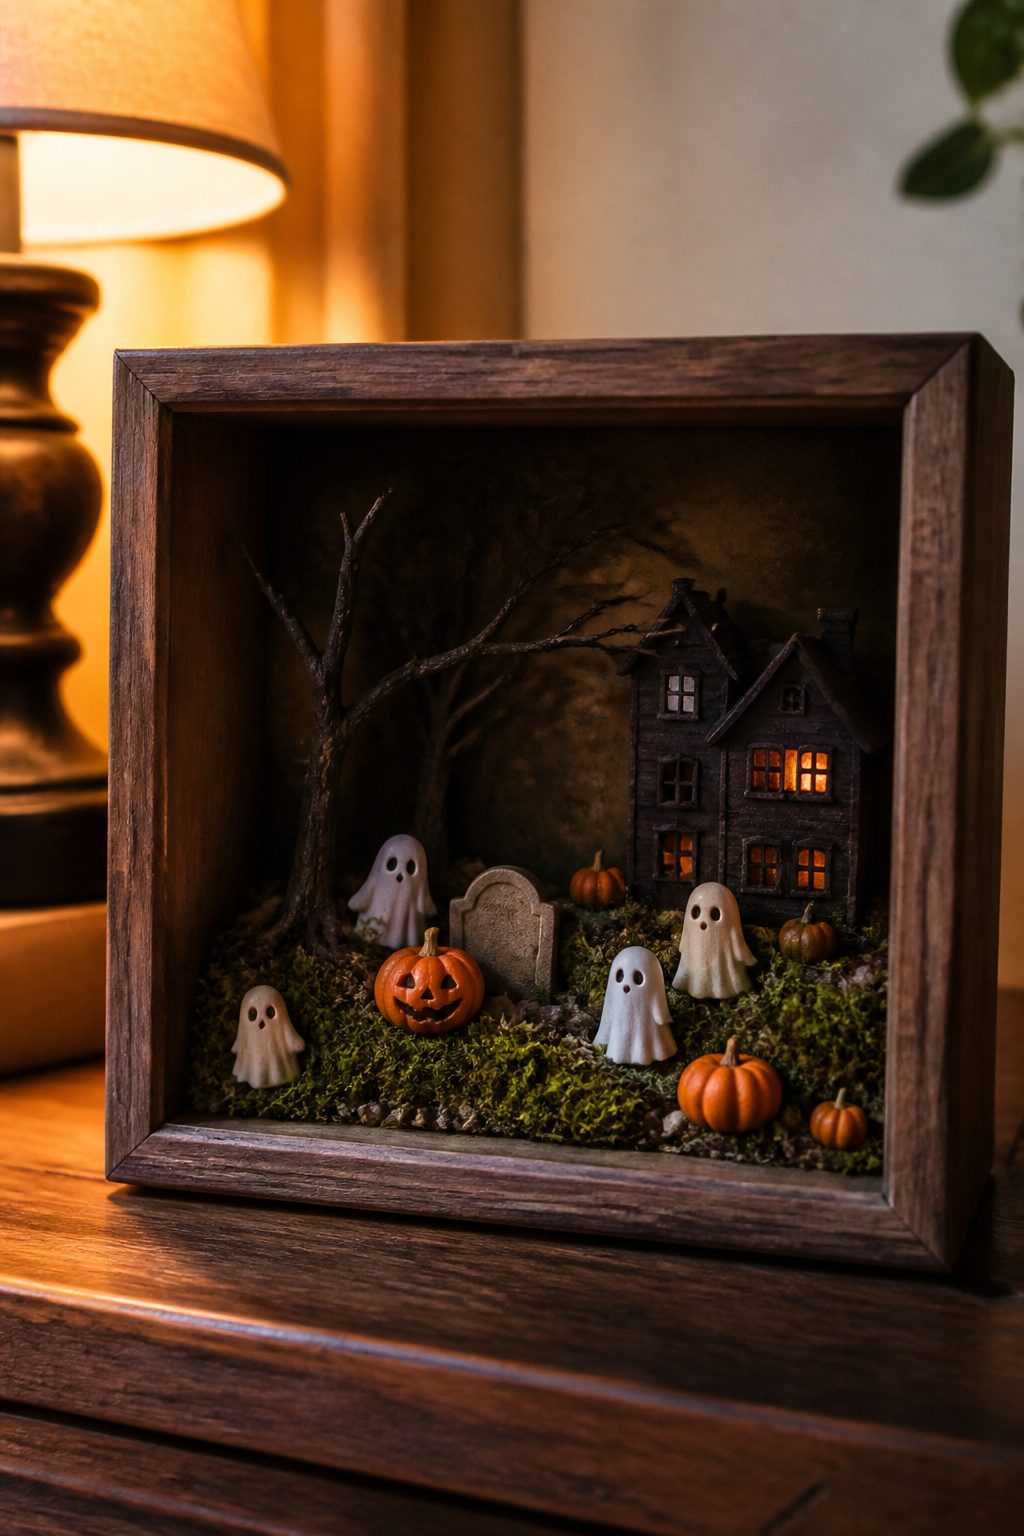
Small scenes inside a jar or shadow box work differently from an open village display. You view them from one fixed angle, so the back wall and depth become the whole stage. We learned this rearranging figures inside a fishbowl with a removable lid; the opening let us swap a ghost for a witch when the first setup looked flat. Moss came from the floral aisle at a craft store, and pebbles from the bagged aquarium section at a pet store. Both cost less than the miniature figures and filled space so we needed fewer of them. The lid also keeps dust off, which matters more than we expected after leaving one open on a shelf through November.
14. Spooky Lanterns
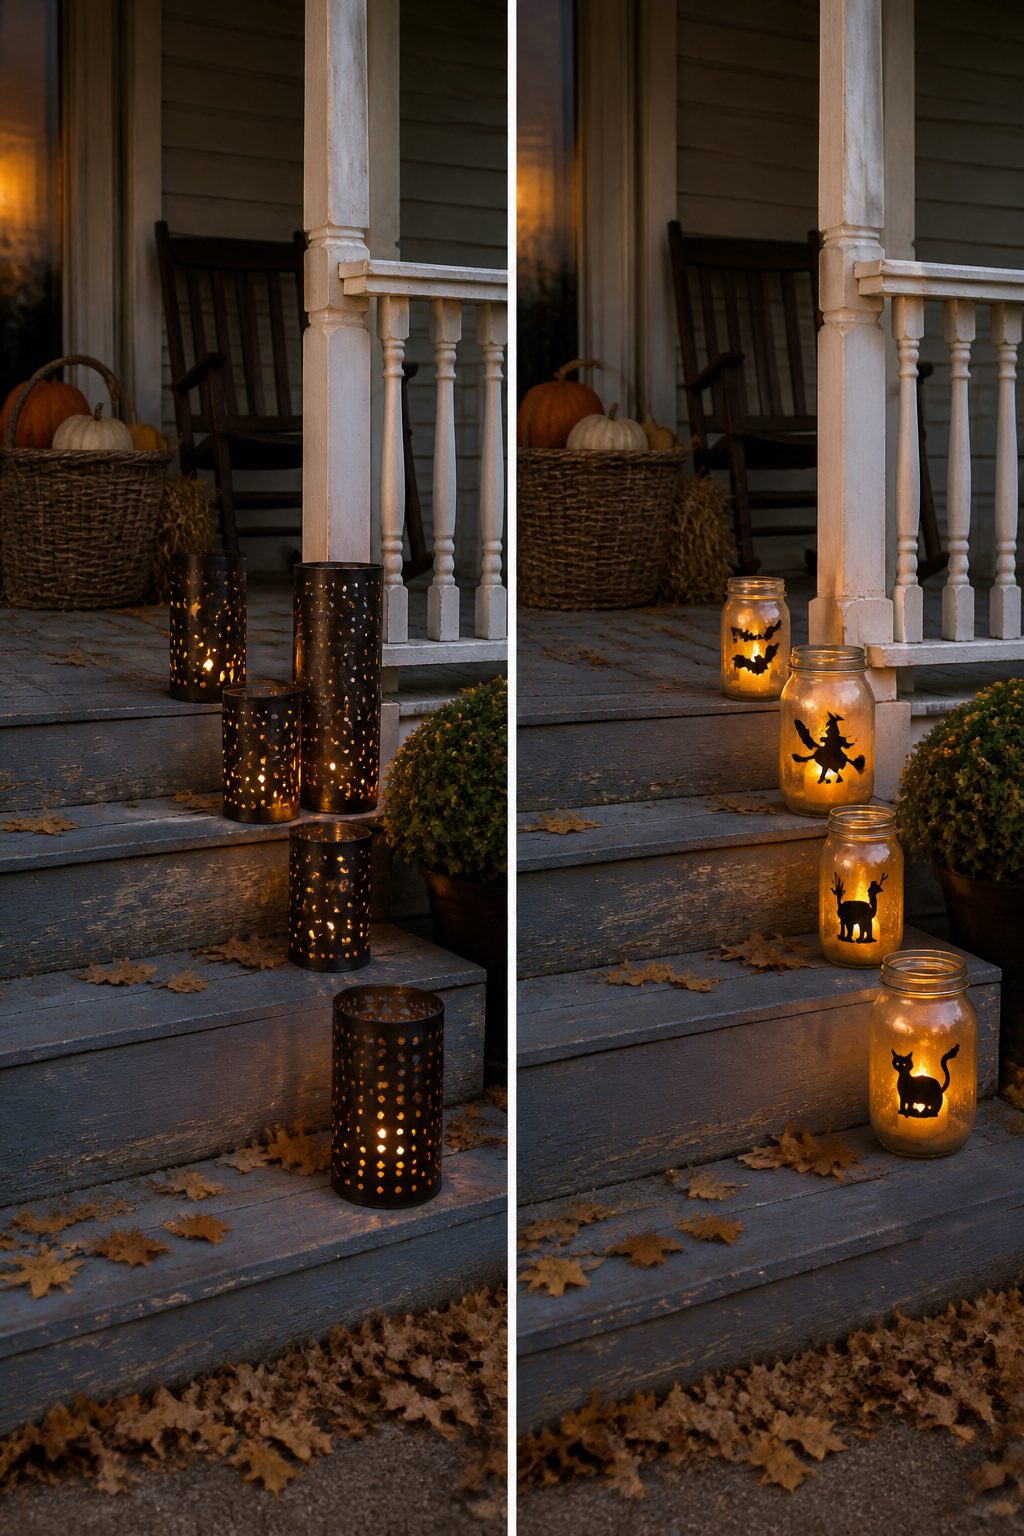
Metal punch patterns and paper inserts both throw beautiful shadows, but only one of them survives an October rain. We learned this last year when we set out pairs of each along the walkway and woke to sodden paper curling off its frames. The punched tin kept its shape and kept throwing light; the paper inserts went straight to the compost. Punched metal wins for anything that sits outside, though it takes patience and a decent awl or rotary punch. If you want the look without the tool investment, the brief’s jack o’ lantern jar lanterns skip the metalwork entirely. A mason jar, a battery tea light, and a vinyl or paper cutout taped to the inside does the same flickering face. The glass keeps the paper dry, and if the cutout warps you are out fifteen minutes, not a whole evening’s punching. We now run metal lanterns along the steps and jar lanterns on the porch rail where the roof gives cover, mixing the two textures without mixing the labor.
15. Creepy Crystal Balls
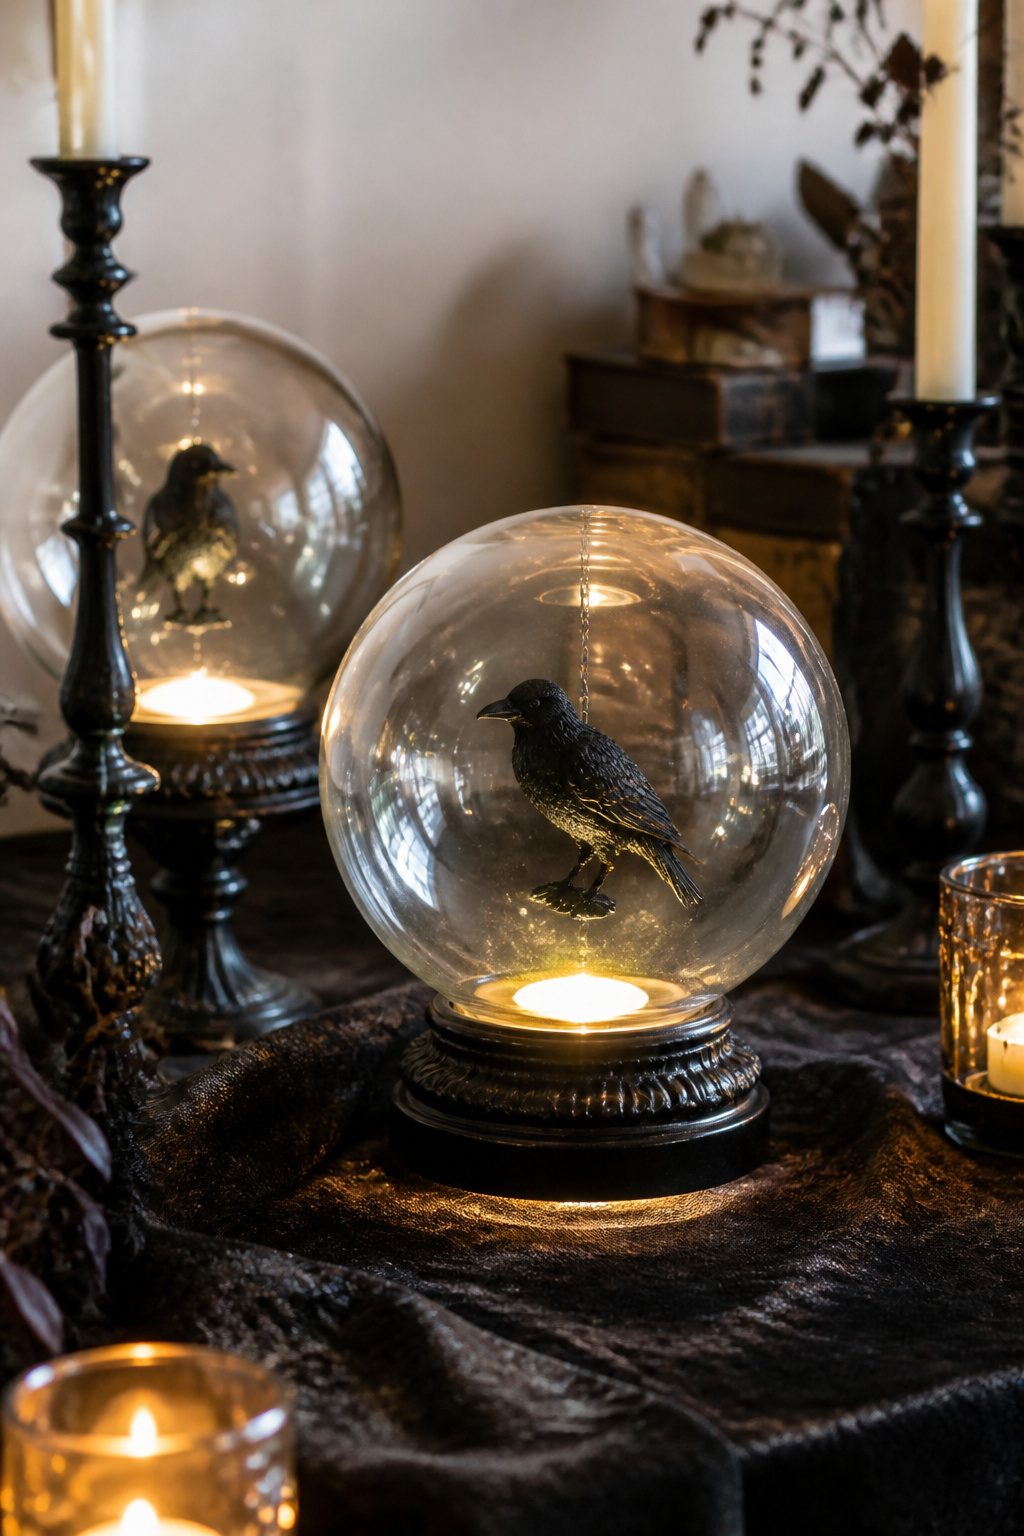
We found a thrifted light fixture globe for this one, the kind that screws into a flush-mount ceiling fixture, which gave us a perfect half-sphere shape without the cost of a craft-store acrylic dome. The problem with globes is they roll, so we weighted the base with a circle of plywood and a handful of spare nuts glued to the underside, then covered the whole base in black felt so it looked intentional on a draped table. Inside we floated a small plastic raven from the dollar store, suspended on fishing line from a dot of hot glue at the top. The eerie effect came from a single battery tea light underneath, not inside. That small light below catches the curve of the glass and throws a soft upward glow that makes the figure inside look lit from within without the fire risk of a candle in a closed sphere. We tried the light on top first and lost the shadow; underneath is the move that works.
What We Spend and Where We Shop
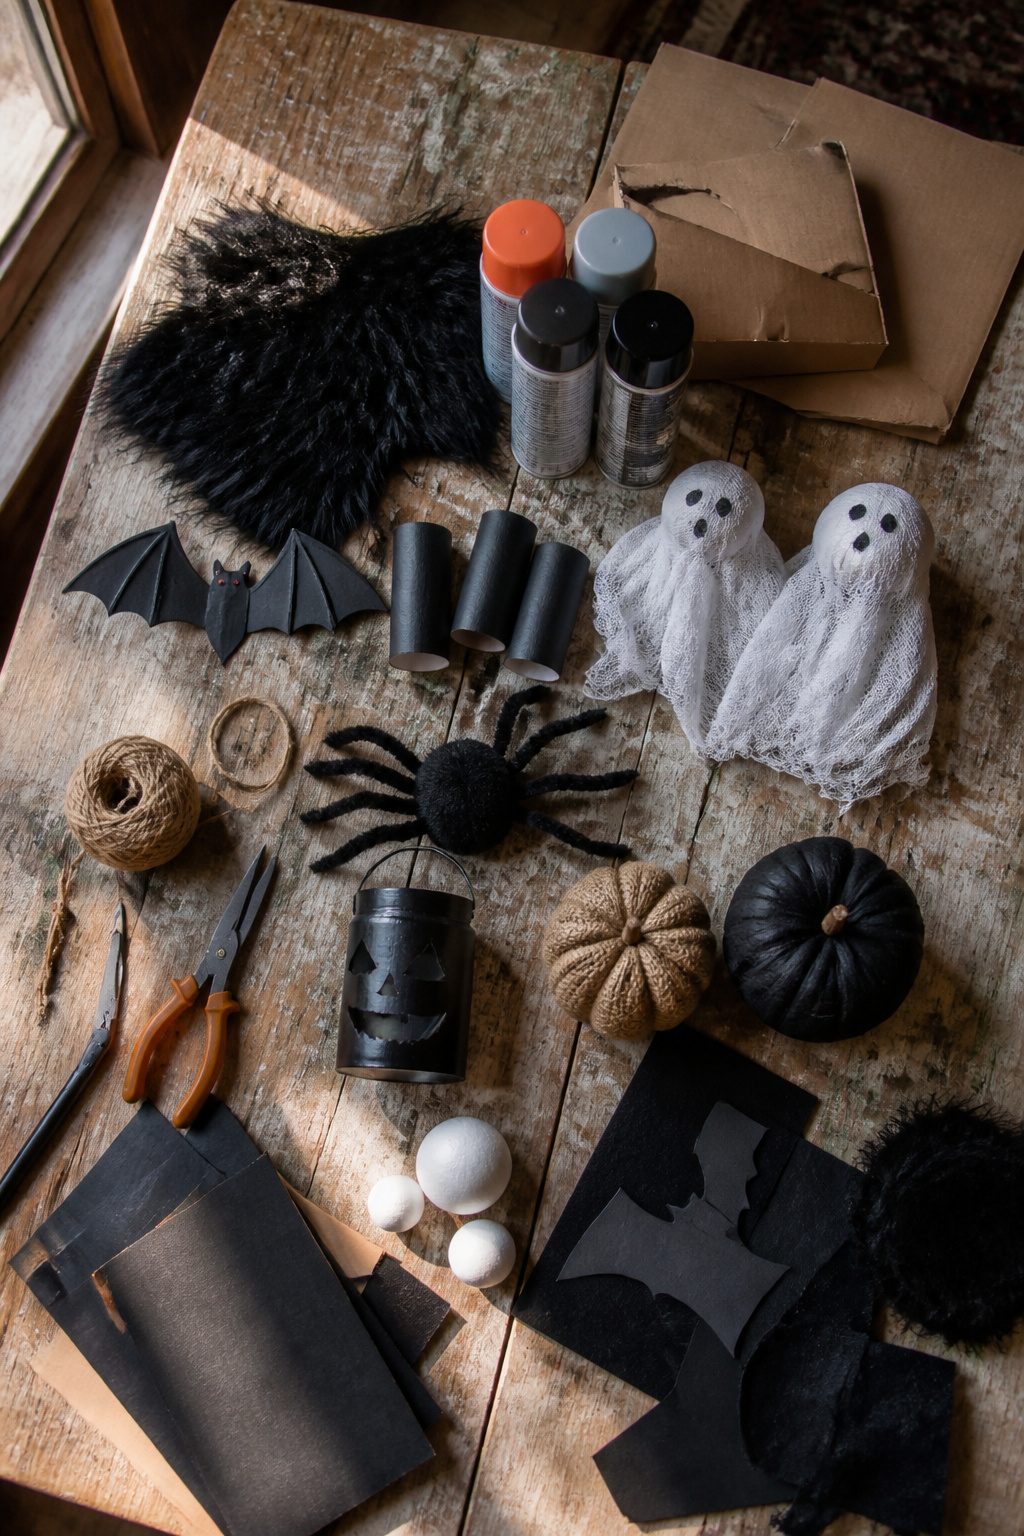
We keep our Halloween budget under $30 per project, and we hit that by splitting runs between Dollar Tree on 3300 South, Deseret Industries in Sugar House, and whatever we already own. A faux fur throw from a thrift store became our giant spider’s body; bubble wrap and coat hangers we had in the closet shaped the legs. Each black painted cage costs less than $4 if you keep basic spray paint on hand. The apothecary jars used plastic animals we found at a dollar store and paint from last year’s supplies. We skip the party kits and disposable aisle displays because a 2020 survey estimated 2000 tonnes of plastic waste from thrown-away Halloween costumes alone, and the total footprint climbs once you add decorations and packaging. Making rather than buying keeps that out of our bins and lets us store the same pieces year to year.
Projects We Build With Kids
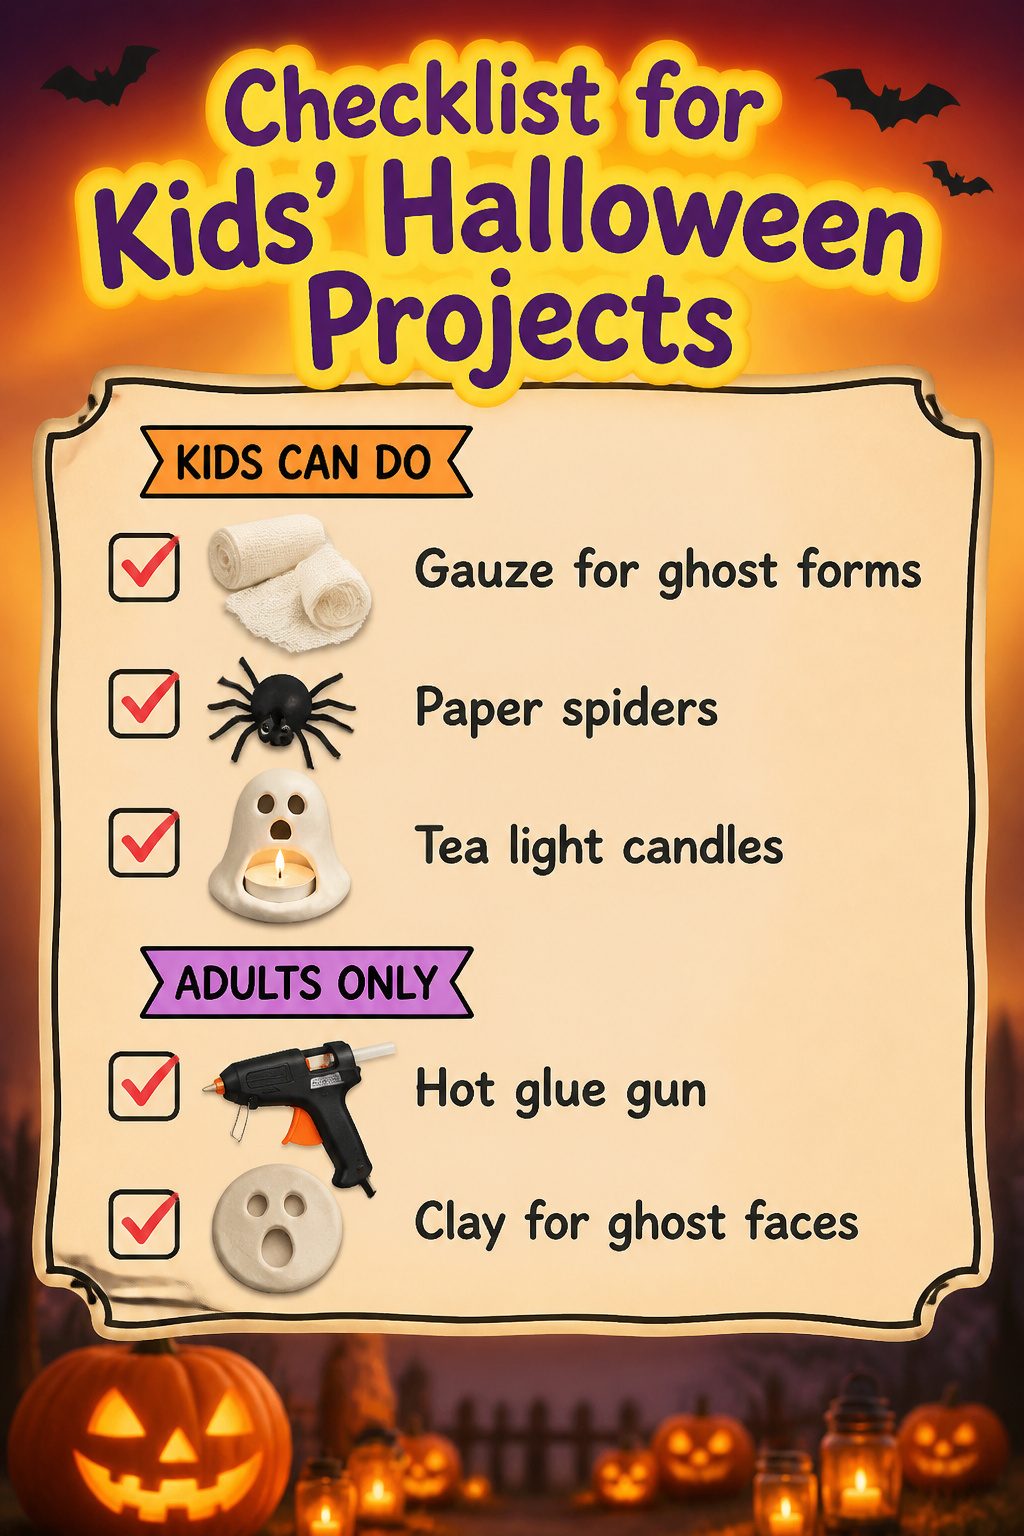
Not every project in our Halloween lineup is meant for small hands, so we split the work by what actually happens without tears. Our eight-year-old handles the gauze wrapping on ghost forms, since stretching and tearing cheesecloth takes patience but not strength. Our five-year-old runs spider placement, deciding which doorway gets the paper spiders and how many cluster on the mantel. The tea light ghosts stay simple enough for that age range too, though we light the candles ourselves after the clay faces are dry. Anything needing a hot glue gun or a sharp edge waits until after bedtime. The paper maché pumpkins look tempting as a family project, but the mess-to-fun ratio is low for anyone under seven, so we save that for a Saturday when the younger kids are at a sleepover.
What We Reuse Year to Year
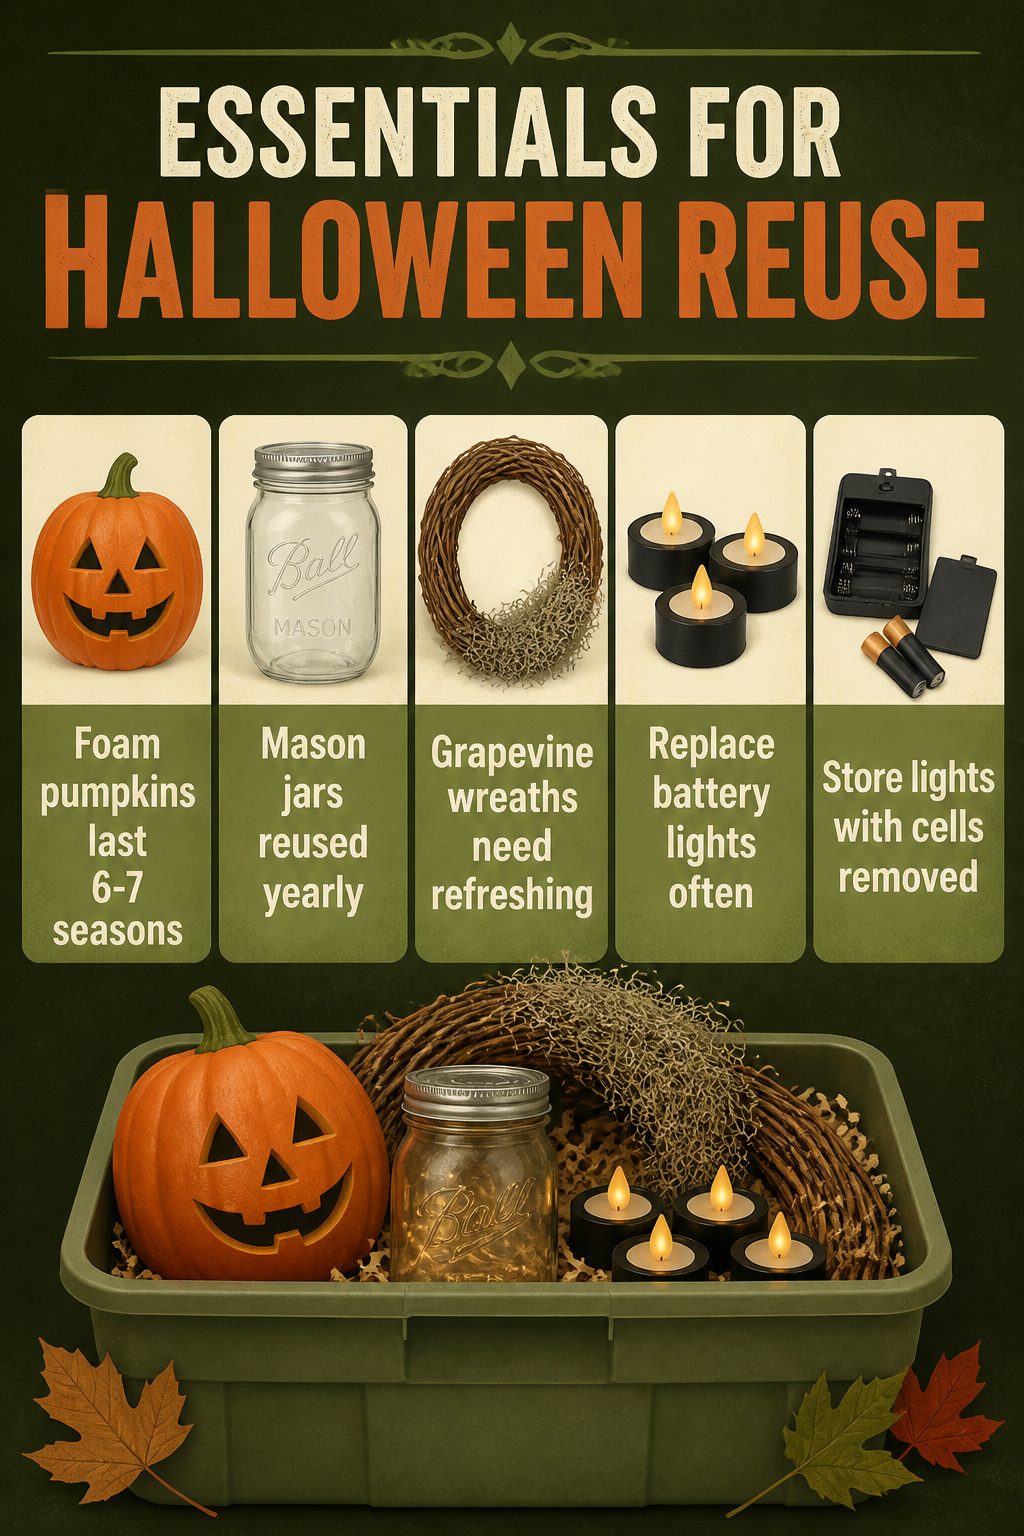
Foam pumpkins, mason jars, grapevine wreath bases, and battery lights are the backbone of what we pull from storage each October. The foam pumpkins weather the best; ours have held paint and push-in faces for six or seven seasons now, though the cheap battery compartments on the first set of tea lights corroded after two years and had to be replaced. Grapevine wreaths shed twigs in the basement bin but the wire frame stays usable, and a fresh layer of Spanish moss hides the bald spots. We stopped buying single-use plastic window clings entirely. The upfront cost for the reusable bases runs higher, but replacing a $4 string of lights every other year beats a $12 disposable prop that cracks in November. Store battery lights with the cells removed; that one habit cut our replacement rate in half.
Frequently Asked Questions
What are some easy DIY Halloween decorations?
Cheesecloth ghosts, paper mache pumpkins, and spider garlands are all simple builds that need only dollar-store supplies and patience rather than skill. The cheesecloth ghost runs about $8 in materials and dries overnight between coats; the spider garland uses puff paint traced over a printed web and threads onto fishing line once cured. Paper mache pumpkins cost six or seven dollars and never rot, though the flour paste should feel like thin pancake batter, not soup, or drying time doubles.
How can I make Halloween decorations on a budget?
Shop Dollar Tree, thrift stores like Deseret Industries, and your own basement before buying anything new. We keep every project under $30 by repurposing mason jars, coat hangers, and old pillowcases, and by skipping party kits that crack and get thrown out. A 2020 survey estimated 2000 tonnes of plastic waste from discarded Halloween costumes alone; reusing foam pumpkins, grapevine wreath bases, and battery lights year after year keeps both cost and waste down.
What are some family-friendly Halloween crafts?
Paper spiders and tea light ghosts work well for kids five to eleven, while gauze-wrapped mummy jars and spider placement on doorways suit even younger children. Our eight-year-old handles cheesecloth stretching and gauze winding, and our five-year-old decides where spiders cluster; we save the hot glue gun and sharp tools for after bedtime. Paper mache pumpkins look tempting as a group activity, but the mess-to-fun ratio is low for anyone under seven, so we schedule that for a Saturday when the younger kids are out.