
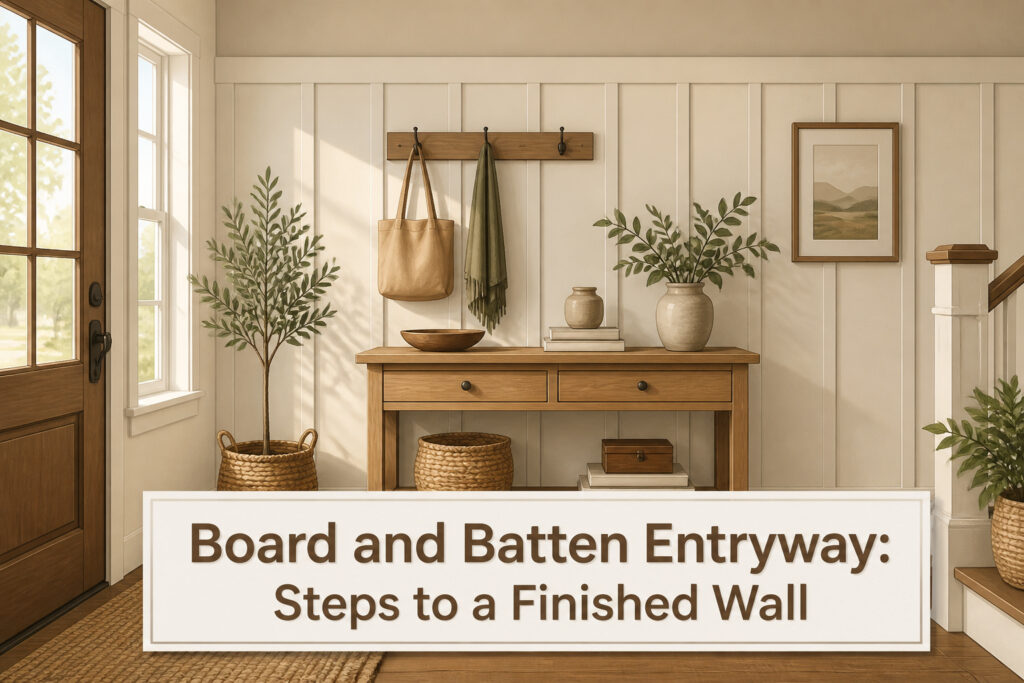
Board and batten is vertical paneling created by wide boards with narrow strips, called battens, covering the seams between them. The finished wall looks built-in, but the real work happens before the first cut: taping a horizontal line and living with it for days until the wall tells you where the top rail belongs. Most builds land between 50 and 72 inches above the baseboard, though furniture you already own matters more than any rule.
[link-whisper-related-posts]1. Visualize Your Project
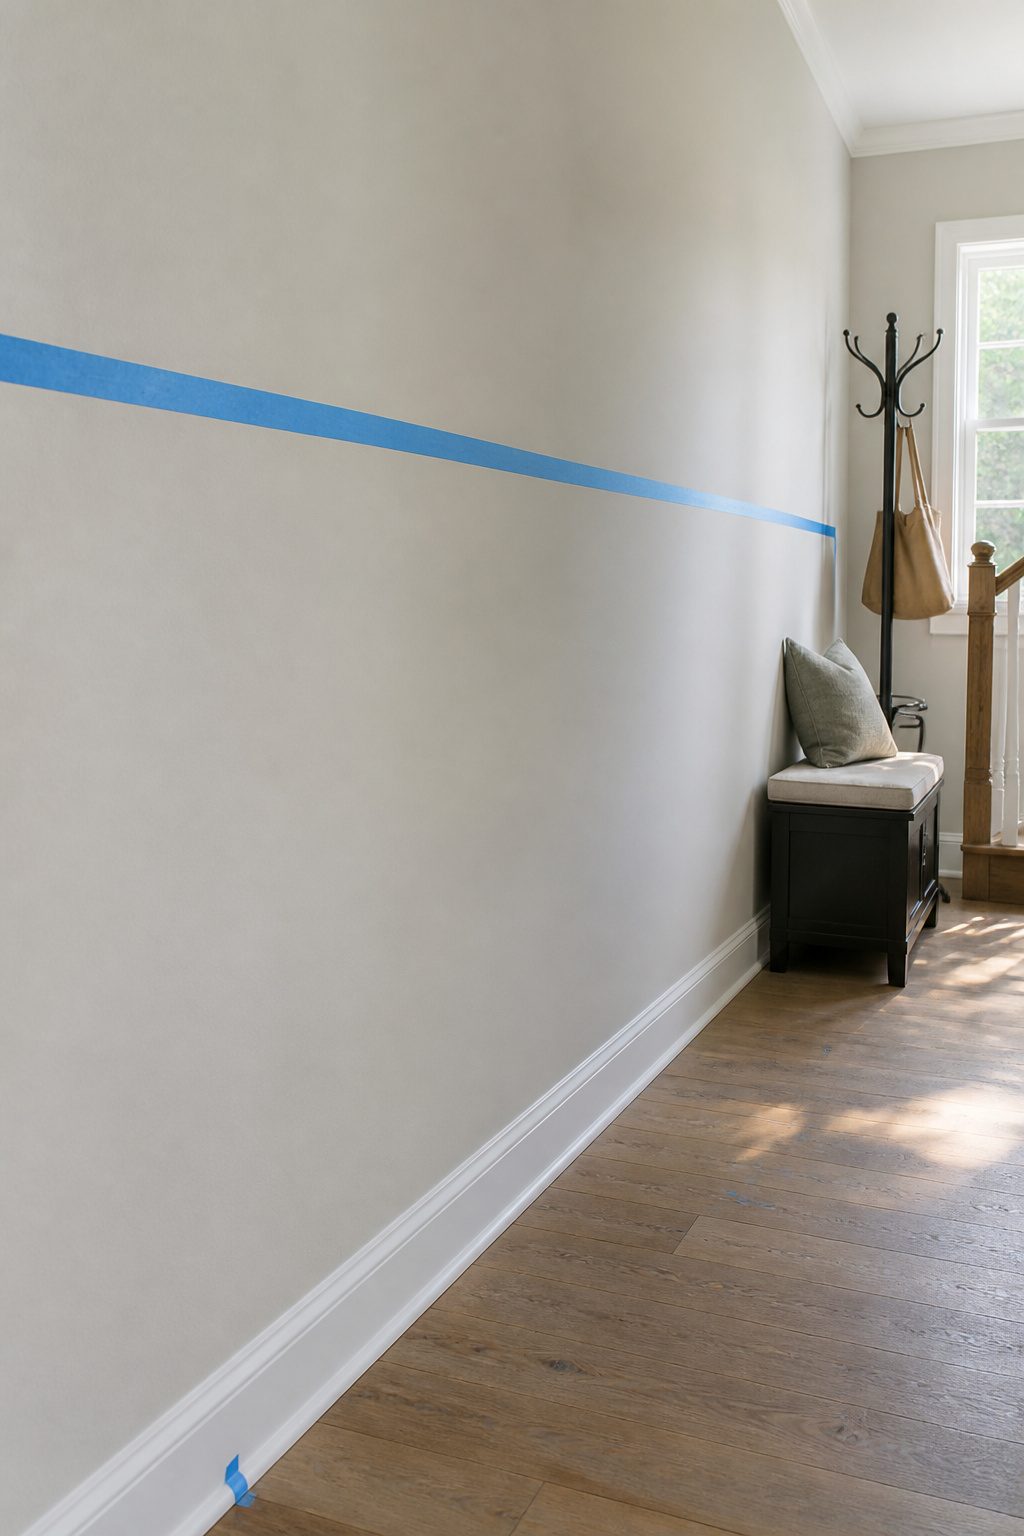
We like to start every board and batten entryway with a roll of painter’s tape and a few days of second-guessing. Tape a horizontal line where you think the top board should sit, then live with it. Move it up, move it down, let the light hit it at different hours. The wall will tell you what feels right before you ever cut a board.
Most builds we see land somewhere in the 50 to 72 inch range above the baseboard. A single, clean rail usually sits lower, around that 50-inch mark. If you want a second horizontal board running below the top rail for more depth, plan for extra height. One build we tracked went to 60 inches specifically to fit a narrow display ledge above the battens, with the final ledge topping out at 61 inches. Another went higher than typical to squeeze in that second horizontal piece about 14 inches below the top.
Your furniture matters more than any rule. A dresser, a lamp, a coat rack you already own, these should guide the tape line, not the other way around. The tape peels off clean once you finally see it the way you want it.
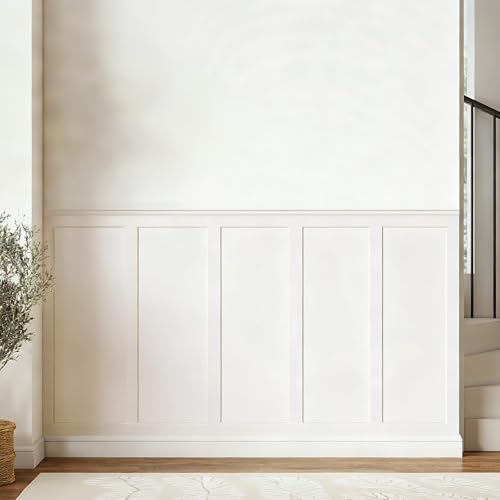
【Coverage】Includes 10 pre-cut wall molding slats and 2 shelf edge strips to create a clean board & batten look. (No peel-and-stick adhesive or nails included)

MDF Material for Lasting Use: this board and batten wall panel kit is made from MDF, offering sturdiness and water resistance; The surface is smooth, providing a comfortable touch for interior wall applications
2. Gather Materials
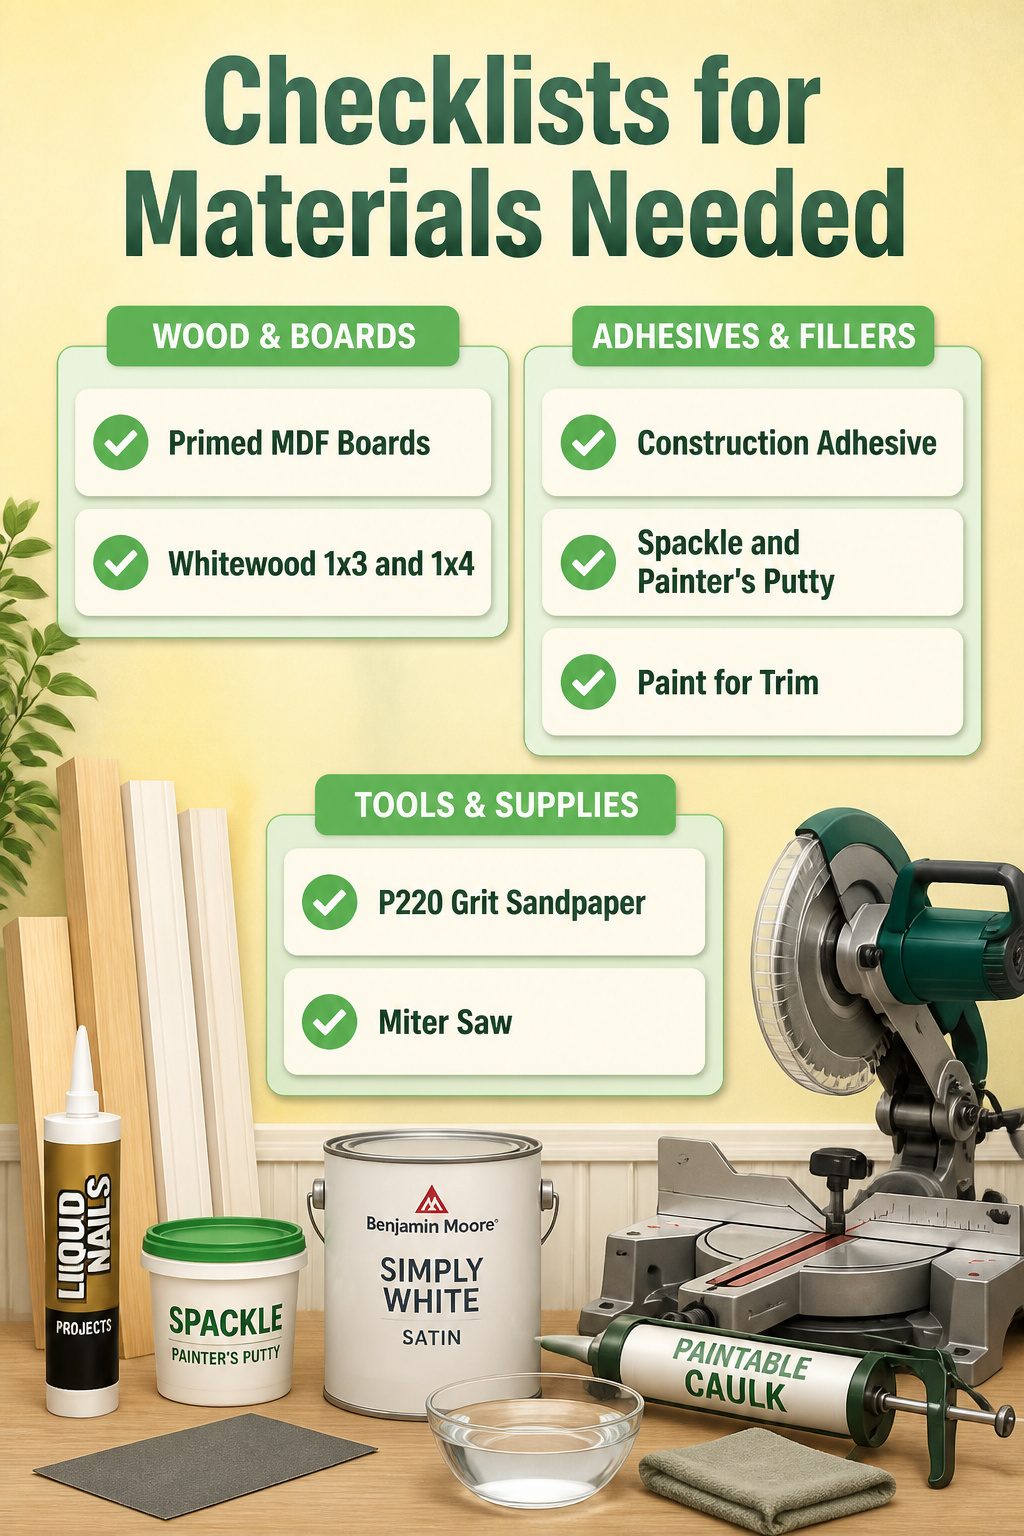
For a standard 8-foot entryway wall, we spent about $150 to $271 total on materials. Here is what actually went into the cart:
- Primed MDF boards or solid wood for the horizontal rails. Half-inch MDF is the flat choice if your wall is uneven; otherwise the wall itself becomes the board.
- 1×3 and 1×4 whitewood for the vertical battens. Pine works fine. We primed and painted ours before cutting to save time on the ladder later.
- Construction adhesive like Liquid Nails, plus a brad nailer with 1½-inch to 2-inch nails. The glue does the holding; the nails keep it in place while it sets.
- Spackle or painter’s putty, paintable caulk, and a caulk gun for the seams. Most people caulk the joints; spackle works too if you prefer sanding to smoothing with a wet finger.
- Paint to match your trim. We used Benjamin Moore’s "Simply White" in satin, but any trim color you already have saves a separate quart.
- P220 grit sandpaper, a rag, and a bowl of water for the caulk cleanup.
- Miter saw for the cuts. A stud finder, level, and tape measure keep the battens straight and actually anchored.
Skip the decorative trim and hooks for now. Those turn this into a different project with a different budget.

All-in-One Design - Package of 20 premade molding trim slat + 4 decorative edge strip create instant board & batten walls

Premade Board and Batten Paintable Wainscoting Kit: Package includes 20 premade molding trim slats, 4 decorative edge strips, and two pairs of gloves for convenient installation

Cover Spaces, Fit Scenes - Covers 167.32 inches long by 70.08 inches high, perfectly suitable for living room, bedroom, hallway and more interior spaces.
3. Prepare the Wall
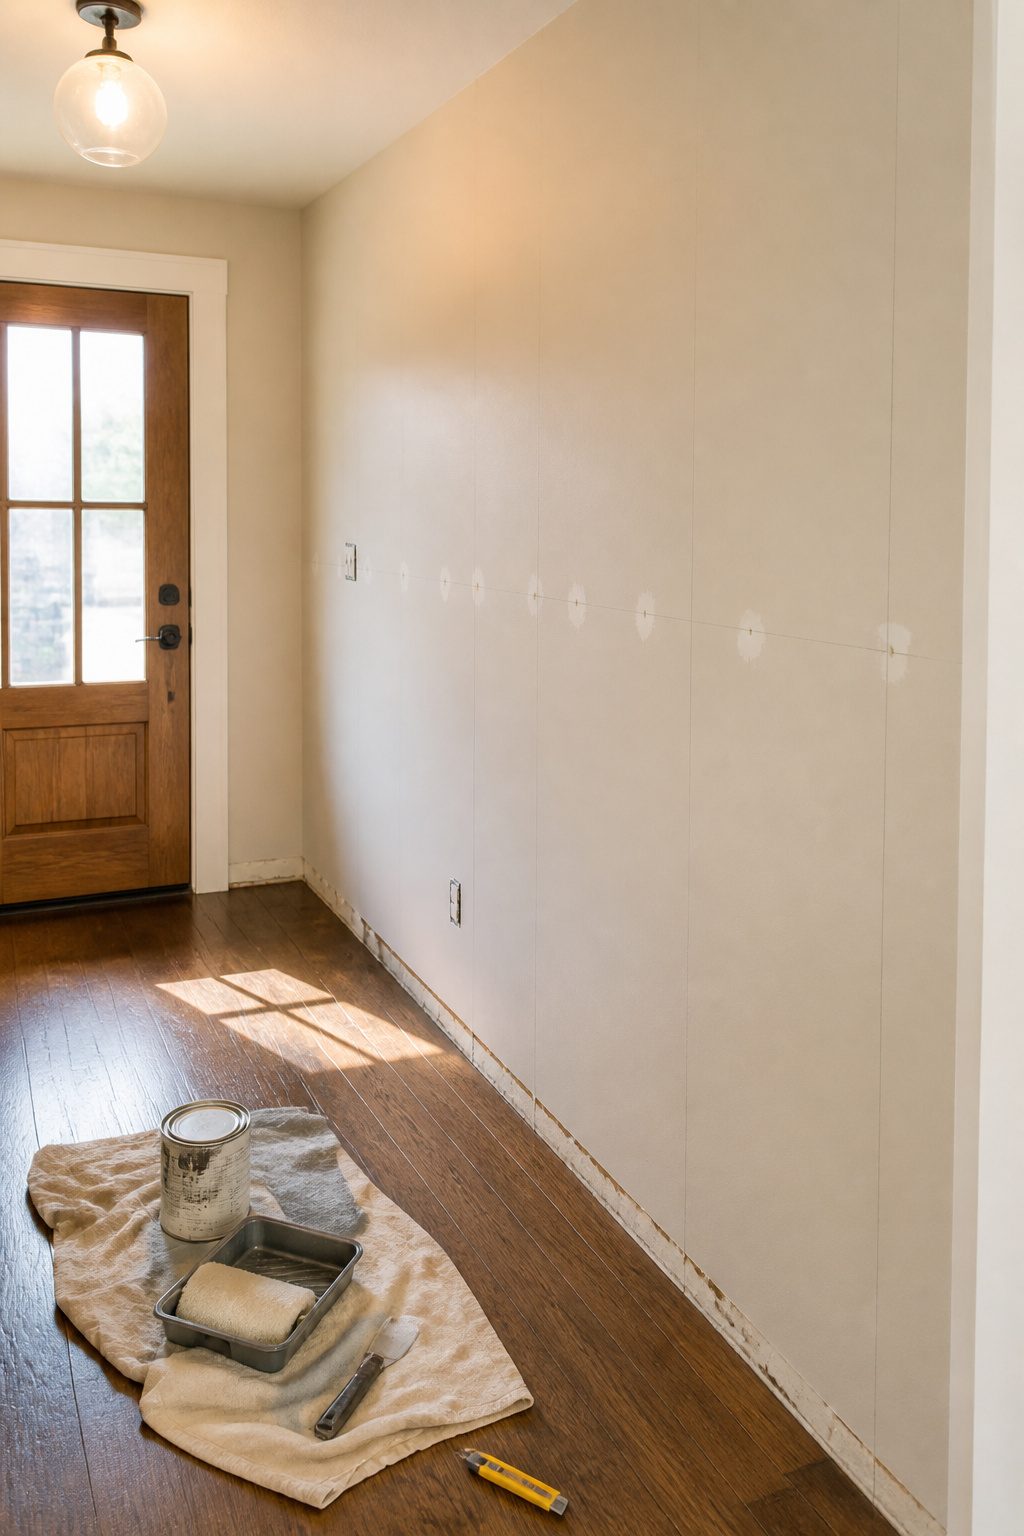
Clear the entryway completely before you measure anything. We learned that the hard way after trying to work around a bench that left us guessing at center points. Remove the baseboards if they interfere with your bottom horizontal board, scoring the paint seam with a utility knife so the putty knife slides underneath without tearing the drywall. Pry carefully; the wall behind you is the same surface the battens will sit on.
Patch every hole from old hooks or anchors, because spackle dries faster than you think and paint hides more sins when it goes on before the boards do. We skipped painting first once and spent an afternoon cutting in around sixteen small rectangles instead of rolling one open wall. Paint the wall your final color now, even if you leave faint layout lines at the top to guide board placement later.
Electrical outlets will interrupt your vertical battens. Plan for them: either extend the outlet flush with the finished surface or cut the batten to frame around it so the pattern reads continuous. Vents and switches need the same foresight. The ten minutes you spend marking these obstacles before the first board goes up saves an hour of improvisation after the glue is open.

[Package Includes] 5,000 Pieces 18 gauge 2-Inch brad nails (type 18G). The package is reinforced with extra tape to ensure it remains secure during transit

【5 Size Versatile Kit】Includes 18ga brad nails in 2 inch, 1-1/2 inch, 1-1/4 inch, 1 inch, and 3/4 inch, perfect for multiple fastening requirements.

PREMIUM PACKAGING: DEWBIN 1000 2-inch (50mm) 18 gauge brad nails features zinc-galvanized construction for enhanced durability resistance, packaged in a little cardboard box for efficient project completion.
4. Install the Horizontal Boards
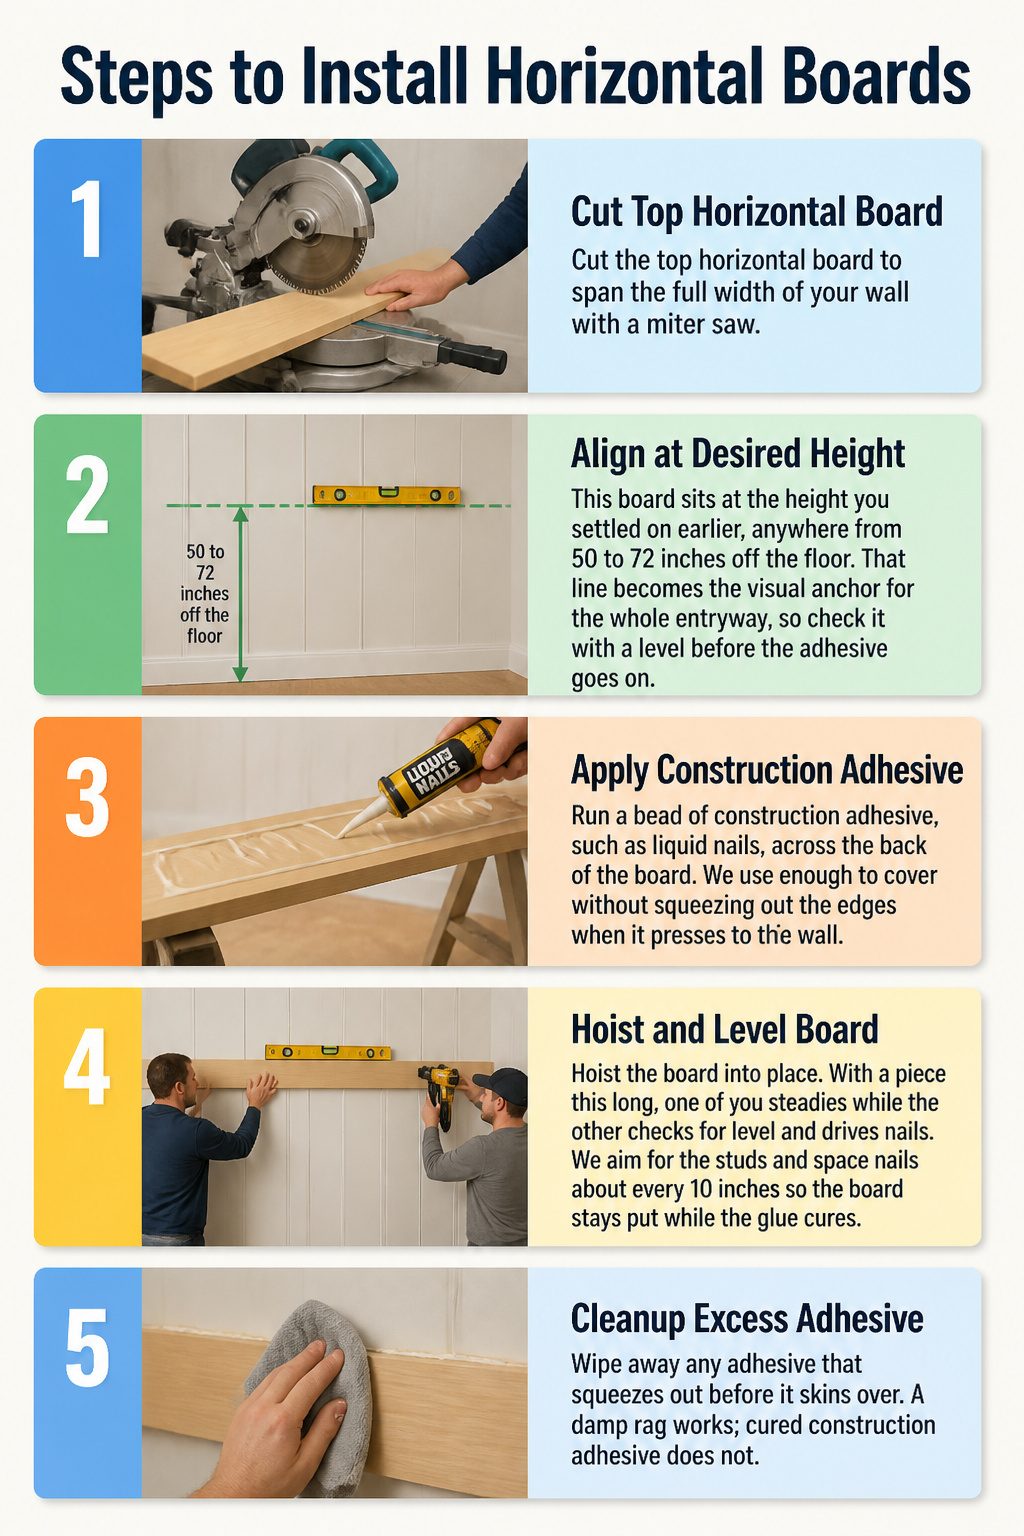
- Cut the top horizontal board to span the full width of your wall with a miter saw.
- This board sits at the height you settled on earlier, anywhere from 50 to 72 inches off the floor. That line becomes the visual anchor for the whole entryway, so check it with a level before the adhesive goes on.
- Run a bead of construction adhesive, such as liquid nails, across the back of the board. We use enough to cover without squeezing out the edges when it presses to the wall.
- Hoist the board into place. With a piece this long, one of you steadies while the other checks for level and drives nails. We aim for the studs and space nails about every 10 inches so the board stays put while the glue cures.
- Wipe away any adhesive that squeezes out before it skins over. A damp rag works; cured construction adhesive does not.

Made of sturdy, smooth‑surfaced MDF, these wainscoting panels are lightweight, easy‑to‑clean and warp‑resistant. The burr‑free surface ensures a smooth, comfortable touch.
All-in-One Design - Package of 10 premade molding trim slat + 2 decorative edge strip create instant board & batten walls

Mdf Material: our board and batten wall panel kit are made of durable MDF with a smooth, non-deformable surface, a comfortable feel, and no burrs; The material is easy to paint or stain and allows for easy personalization
5. Install the Vertical Battens
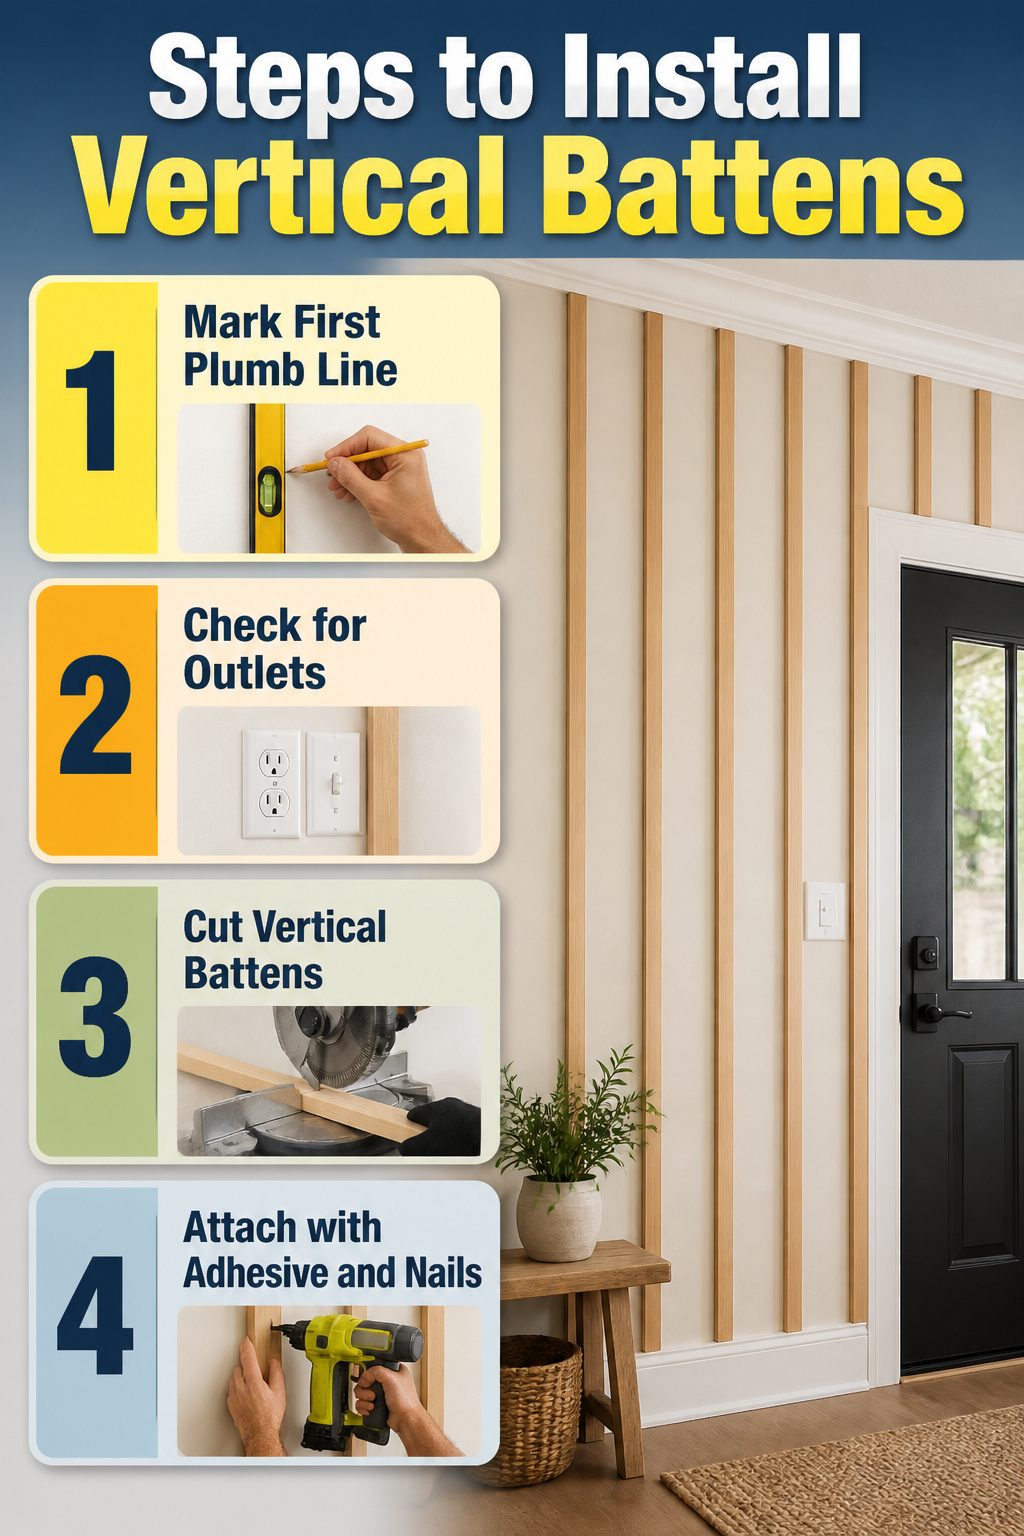
We space vertical battens 12 to 16 inches apart, measured center to center. For our wall we landed on 16 inches, which felt right for the scale of the entryway without looking crowded.
- Mark your first plumb line at one end of the wall, then measure and mark every 16 inches across. A spacer board cut to exactly that length speeds this up and keeps you from recalculating each time.
- Check for outlets, switches, or trim before you commit. We had to adjust one batten slightly to miss a switch plate, and it is easier to see that conflict now than after cutting.
- Cut each vertical batten to the height you set earlier. We used 2-inch lattice strips, which are light enough to handle easily but still read as substantial once up.
- Attach each piece with construction adhesive and finish nails, working left to right and checking against your plumb marks as you go. If your wall has a door or window that breaks the rhythm, you can fudge one gap slightly wider or narrower. We pushed one space to 16.75 inches around a door frame, and the difference disappears once the whole wall is in.

All-in-one Molding Kit: This premade board and batten wainscoting kit includes 20 molding slats and 3 decorative edge strips for quick accent wall assembly. It is supplied to build classic board and batten wall designs

Complete Pre-cut Kit: these board and batten wall panel kits include 20 premade molding trim slat (40 x 3 x 0.35 inches / 101.6 x 7.62 x 0.89 cm) and 4 decorative edge trims (40 x 3 x 1.3 inches/ 101.6 x 7.62 x 3.3 cm), covering a total area of 160'' L x 47'' W; Precision pre-cut to size-no sawing, no measuring required; Even first-time DIYers can snap together a seamless slat wall in minutes, eliminating the hassle of custom cutting and tedious splicing
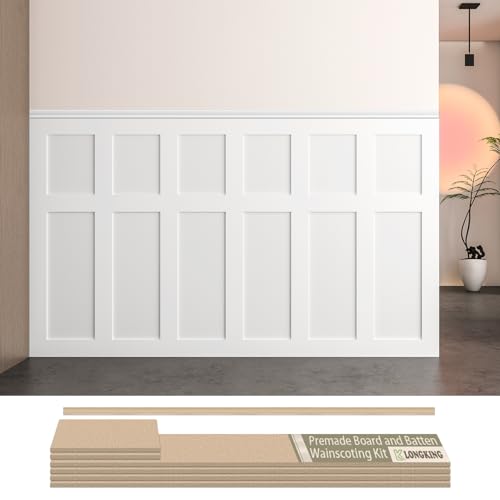
Board and Batten Wainscoting Kit – LONGKING pre-cut MDF wall panel kit is designed for easy DIY installation. Create a stylish accent wall with classic board and batten molding trim, perfect for modern and traditional home décor.
6. Finish the Seams and Surface
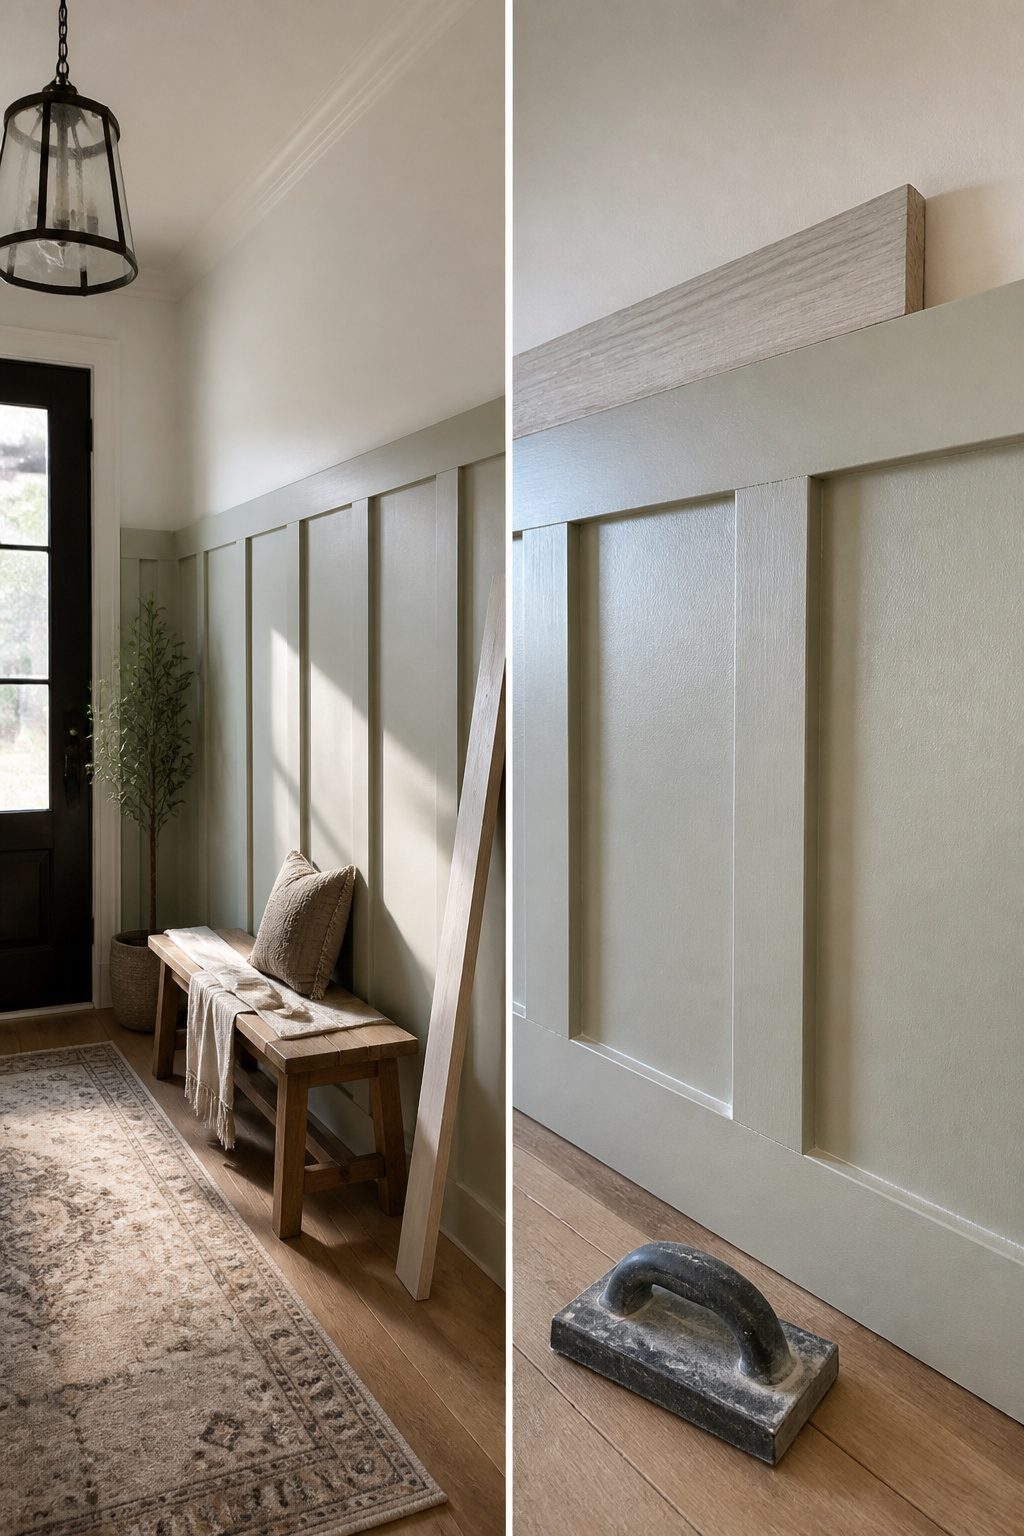
Caulk runs where wood meets wall, spackle or wood filler where wood meets wood. We press filler into each nail hole with a finger, using the least amount possible; the more you pile on, the more sanding you will face later. Let it dry, then hit it with 220-grit paper. Some holes need a second pass. That is normal.
Prime before the final coat, even if your filler claims no re-priming needed. We have seen spackle flash through paint that skipped this step, and one more hour of prep beats a do-over.
For color, three Sherwin-Williams tones keep turning up in entryways that work. Evergreen Fog reads warm and earthy against white above the rail. Iron Ore goes dark and grounding if you want the boards to disappear into shadow. Modern Gray leans greige, the choice when your foyer opens straight into living space and the color has to bridge both rooms. Any of the three will look intentional; none will read like you grabbed what was left on the mistint shelf.

Quantity and Coverage: this board and batten wall panel kit includes 42 pre cut MDF strips, each approx 3.15"W x 0.35"T; The finished wall coverage is approx 157.5 x 94.5 inches/ 400 x 240 cm: simply measure your wall and order the exact number of kits needed

Pre-Cut Arch Wainscoting Panel Board:A complete set of 4 pre cut arched wall decorative strips, each set containing 9 components: one arched component and 8 vertical strips, totaling 36 components; These 9mm thick panels can be easily connected, adding a delicate touch to doors or walls

ELEVATE ANY ROOM INSTANTLY: Transform boring walls into high-end architectural features. This classic wainscoting pattern adds sophisticated depth and texture, making it the perfect DIY accent wall for living rooms, bedrooms, hallways, stairwells, and dining spaces
7. Add Hooks or Shelves
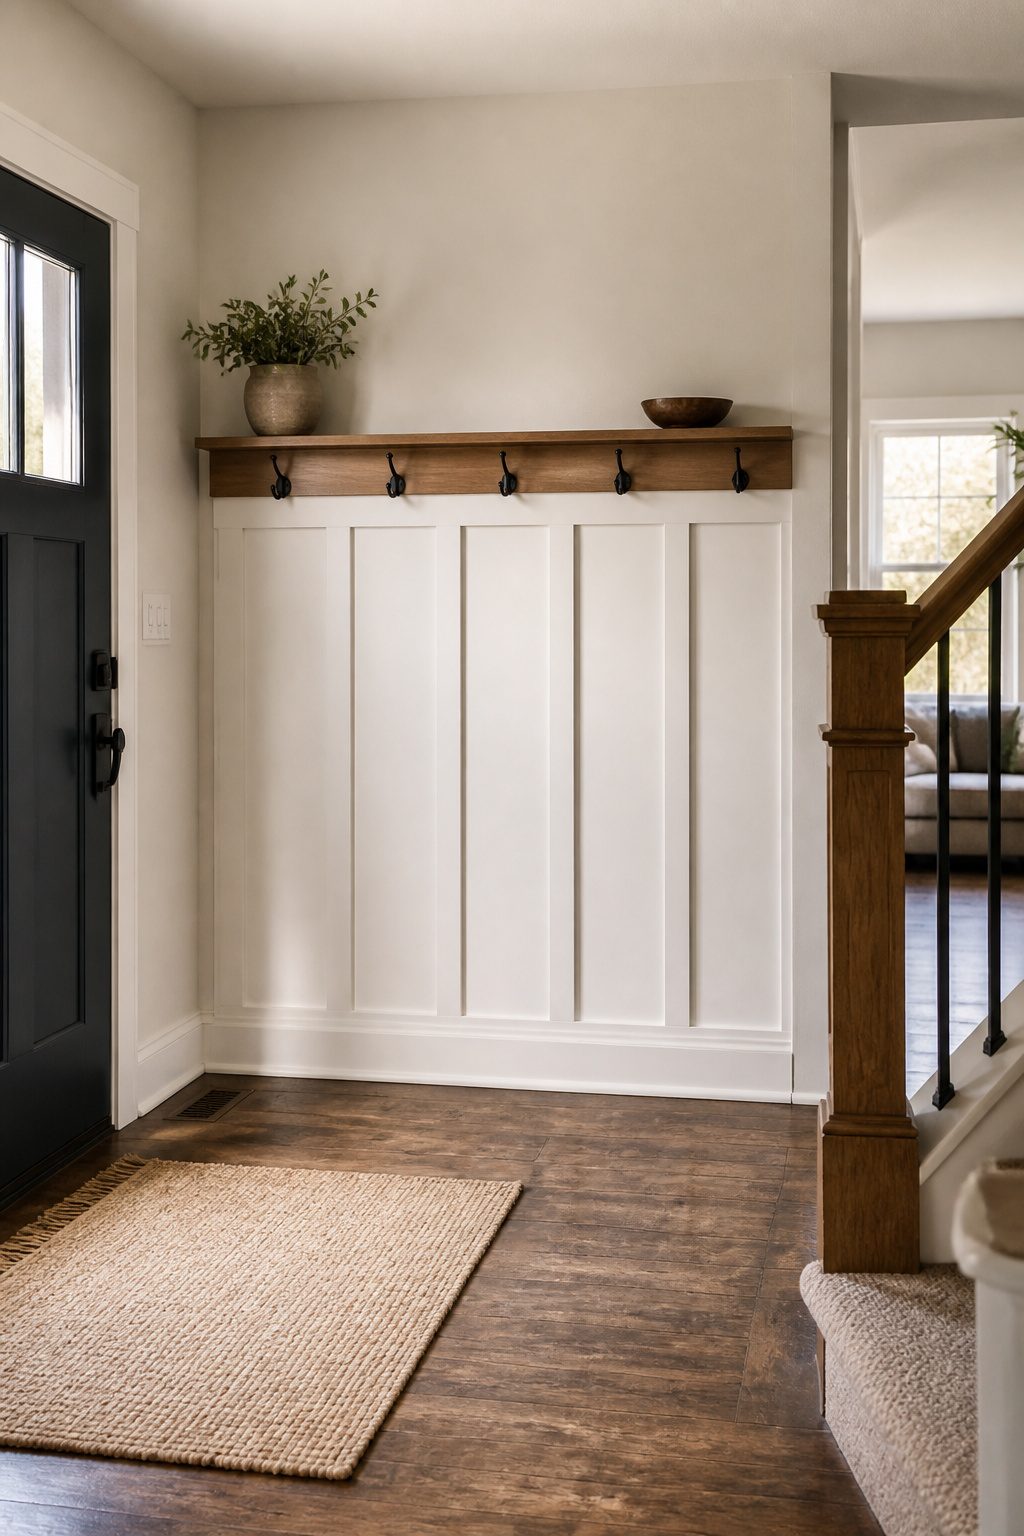
Once the boards and battens are in place, the wall is only half useful until you add the hardware that turns it into an entryway. We like to start with five hooks spaced across the span, which hits the sweet spot for coats, bags, and umbrellas without crowding. Odd groupings just look more settled to the eye, and five fills a typical eight-foot wall without running into the battens.
If you want a shelf above the hooks, run a 1×5 horizontal board the full length of the wall and screw it into the top rail of your board and batten. That gives you a spot for mail, keys, or a small plant. Pilot holes are non-negotiable here; drill into the wood first, then drive your screws, or the bit will skate and scar the face you just finished.
For the hooks themselves, black iron against white or gray paint is a clean, unfussy look that reads as intentional rather than decorated. We have seen rechargeable light bulbs tucked on those shelves too; they solve the wiring problem when there is no junction box where you need one.

[Size] 18 gauge brad nails 2-inch (50 mm) in length galvanized brad nails; [Quantity] 1,000 PCS per Small Pack

Engineered To Work Seamlessly With DEWALT 18GA Brad Nailers
Design Styles to Choose From
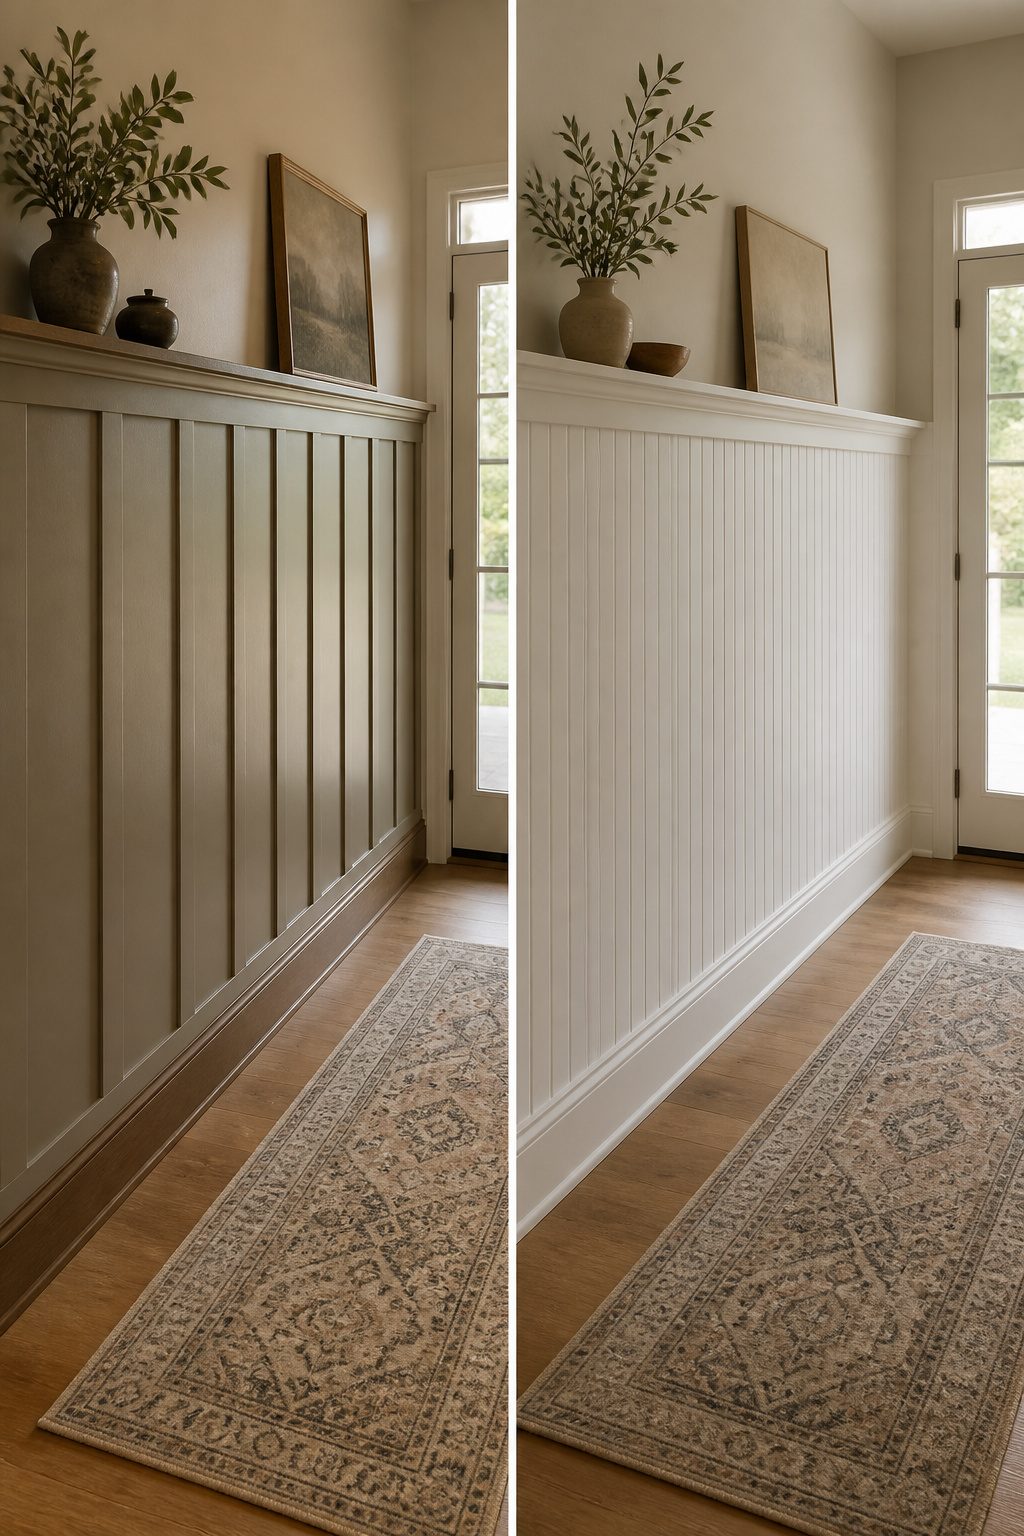
The four styles we see homeowners actually finish in a weekend break down like this:
- Traditional board and batten runs battens at tighter spacing, usually every 12–16 inches, with a prominent top rail and baseboard that look built into the architecture. It reads as paneling that was always meant to be there, which works when your entryway already has some older detail to match.
- Modern board and batten strips the ornament back: wider gaps between battens, flat stock instead of molding profiles, and often no top rail at all, letting the battens end clean into the wall. We like this for renters because it looks intentional without fighting a contemporary door or light fixture.
- Farmhouse board and batten splits the difference with a thick, chunky baseboard and a visible ledge or shelf at the top, sometimes with a darker painted rail against white battens. The contrast is the whole point, so you need two colors and a steady hand on the tape line.
- Minimalistic board and batten goes even leaner than modern: fewer battens, sometimes just three or four across a whole wall, and every edge kept square. It lives or dies on your spacing math being exact, because there is nowhere for a crooked line to hide.

Board and Batten Wall Molding Kit : Include 21 premade molding trim slats and 2 decorative edge strip.No measuring or extra shopping. Everything you need for a accent wall, ready to assemble right out of the box

ELEVATE ANY ROOM INSTANTLY: Transform boring walls into high-end architectural features. This classic wainscoting pattern adds sophisticated depth and texture, making it the perfect DIY accent wall for living rooms, bedrooms, hallways, stairwells, and dining spaces

ALL-IN-ONE WALL PANEL KIT:Includes 10 premade molding trim pieces and 2 decorative edge strips, providing everything needed to create a stylish board and batten accent wall with a clean, professional finish
MDF or Solid Wood
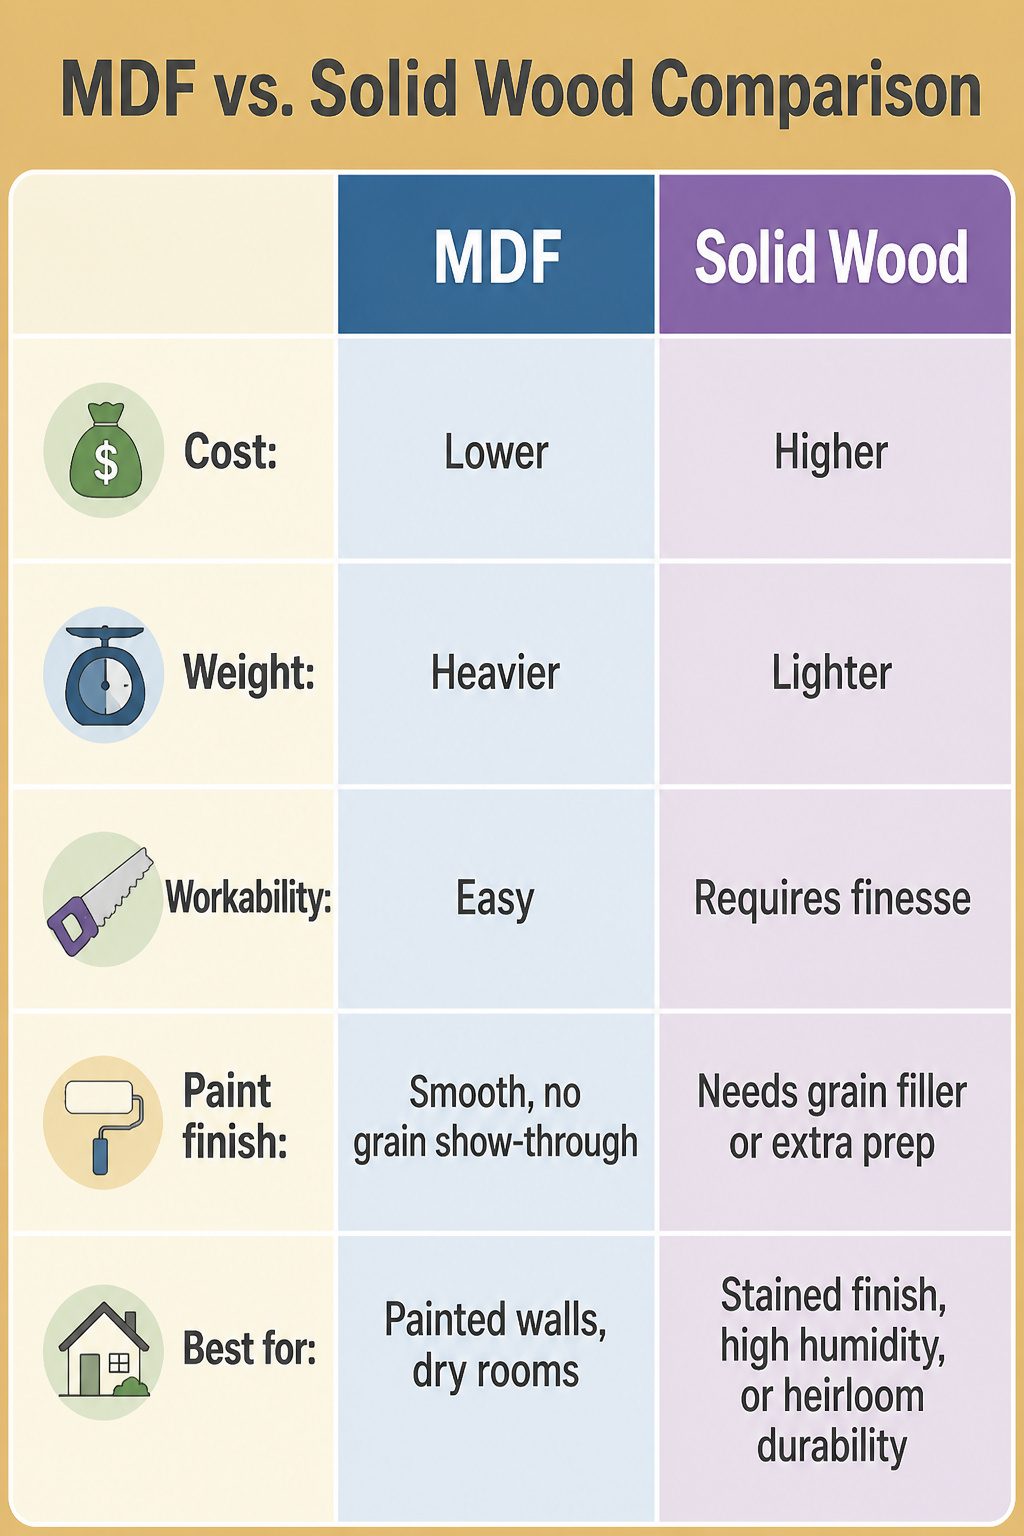
MDF wins on price and predictability. It is flat, it does not warp between the studs, and it takes paint without the grain telegraphing through. For a painted board and batten entryway in a climate-controlled house, it is the practical choice. Solid wood costs more, weighs more, and demands more patience. Poplar or pine battens will have you filling nail holes and sanding seams longer because the grain raises after the first coat and the boards themselves can move with the seasons.
| Attribute | MDF | Solid Wood |
|---|---|---|
| Cost | Lower | Higher |
| Weight | Heavier | Lighter |
| Workability | Cuts clean, no knots | Knots and grain to work around |
| Paint finish | Smooth, no grain show-through | Needs grain filler or extra prep |
| Best for | Painted walls, dry rooms | Stained finish, high humidity, or heirloom durability |
We have used both. MDF saves enough on material to cover the cost of a better paint, which is where the eye actually lands. The catch is weight: a full wall of MDF battens will need adhesive plus nails, not nails alone, or they sag over time. Solid wood justifies itself if you ever plan to strip and stain, or if your entryway sees wet boots and big temperature swings. For the typical weekend project with a roller and semi-gloss, MDF is where we would put our own money.
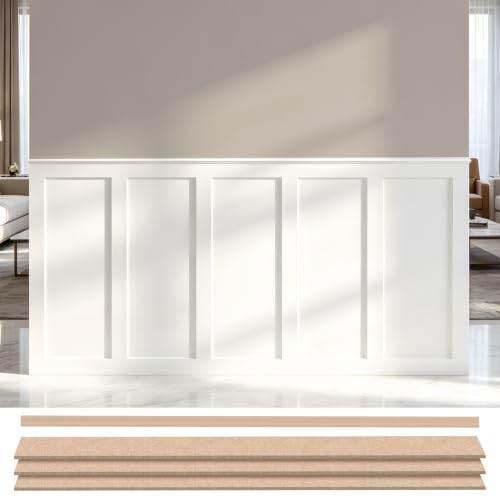
[Complete Board & Batten Wall Makeover] Refresh plain walls with a timeless board and batten design using one convenient kit. The premade panels and matching molding trim help create a clean, custom-built accent wall while reducing measuring, cutting, and assembly for a faster DIY installation.

【Create a Professional Board and Batten Accent Wall】Upgrade plain walls with a timeless board and batten design. This premade wainscoting panel kit includes 12 pre-cut wall molding slats and 3 decorative edge strips, providing coverage for walls up to 118 in x 45.3 in. Designed to simplify installation, it eliminates complicated measuring and cutting while helping create elegant wall paneling, accent wall panels, and decorative wall molding for living rooms, bedrooms, hallways, dining rooms, and other interior wall decor projects.

COMPLETE WALL PANEL KIT: This all-in-one board and batten wall panel kit includes 4 header/base boards (1/2" x 3-1/2" x 47") and 8 vertical battens (1/2" x 2-1/2" x 36"), providing everything needed to create a board and batten or wainscoting accent wall.
Adhesive, Nails, or Both
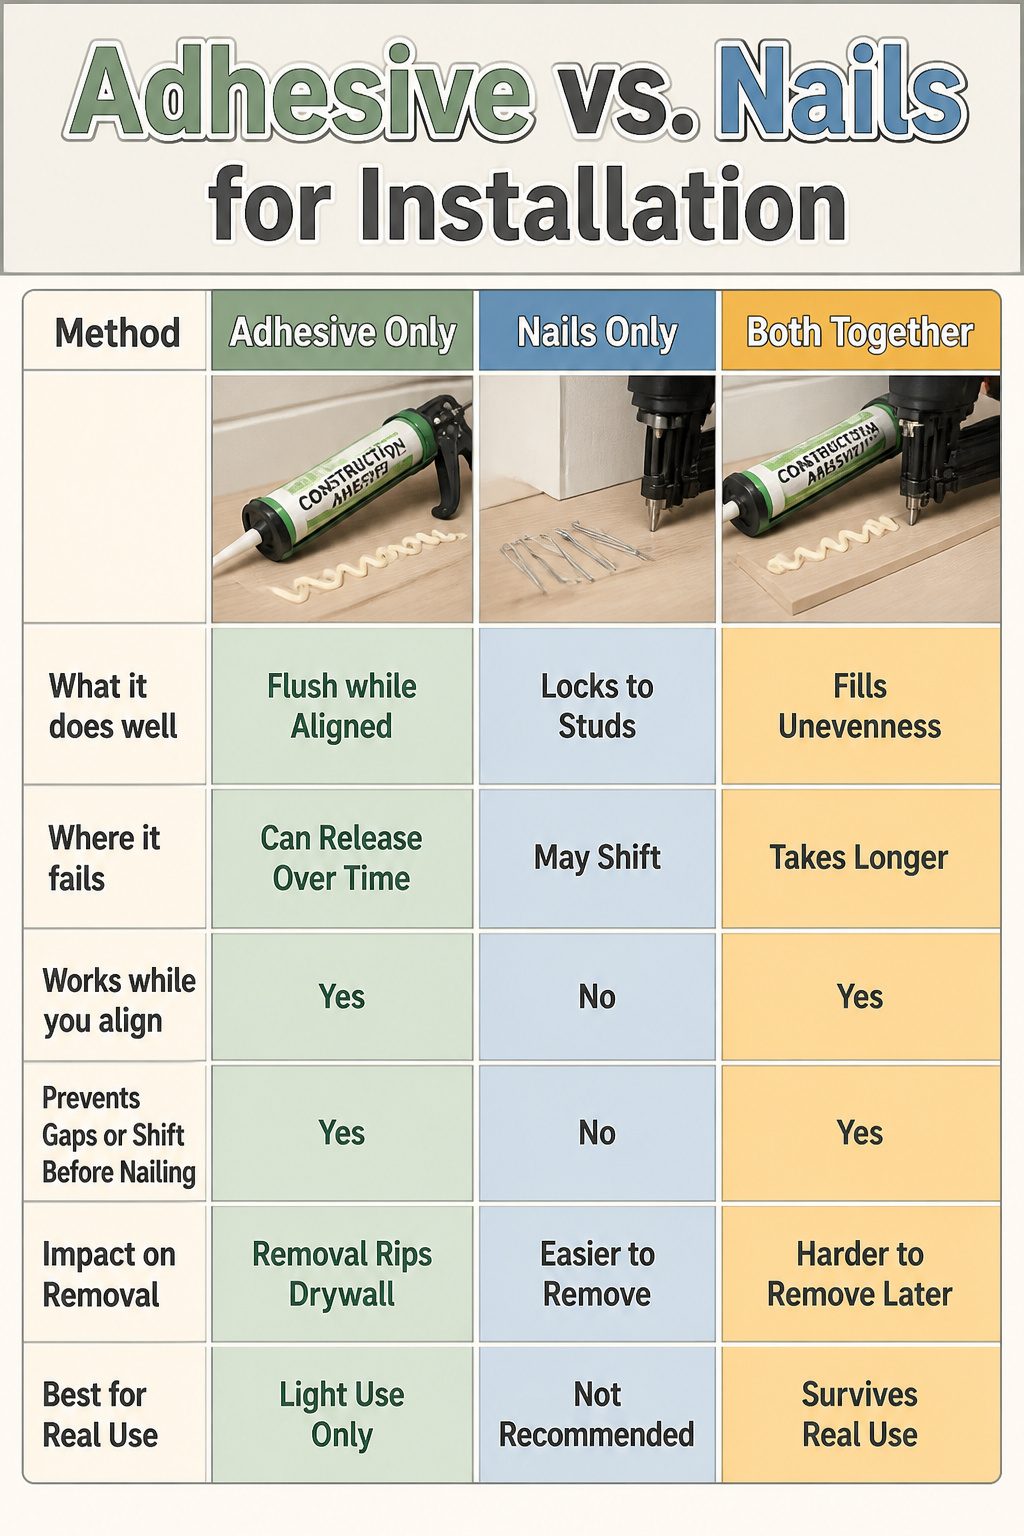
Construction adhesive alone will hold a board in place while you work, but it is not enough for a wall that gets bumped by coats and bags every day. We use adhesive followed by a line of brad nails, because the glue keeps the board from shifting and the nails keep it from pulling away.
| Method | What it does well | Where it fails |
|---|---|---|
| Adhesive only | Holds the board flush while you align it | Can release over time; removal rips drywall |
| Nails only | Locks into studs or drywall at an angle | Boards may gap or shift before nailing |
| Both together | Glue fills minor wall unevenness; nails anchor | Takes longer; harder to remove later |
If you ever plan to take the wall back to flat drywall, skip the adhesive. One builder we follow skips liquid nails on accent walls for exactly that reason: the glue tears the paper face off the drywall when you pry the board loose, and you end up re-drywalling or patching extensively. For a permanent board and batten entryway, both together is the method that survives real use. Nail at an angle up, then at an angle down, so the brads lock behind the drywall like a barb. Straight-in nails can pull free if a batten gets knocked.

MDF Material: The accent wall panel kit is made of MDF, which is durable, waterproof, easy to clean, and easy to cut; The Smooth surface and comfortable touch. Modern &...
Frequently Asked Questions
How far apart should the battens be?
Space vertical battens 12 to 16 inches apart, measured center to center. A 16-inch gap works well for most standard entryways without looking crowded. You can adjust slightly for obstacles like outlets or door frames without the difference being noticeable.
What materials do I need for a board and batten wall?
You will need primed MDF or solid wood for horizontal rails, 1×3 or 1×4 whitewood for vertical battens, construction adhesive, a brad nailer with 1½-inch to 2-inch nails, spackle or caulk, paint, sandpaper, and basic tools including a miter saw, stud finder, level, and tape measure. Expect to spend about $150 to $271 for a standard 8-foot wall.
How high should I install the top board?
Install the top horizontal board between 50 and 72 inches above the baseboard, with single clean rails typically sitting lower around the 50-inch mark. Your existing furniture, not a fixed rule, should guide the final height. Painter’s tape lets you test the line for a few days before committing.