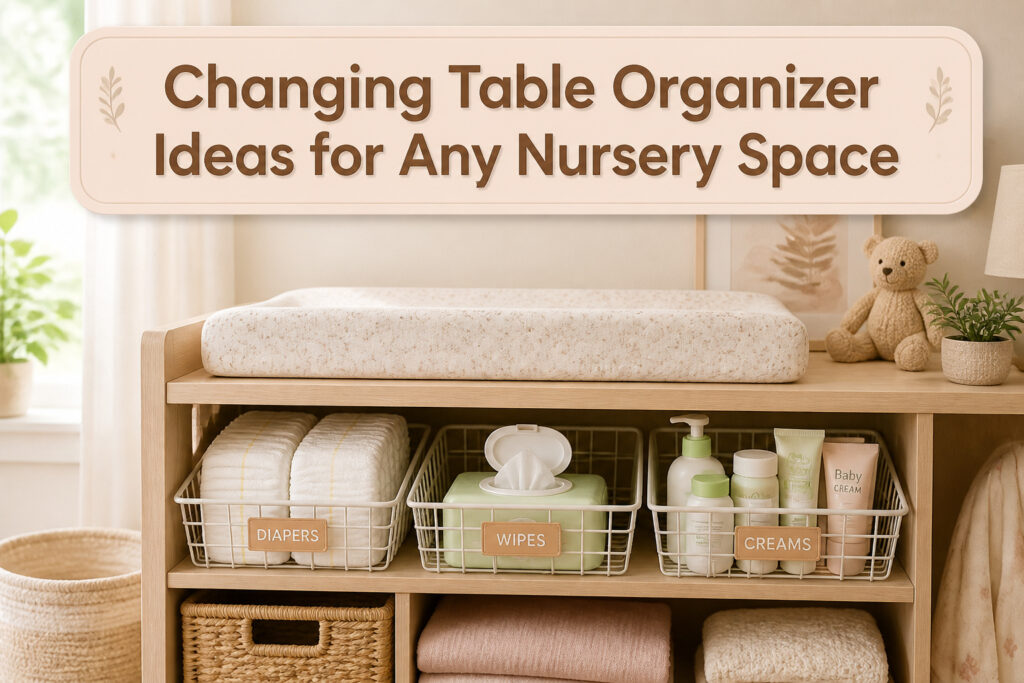
A changing table organizer is any system that keeps diapers, wipes, and creams within arm’s reach while one hand stays on the baby. The catch is that most setups fail because parents choose baskets that are too deep or mount shelves too high to reach without straining. We learned that shallow wire baskets under five inches tall work better than tall woven ones that hide supplies during a messy change.
[link-whisper-related-posts]Use a Changing Table or Dresser With a Changing Pad on Top
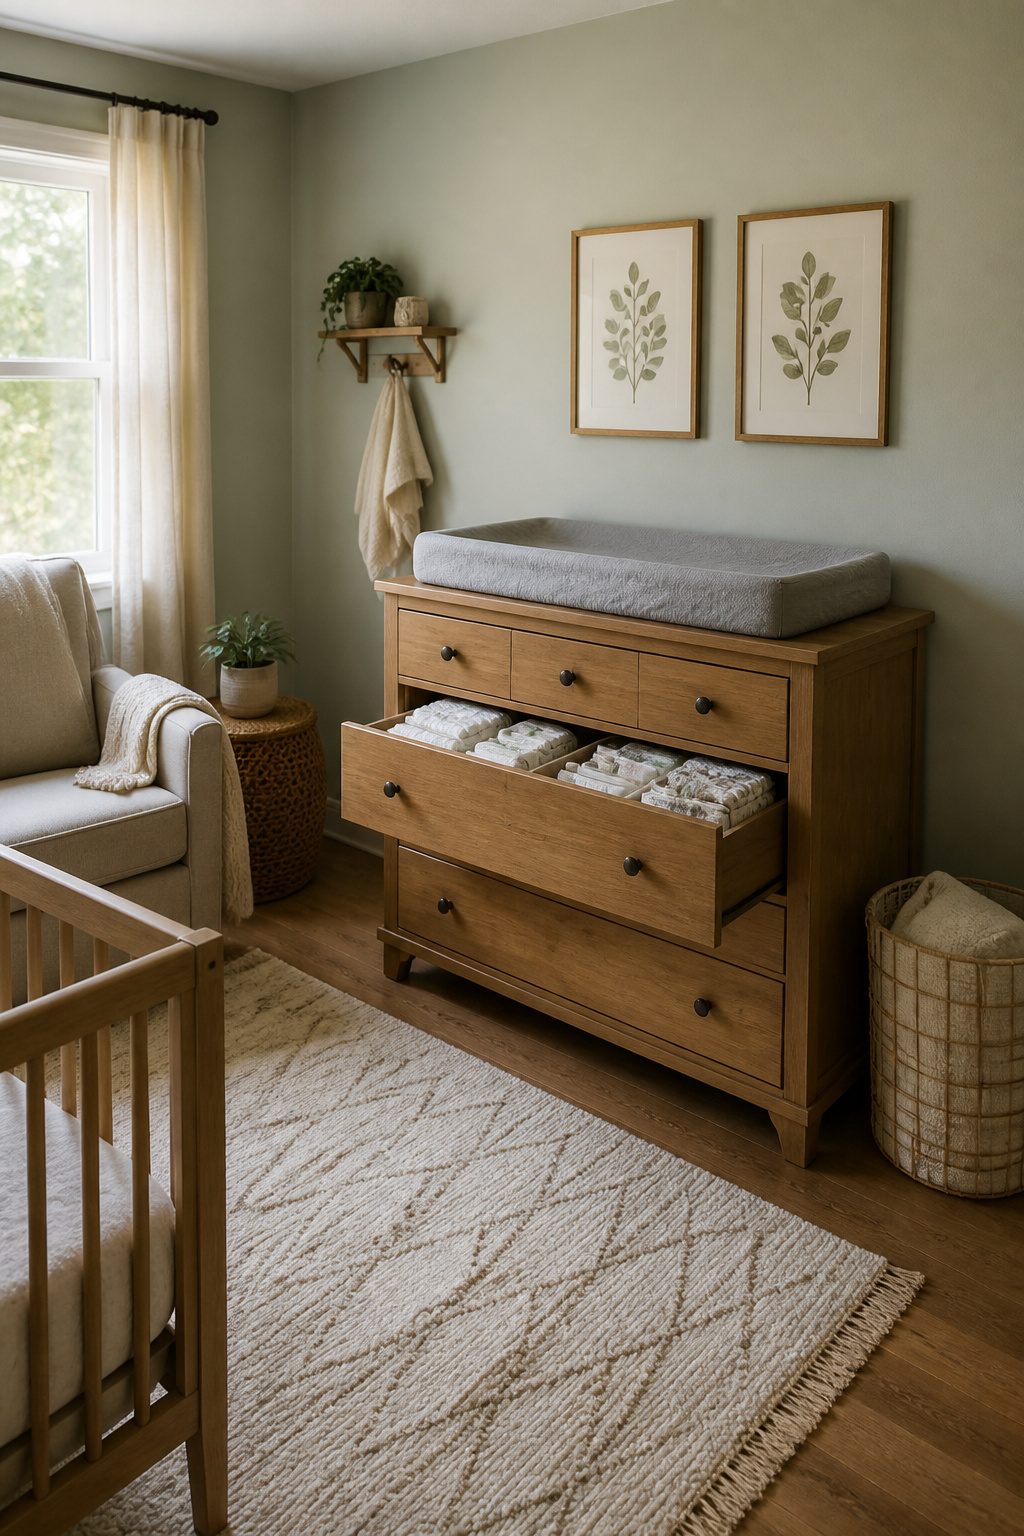
A dedicated changing table is one of those nursery purchases that looks essential and then sits useless after eighteen months. We skipped it entirely and went with a standard dresser topped with a removable changing pad. The piece still works in a kid’s room years later, and we did not have to find storage for a single-purpose table.
The Babyletto changing pad is what we kept seeing recommended for this setup. It wipes clean without absorbing stains, and the proportions fit dressers that stay useful well past diapering. Check your dresser top dimensions before ordering, since changing pads run in different shapes and sizes and a gap at the edge is a safety issue.
The drawer directly below the pad holds diapers, wipes, and creams within arm’s reach. Once the phase ends, you pull the pad off and the dresser becomes ordinary bedroom furniture. That longevity is hard to beat on a real budget.

Tabletop baby diaper caddy holds over 20 diapers, wipes, lotions, ointments and more, keeping diaper duty organized on a shelf, dresser or changing table.

Luxury Handmade Rattan Diaper Caddy Organizer with 5 easy-access compartments to keep baby essentials neat and organized. The Overhead Wipes Station Ledge is compatible with certain wipe warmers
Incorporate Baskets for Easy Access to Supplies
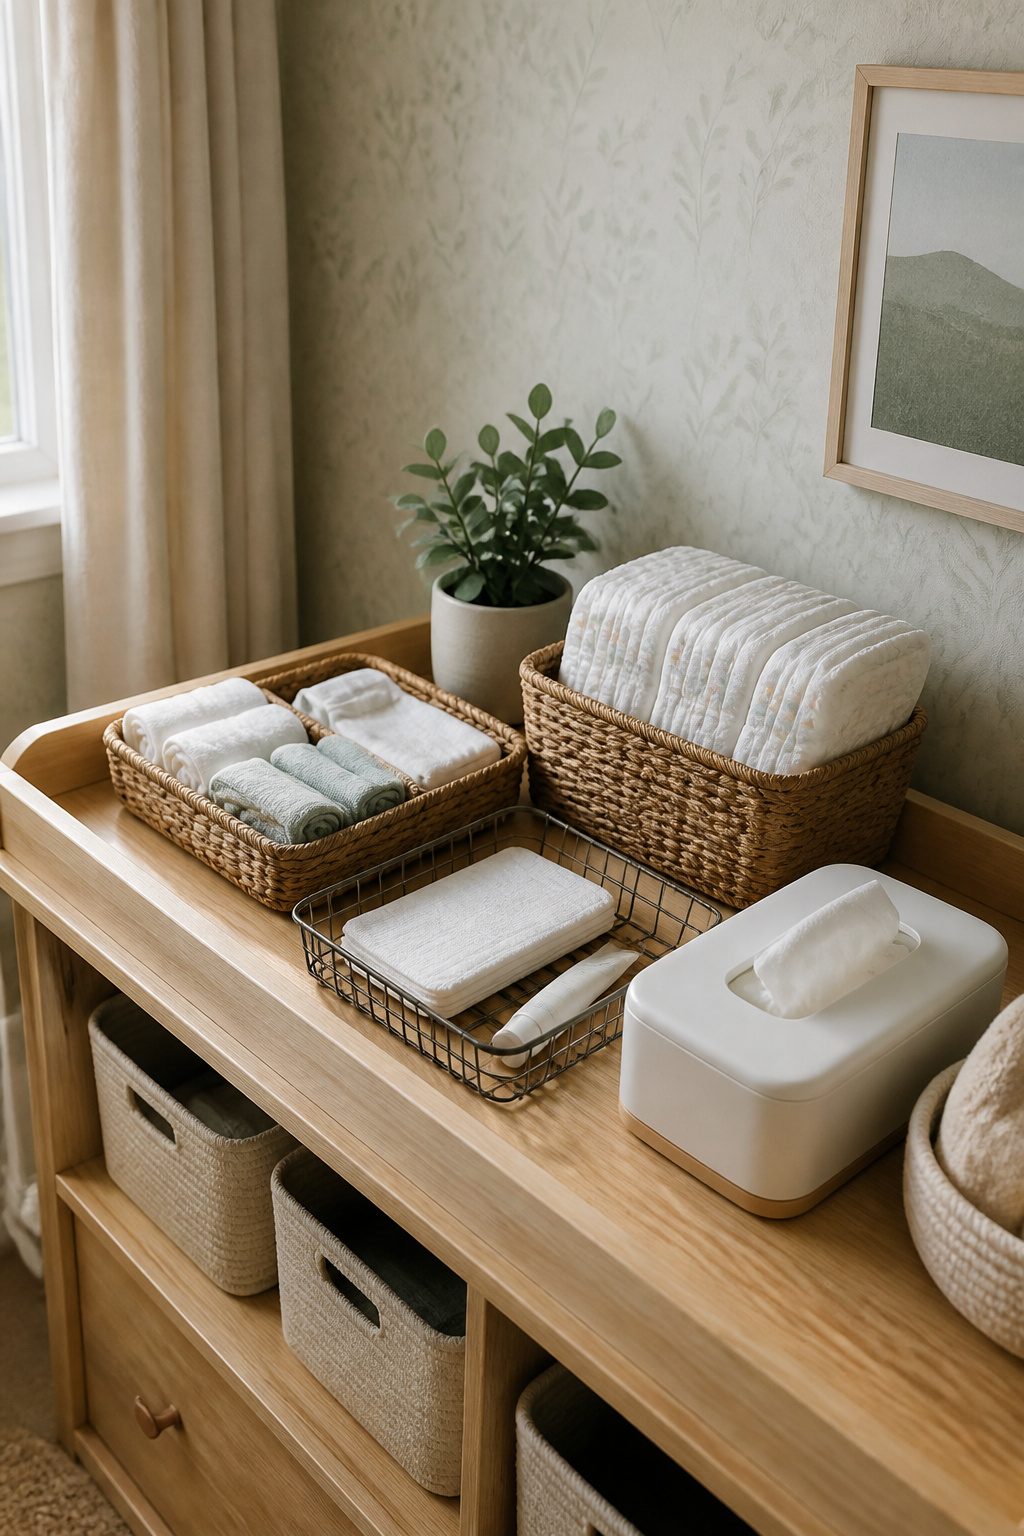
Open baskets on the changing table surface keep diapers, wipes, and creams where you can see them and grab them one-handed while the other hand stays on the baby. We learned that baskets taller than four or five inches defeat the purpose; you end up digging with two hands or lifting the whole basket out. A shallow wire basket, roughly the size of a shoebox, works well for diaper cream and a small applicator, changing pad liners, and a spare cover or two. We set a second shallow basket at the front edge of the table for the wipe dispenser with the pop-up lid facing out, and a third, slightly larger open bin for a single row of diapers stood upright so you can pull one free without looking down. The mistake we made early on was a deep woven basket that looked tidy but hid everything inside. During a messy change, you do not have time to root around. Stick to low sides, open tops, and placement within arm’s reach of where you stand.

SOFT CUSHIONED PAD FOR CHANGING TABLE | Premium Pillow Topper Provides Baby with Fluffy Support, Breathable Comfort & Dependable Safety During Diaper Changes, Swaddling, Dressing, Grooming & More | Mat Measures 31.25 x 16” & Includes Adhesive Straps for Secure Mounting on Any Standard Size Changing Table, Dresser Top, or Similar Surface

Comfy design: The pad's comfy foam construction provides a sturdy surface that helps distribute weight evenly and deliver pressure point relief

COMFORTABLE FOR BABY: The soft yet firm changing pad provides a comfortable surface for baby during diaper changes.
Utilize Drawer Organizers for Creams, Wipes, and Diapers
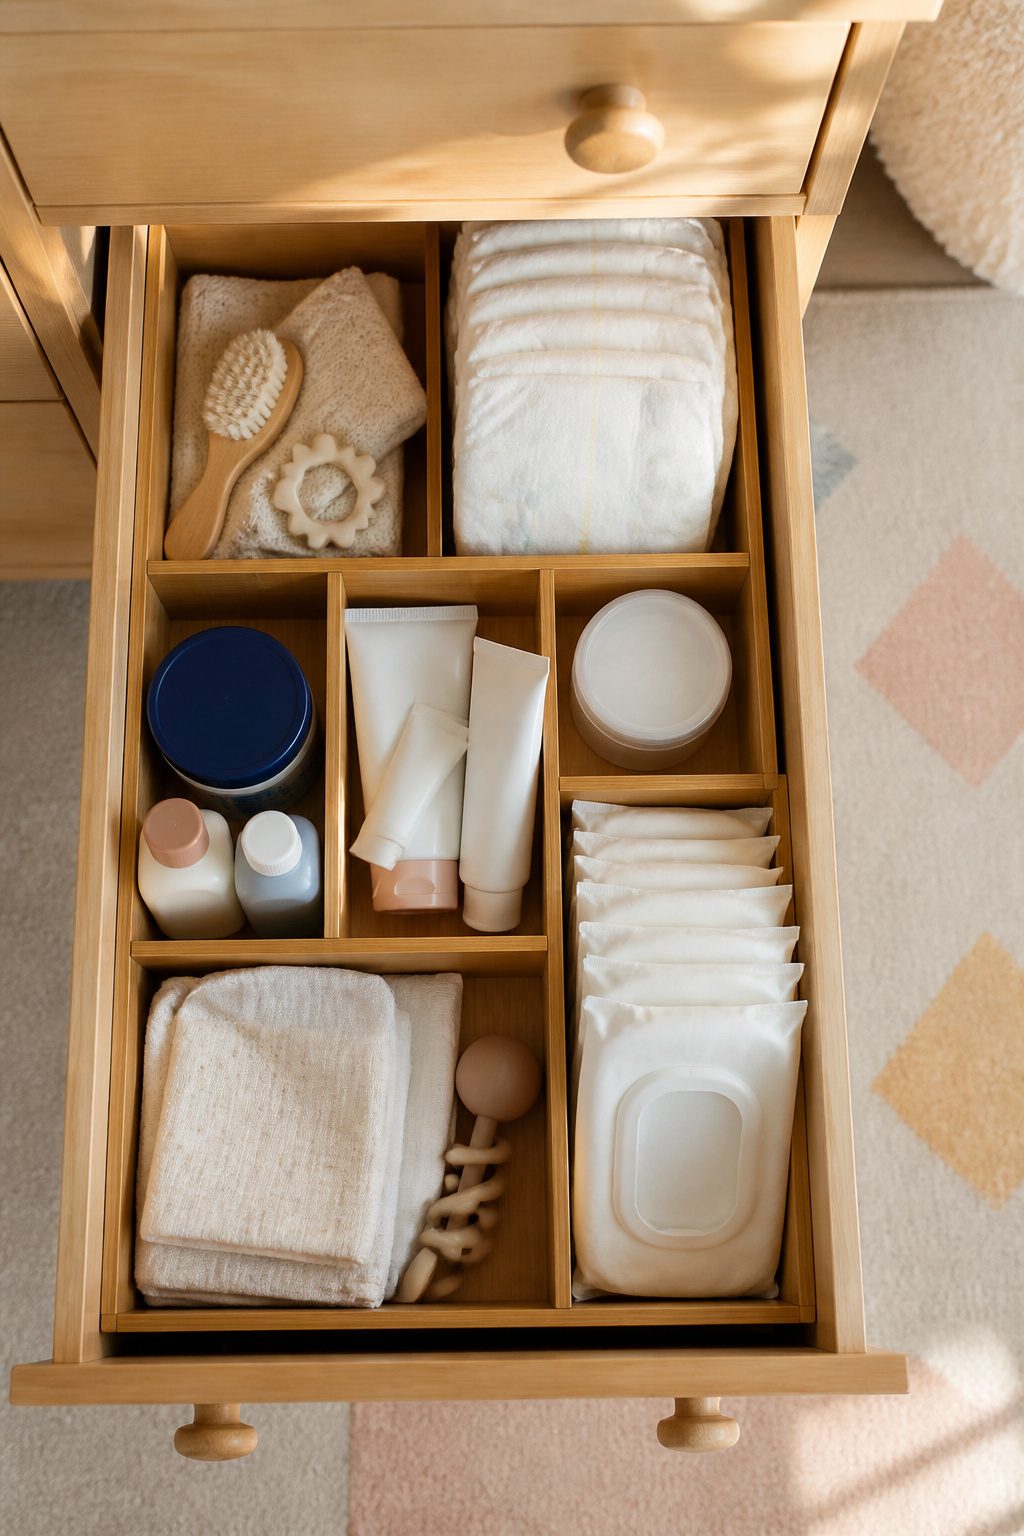
We tried the expandable bamboo dividers first and they slid every time we reached for a tube of Boudreaux’s Butt Paste. The spring-loaded ones with the gray rubber pads grip better, and they shift when your kid outgrows newborn onesies and you need that same drawer for size 2T pants.
Leave one compartment loose for half-empty wipe packs. Pampers Sensitive wipes come in those soft packs that collapse weirdly; if you wedge them into a fixed slot they bulge and jam the drawer. A little flex space fixes that.
For diapers, we unpackage the top ten or so and stand them in a divided section so you grab one with a single hand. The rest of the box lives in the closet. Skincare stays in its own zone, smallest items toward the front: diaper cream, baby Vaseline, the tiny Wet Brush. Socks and bow headbands tangle if they share a compartment, so we split them even when the drawer runs shallow. The dividers cost maybe fifteen dollars a set and take ten minutes to place. The real time sink is testing the fit, opening and closing the drawer twenty times until nothing catches.

Sturdy & Protective Design: Made from durable, shatter-resistant ABS plastic for long-lasting daily use. Non-slip silicone pads on both ends help grip drawer walls securely, while cushioning contact to protect the drawers from friction, scratches, and marks

Classify Match: DIMJ Sets of 12 drawer organizer clothes help you storing Underwear, Bras, Socks, Ties, Scarves, Shirt, T-shirt, Underpants, Undergarment, accessories etc. Easy to find which one you want to wear and never need to ransack all of your clothes.

Expandable & Adjustable: Measures 4 inches (10 cm) high and 0.8 inches wide, with an adjustable length that fits most drawers with an inner width or depth of 11 to 17 inches (28 to 43 cm), providing the ideal solution for keeping your items organized and drawers tidy. Note: Please carefully Measure your drawer’s inner dimensions before purchasing
Keep a Diaper Caddy for On-the-Go Essentials
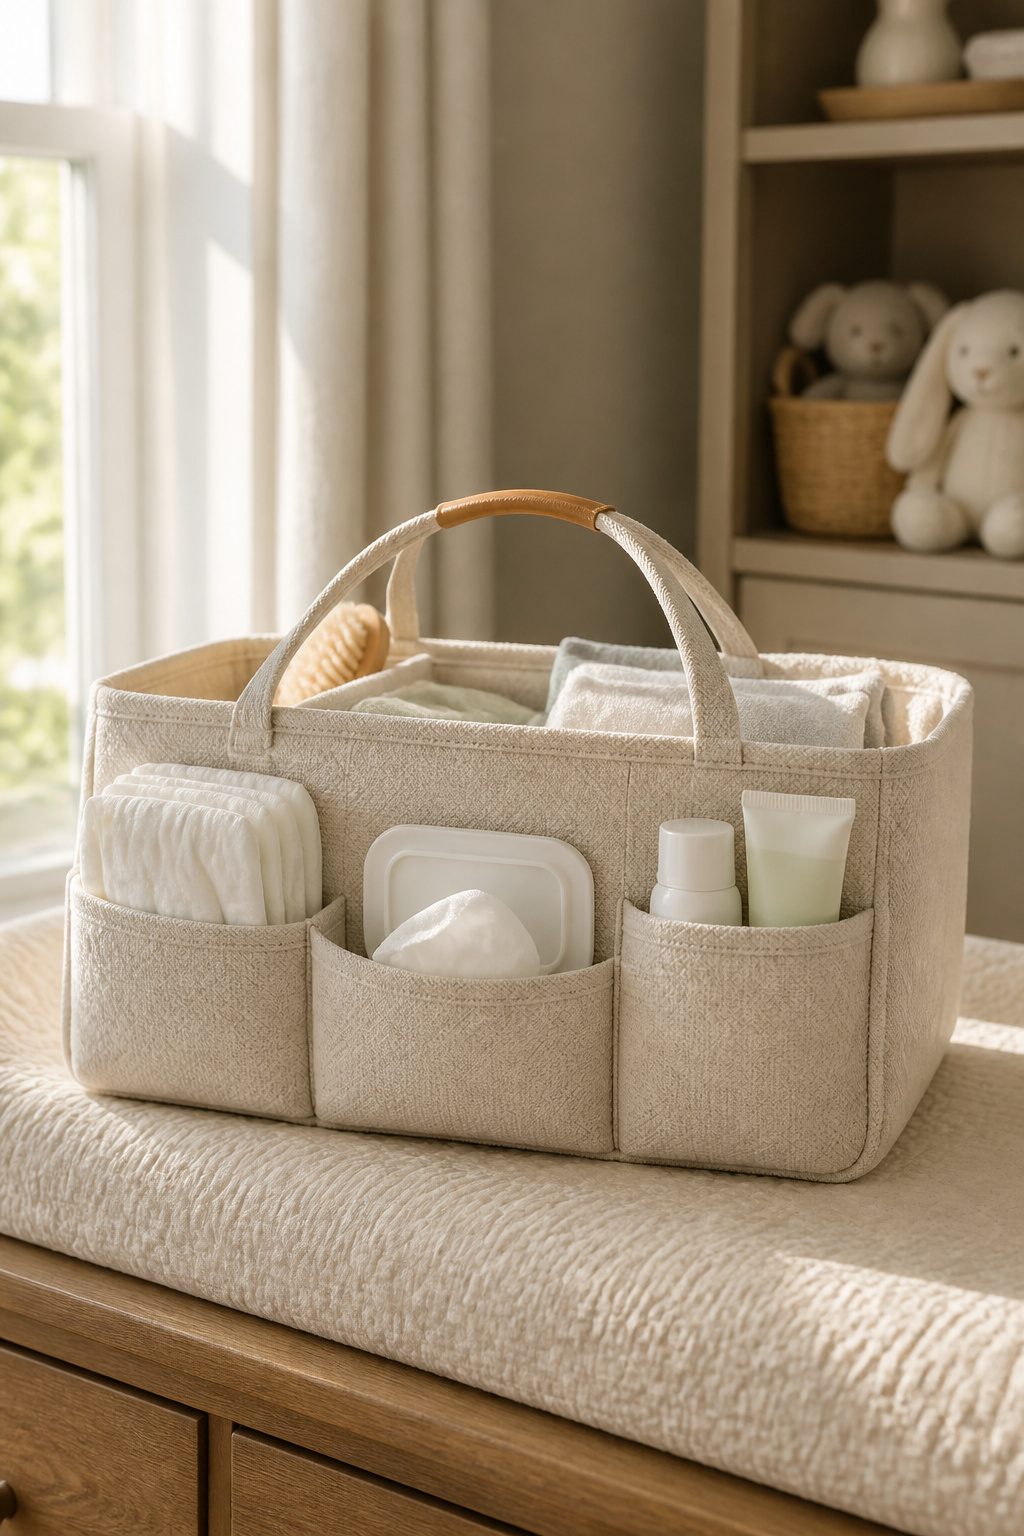
A diaper caddy is your secondary kit for changes that happen wherever you actually live, not just in the nursery. We set ours up after realizing the main station stayed put while the baby did not.
Pack it like a diaper bag minus the snacks and toys: diapers, wipes, a portable change mat, travel-size diaper cream, hand sanitizer, and plastic poop bags for when you are nowhere near the diaper pail. Add a spare outfit for leaks, and if you have room, a small toy or pacifier to buy time during a messy change. The mat matters most here; since you are not hauling a Keekaroo Peanut from room to room, a foldable mat or even thick disposable pads protect your couch or rug and can be reused a few times if they stay clean.
The real difference from your main setup is mobility. The nursery station holds everything in quantity; the caddy holds just enough to keep you from running upstairs every forty-five minutes. Some families use a handled basket, others a caddy that hooks onto the changing table itself and slides around a little without falling off. Either way, keep a restock drawer or bin nearby so refilling takes thirty seconds, not a trip across the house.

Wipe Clean and Pet Hair Resistant: Unlike felt caddies that trap lint, fur and spills, BabyBliss is made from smooth 100% polyester that wipes clean in seconds with a damp cloth, making everyday messes easier to manage.

Premium Wicker Diaper Caddy Organizer:Handcrafted with 100% round paper rope and a sturdy internal frame, this wicker diaper caddy organizer combines durability with a natural woven style. The lightweight basket design adds a beautiful touch to any nursery while keeping baby supplies organized.
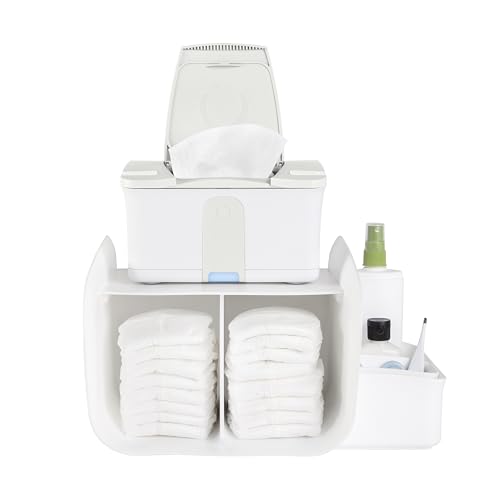
Spacious Storage: The Ubbi Tabletop Diaper Caddy Organizer holds up to 30 diapers, making it the perfect solution for keeping your baby’s essentials organized.
Store Baby Clothes Within Reach
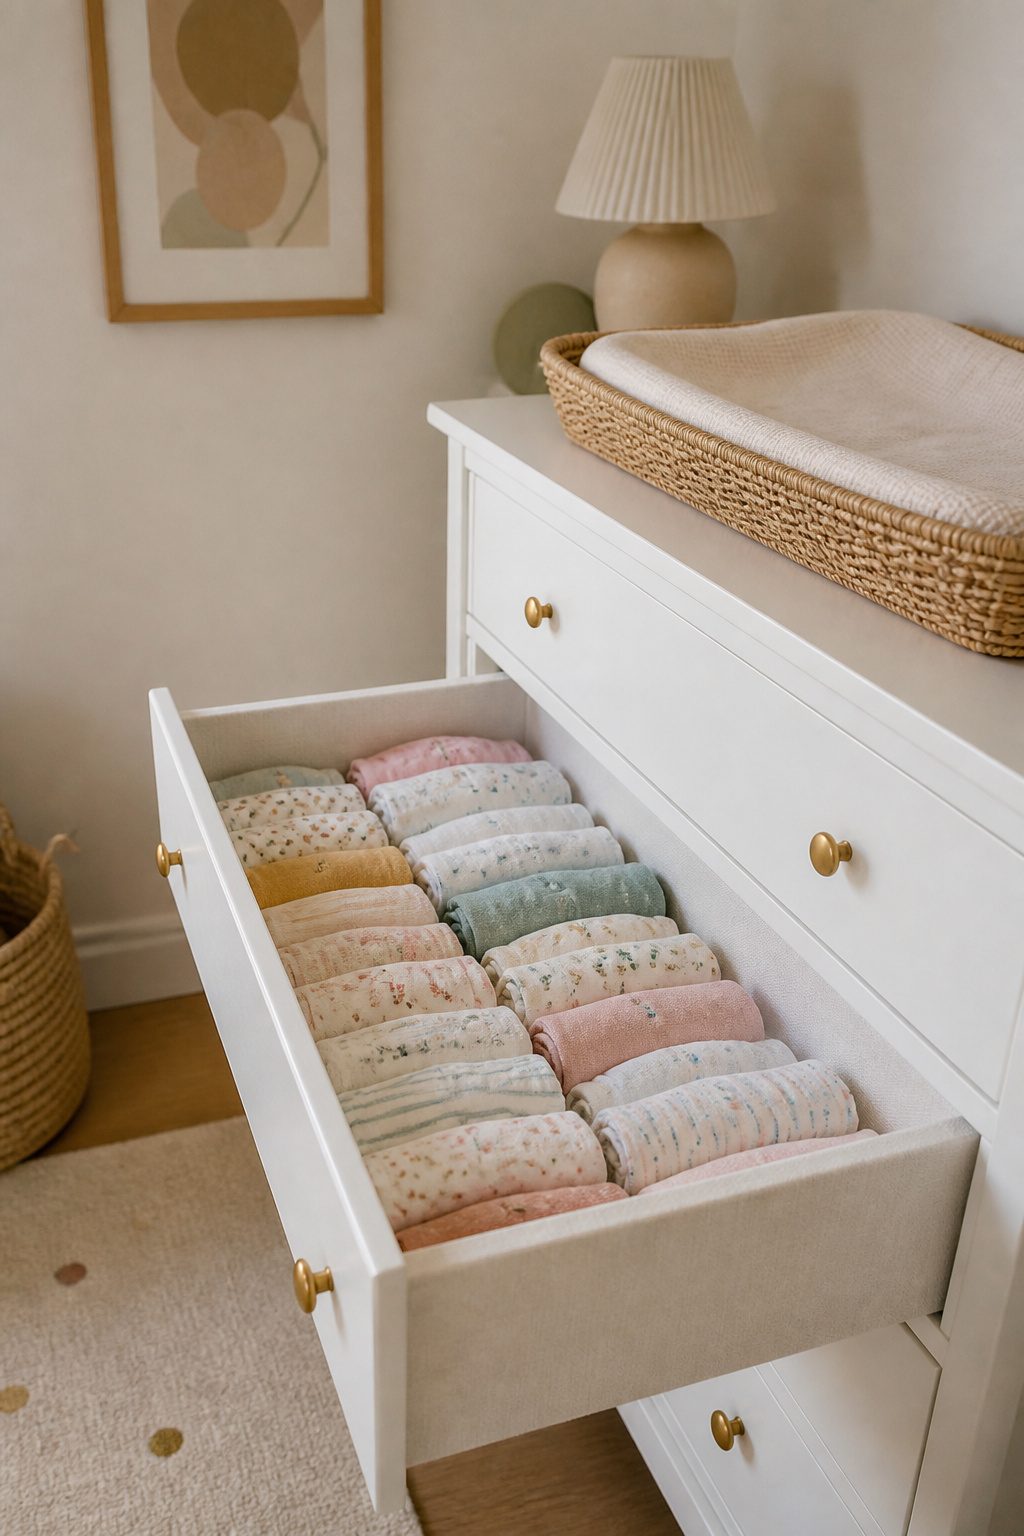
We keep three spare outfits at the changing station, no more. In the first weeks we learned the hard way that a stack of six looks tidy at 9 a.m. and avalanches by noon. The rest live in the dresser drawer, rolled tight the way you would for a suitcase so you can see each piece without digging. Onesies on the left, matched tops and bottoms center, next size up on the right for when the growth spurt hits overnight. That drawer is reachable with one hand while you hold the baby with the other. The changing surface itself stays clear except for what that hour demands.

Fits Multiple Drawer Widths: Designed for standard household drawers with an inner width of 18" to 20.6". These bamboo drawer dividers are adjustable from 16.7" to 21.7" in length and measure 3.2" in height, providing a flexible fit for drawer organization. Please measure your drawer before ordering to ensure compatibility

Recommend Drawer Dimension: **Measure Your Drawers Before Buying!** This product is designed for drawers with an inner size of 17.8" to 20.6". If your drawer's inner size exceeds 20.6", it will doesn't work

Recommend Drawer Dimension: **Measure Your Drawers Before Buying!** This product is designed for drawers with an inner size of 17.8" to 20.6". If your drawer's inner size exceeds 20.6", it will doesn't work
Use a Diaper Pail to Contain Odors
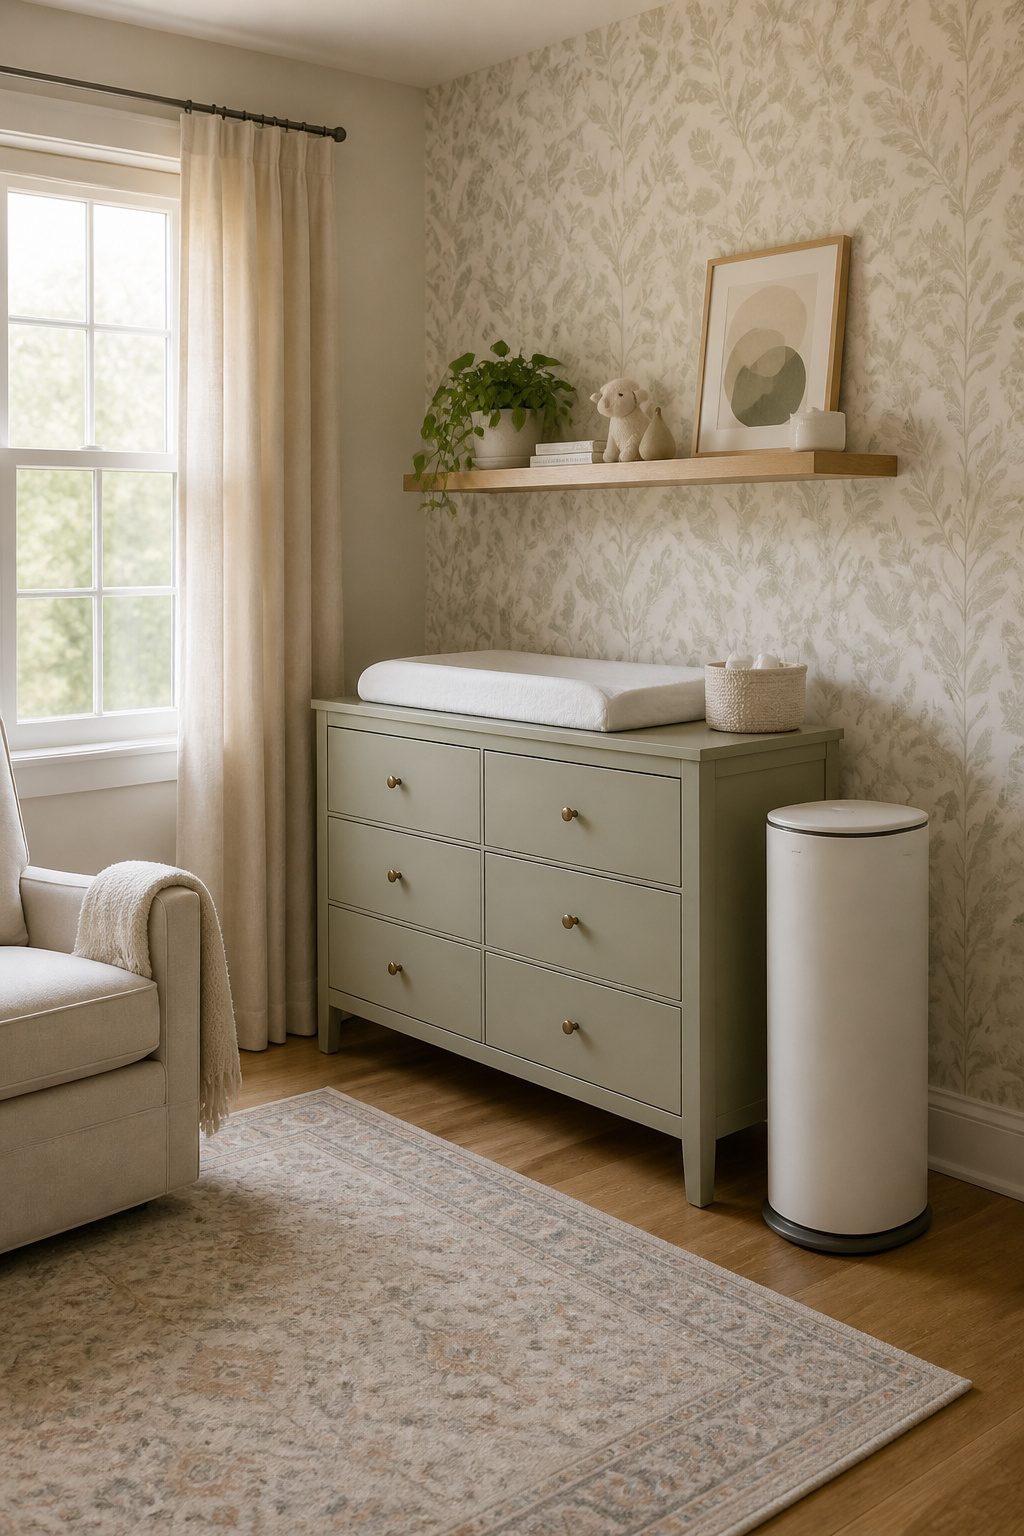
A diaper pail belongs beside the changing surface, not behind or below it. We tried tucking ours against the wall at the back of the dresser and ended up half-lifting the baby every change just to reach the pedal. The pail needs to sit close enough that you can drop a diaper in without shifting your weight, but the opening should sit below the baby’s eye line so you are not tipping odors toward them while they are still on the pad. We have seen setups with the pail on the open side of a dresser, roughly at knee height, which keeps the path short and the lid out of the way of your elbow. If you are using a traditional changing table with open shelving, the floor directly beside your dominant hand is usually the least awkward spot. Skip the small trash can we used for our first few rounds; the smell escapes the moment you lift the lid, and you will end up taking the bag out twice as often.

Keeps Baby Diapers Within Easy Reach: This hanging diaper organizer holds about 40 diapers. It can holds wipes, lotions, baby cream, clothes and other newborn essentials, neatly stored in one place. Perfect for faster diaper changes without leaving your baby’s side.
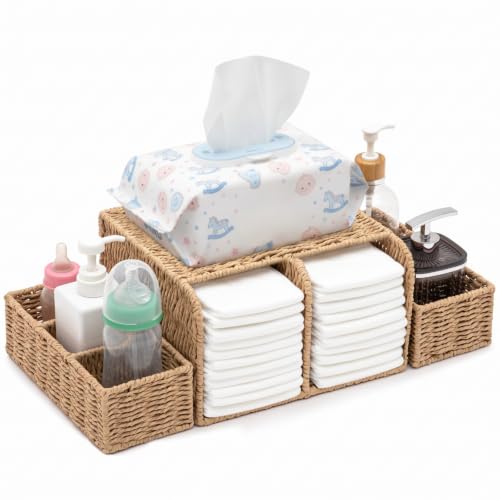
Detachable Modular Design: Our woven diaper caddy organizer features removable storage bins that can be used together as a complete set or separately in the nursery, bedroom, bathroom, or living room; Unlike fixed one piece organizers, this flexible design adapts to your daily parenting needs and maximizes space efficiency

Drawer Storage: Designed as a diaper organizer with drawer, baby essentials organizer, and changing table organizer, the upgraded bottom drawer creates dedicated hidden storage for pacifiers, bibs, creams, nail clippers, and small baby accessories while keeping the nursery countertop clean and organized.
Label Storage Areas for Quick Identification
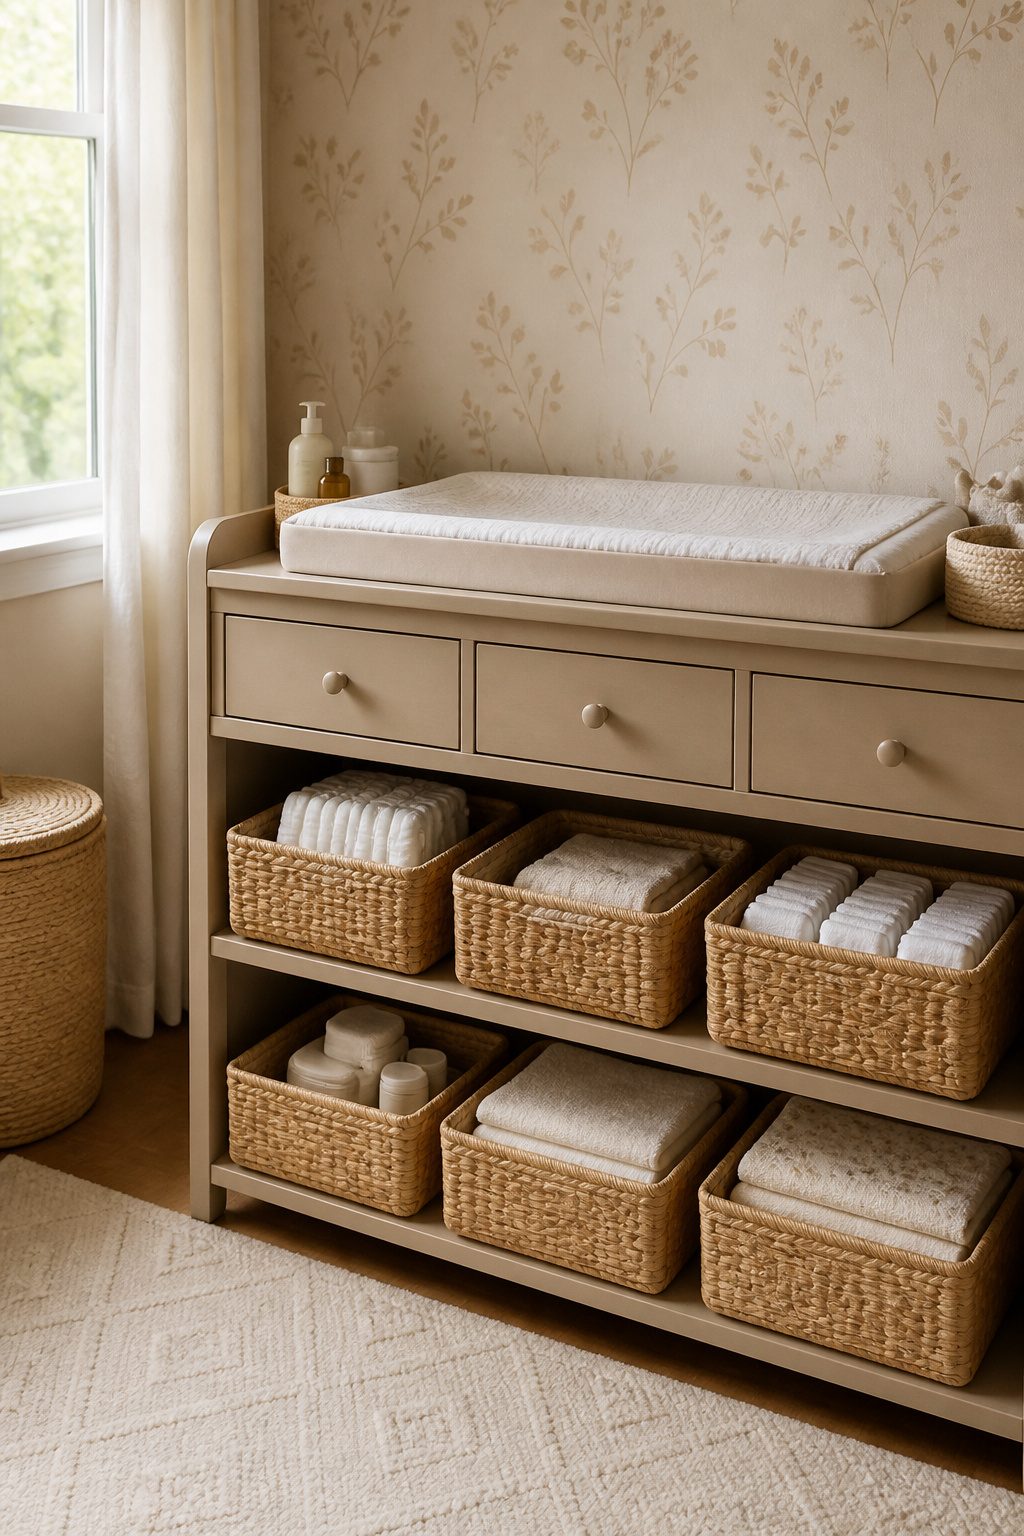
Labels turn a midnight diaper change into something you can do with your eyes half open. We learned this after a week of sleep-deprived fumbling where "diapers" and "wipes" got mixed into the same basket and nobody could find the rash cream. A simple label on the front of each drawer or basket means a grandparent or a partner on night duty knows exactly where to reach without turning on a lamp or asking questions.
We label the big categories: diapers, wipes, creams, and the current size of backup clothes in the drawer below. We skip the micro-categories. A label that says "socks and hats" sounds precise until you realize the hat is on the baby and you are standing there reading instead of grabbing. Over-labeling turns the whole changing area into a filing cabinet, and the visual clutter works against the calm you are trying to build. Three or four labels total is the practical ceiling for most setups. If you need more than that, your storage is probably too fragmented already.

SOFT CUSHIONED PAD FOR CHANGING TABLE | Premium Pillow Topper Provides Baby with Fluffy Support, Breathable Comfort & Dependable Safety During Diaper Changes, Swaddling, Dressing, Grooming & More | Mat Measures 31.25 x 16” & Includes Adhesive Straps for Secure Mounting on Any Standard Size Changing Table, Dresser Top, or Similar Surface
💡Cups Bra Inserts Size: A/B:4.5*4.5 Inch ,B/C:5.1*5.1Inch.Support free cutting

WATERPROOF & WIPEABLE CHANGING PAD: The surface of the baby diaper pad is waterproof and can effectively prevent moisture from seeping in. The smooth and washable surface allows for quick and easy cleaning of stains, ensuring a hygienic space for every replacement
Include a Nightlight for Nighttime Changes
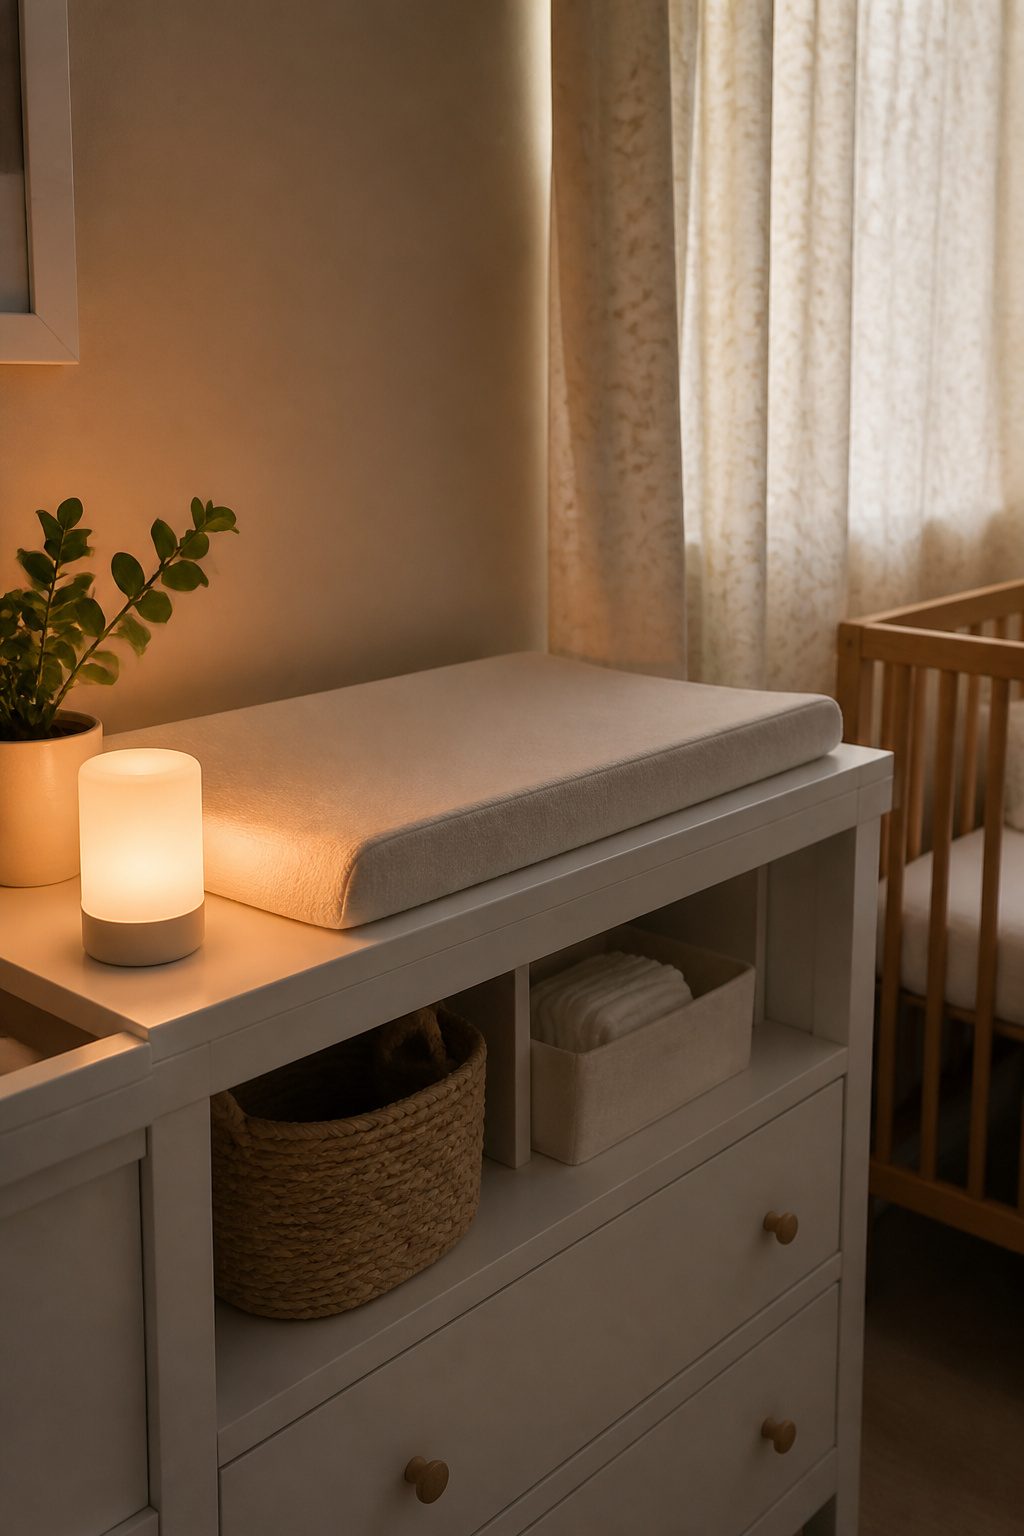
A push-on nightlight sitting on the changing table itself beats anything plugged into a distant wall. You need just enough glow to locate the wipes and diaper cream without flipping a switch that wakes the baby fully. We learned that the hard way with our first pick, a bright white LED nightlight that made the nursery feel like a gas station at 2 a.m. The baby stirred more, and we stayed awake longer.
Color temperature matters more than brightness. That first light ran around 5000K, the blue-white tone that signals "daytime" to human brains. We switched to a dimmable warm light closer to 2200K, the amber range that keeps melatonin intact. Adjustable output helped too; the kids bought one for us that twists from barely-there to a soft pool of light. Now we set it low enough that we can find the pacifier jar lid without squinting, but the baby stays half-asleep through the change.

4 Drawer Dividers with 9 Inserts: Customize your drawer with our bamboo dividers and inserts; You can organize everything from silverware to utensils. The mini dividers can be easily inserted to make smaller or larger storage parts; LENGTH SIZE: Expandable from 17" to 22" Long

INSTANT ORGANIZATION: Easily store and organize socks, leggings, sports bras, yoga pants, lingerie, underwear, tights, t-shirts, scarves, belts, accessories, jewelry, and more; The dividers expand to desired length and lock into place to keep clothes situated; Customize dresser drawers to perfectly fit your storage needs with these spacers; Keep clutter under control with separators; Set of 4

★ LONG-LASTING QUALITY! Not all drawer organizers are created equal. Our fabric drawer organizer is built from ultra-sturdy, breathable material with reinforced stitching so every dresser drawer organizer and drawer organizer bin holds its shape for years to come!
Choosing the Right Changing Table
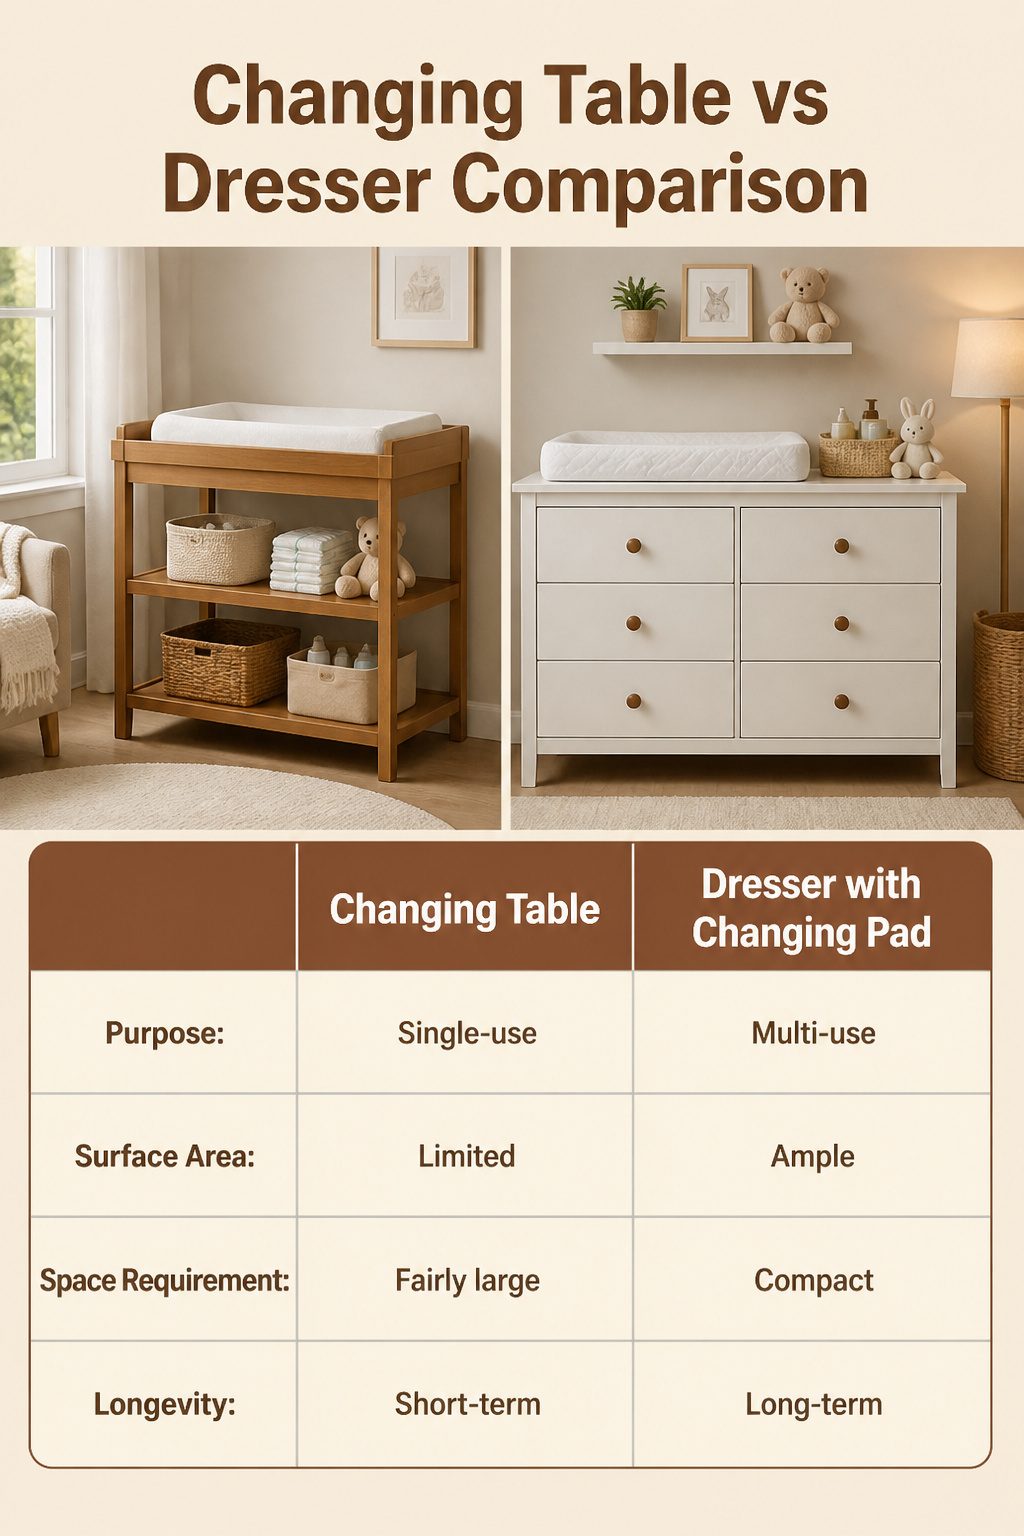
A changing table is one of those purchases that looks essential in the store and turns into a clothes-drying rack by year two. We learned that the hard way with our first setup, and now we steer families toward a dresser with a changing pad on top instead of a dedicated table. The dresser survives the diaper phase as real furniture; the changing table does not.
For tight spaces, a pack-and-play with a built-in changing station keeps a shared bedroom functional without committing floor space to a single-purpose piece. We have seen that arrangement work well in rentals where the nursery doubles as a guest room.
Whichever route you take, measure before you buy. Changing pads come in different sizes, and a pad that overhangs the edge by even an inch is a pad you will not trust at 2 a.m. Check the surface area, too. A full-size dresser gives you room to stage supplies without everything crowding the baby.
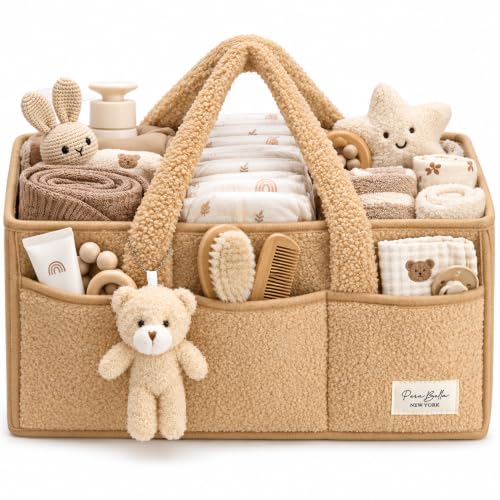
VERSATILE BABY CADDY AND NAPPY CADDY: Versatile diaper caddy organizer for all baby stuff, baby toys storage, baby clothes, diapers, baby wipes, cloth dipaers, medicine, onesies, burp clothes, changing pads and other baby essentials. With multiple compartments, you can easily store all of your breast pump and breast pump parts, also use it as a car organizer

All-in-One Diaper Organizer: The PandaEar Baby Diaper Caddy Organizer is a versatile and essential baby registry must-have. It serves as a changing table organizer, baby storage basket, and baby laundry basket, making it convenient for parents to keep all newborn essentials close by.

CELEBRATED AWARD WINNER - Bebe Bask has won the Mum's Choice Awards for its outstanding design and functionality. This sustainable masterpiece embodies style and convenience in one beautiful package, seamlessly blending elegance with practicality. Discover why it has become the ultimate favorite...
Essential Supplies
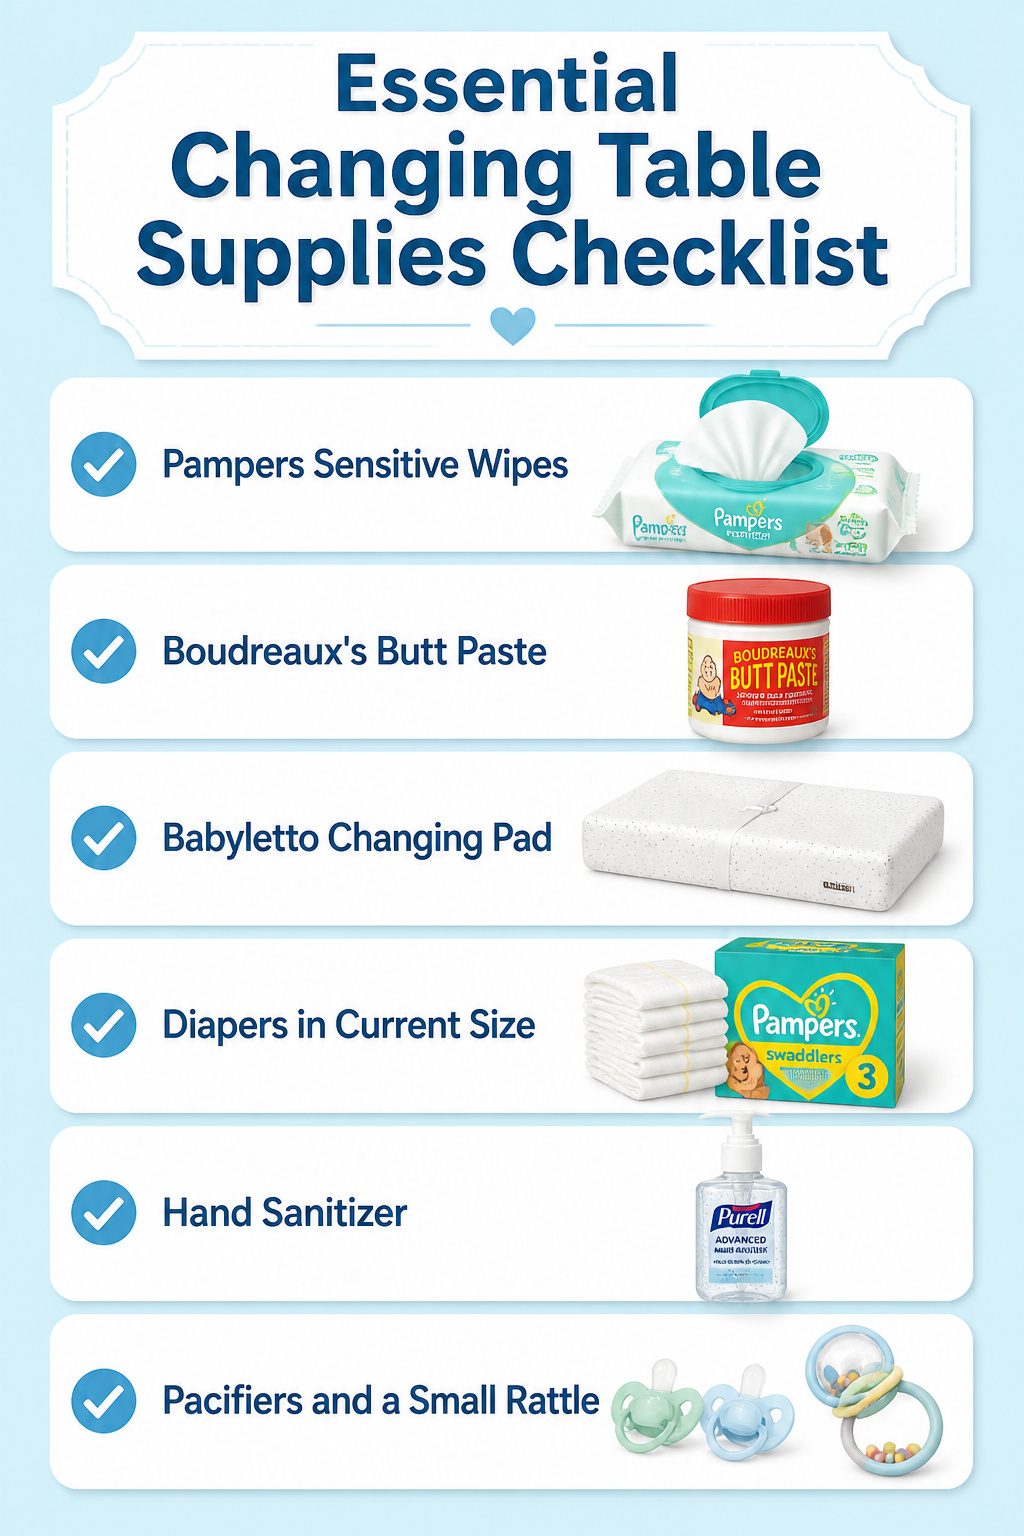
The core items sit where your hands already reach. We keep diapers stacked in the top right drawer, wipes open and ready to the left of the pad, and diaper cream within arm’s reach because a rash can flare between one change and the next.
- Pampers Sensitive wipes for the wipe dispenser; unscented tends to irritate less in the early weeks
- Boudreaux’s Butt Paste for the cream slot; zinc-oxide based, thick enough to stay put
- Babyletto changing pad on top; wipes clean and runs large enough for toddler length
- Diapers in whatever size fits now, plus one box up, since sizing shifts fast
- Hand sanitizer for after the messy ones
- Pacifiers and a small rattle or teether for the minutes you need a distraction
We skipped the wipe warmer after the first round. It is nice at 2 a.m. in January, but most babies do not flinch at room-temperature wipes, and it is one more cord and reservoir to manage.

Recommend Drawer Dimension: **Measure Your Drawers Before Buying!** This product is designed for drawers with an inner size of 18.6" to 20.6". If your drawer's inner size exceeds 20.6", it will doesn't work

SET OF 6: Includes six adjustable drawer dividers to help you organize multiple drawers throughout your home.

【Make Everything Organized】These clear versatile drawer dividers trays are perfect for any place in your home. Fit all kinds of drawers, such as vanity / bathroom / kitchen / office drawers/ craft room, ideal for organizing cosmetics, makeup tools, hair accessories, jewelry, pins, office supply, craft supplies, utensils, etc.
Organization Tips
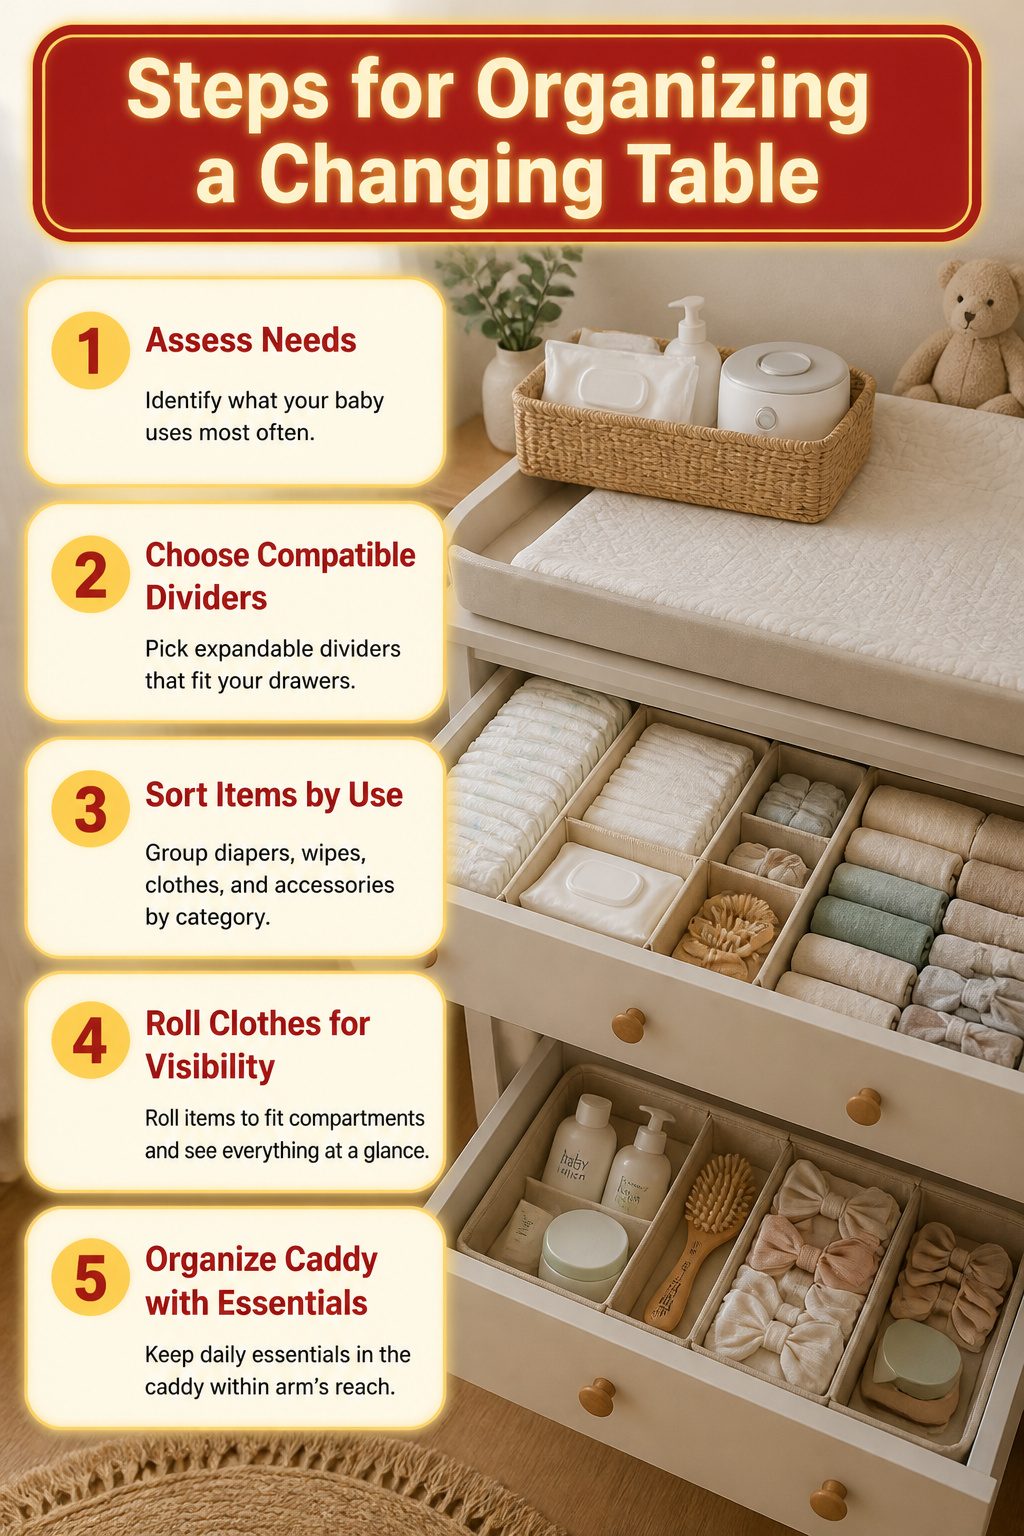
Expandable drawer dividers let you shift compartments as your needs change, which matters because a newborn’s socks and a toddler’s onesies are not the same shape. We have seen parents roll clothes to fit those compartments; it takes an extra ten seconds per load and the payoff is seeing every item at a glance instead of digging past the top layer. The same dividers work in the top drawer for diapers and extra wipes if you unpack them first, so you are not wrestling packaging with one hand while the baby squirms.
A collapsible organizer for skincare and small accessories belongs in the drawer you open with your off hand, the one that is not holding a dirty diaper. That keeps creams, a mini Wet Brush, and bow headbands from migrating into one jumbled pile. We like this setup because it mirrors the basket system on top: the caddy or wipe warmer lives within arm’s reach of the pad, while the drawer below handles the backup supply. The two systems talk to each other, and you are never caught with an empty wipe dispenser at 2 a.m. because the refill was three drawers down.
Accessibility
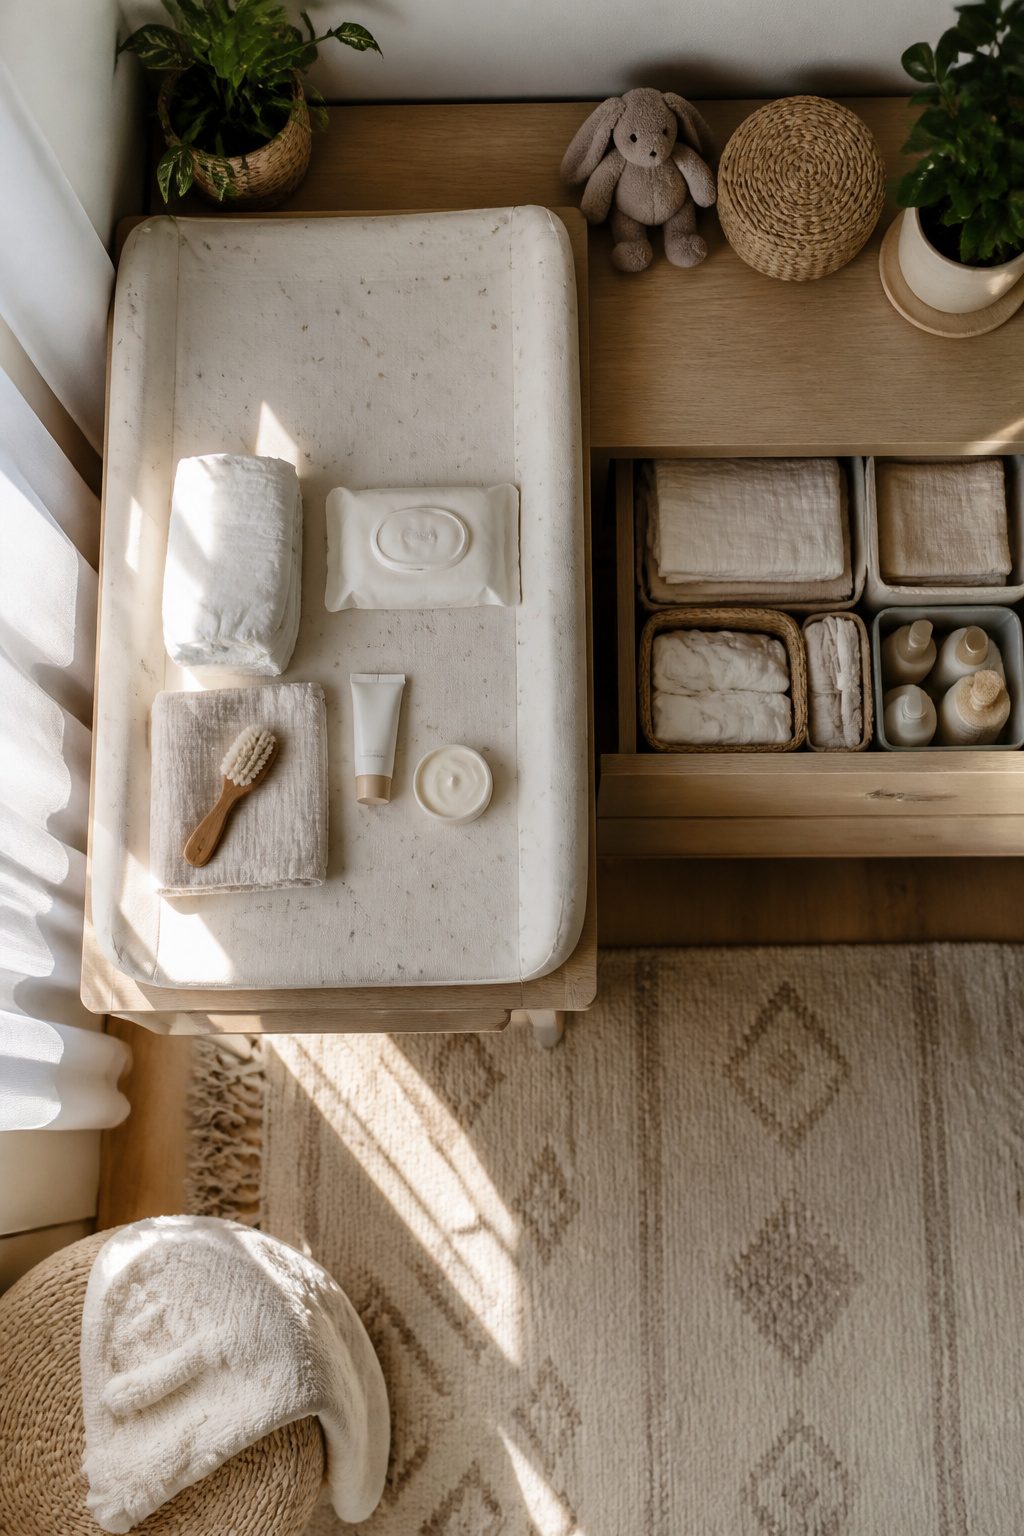
The height of your changing surface sets the radius you can actually use. We learned this after watching a friend strain to reach a shelf mounted twelve inches above her table; she ended up moving the whole operation to the floor by month three. Keep your most-used items within the arc you can sweep while one hand stays on the baby. That means diapers, wipes, and cream sit on the surface itself or in the top drawer, not on a wall shelf or the floor.
When supplies drift too far, two things happen. You either let go of the baby to grab them, or you develop a one-armed stretch that wrecks your shoulder by week six. A wipe warmer or dispenser belongs beside the pad, not across the room where its soothing purpose becomes pointless. The same goes for backup diapers: a top drawer restocked from a lower one beats a closet run mid-change.
We have seen nurseries where everything looks organized but nothing functions. A basket of toys on a high shelf entertains nobody; a diaper caddy you have to stand up to reach is a caddy you stop using. The test is whether you can close a change with your eyes still on your baby and your back still straight.
Frequently Asked Questions
What are the must-have items for a changing table?
Diapers, wipes, diaper cream, and a changing pad form the core kit. The article also recommends keeping hand sanitizer nearby, plus a spare outfit or three for blowouts. A diaper pail within arm’s reach rounds out the station so you are not crossing the room mid-change.
How can I organize my changing table effectively?
Use shallow baskets with low sides on the surface so you can grab supplies one-handed, and spring-loaded drawer dividers below to keep compartments from shifting. Label your main categories, but stop at three or four labels so the area does not turn into a filing cabinet. Everything you touch most often belongs within the arc you can reach while keeping one hand on the baby.
What type of changing table is best for small spaces?
A dresser with a changing pad on top saves space and stays useful as bedroom furniture after the diaper phase ends. For very tight quarters or shared rooms, a pack-and-play with a built-in changing station keeps the floor clear. Either way, measure your surface before buying the pad; overhang by even an inch creates a safety issue.