
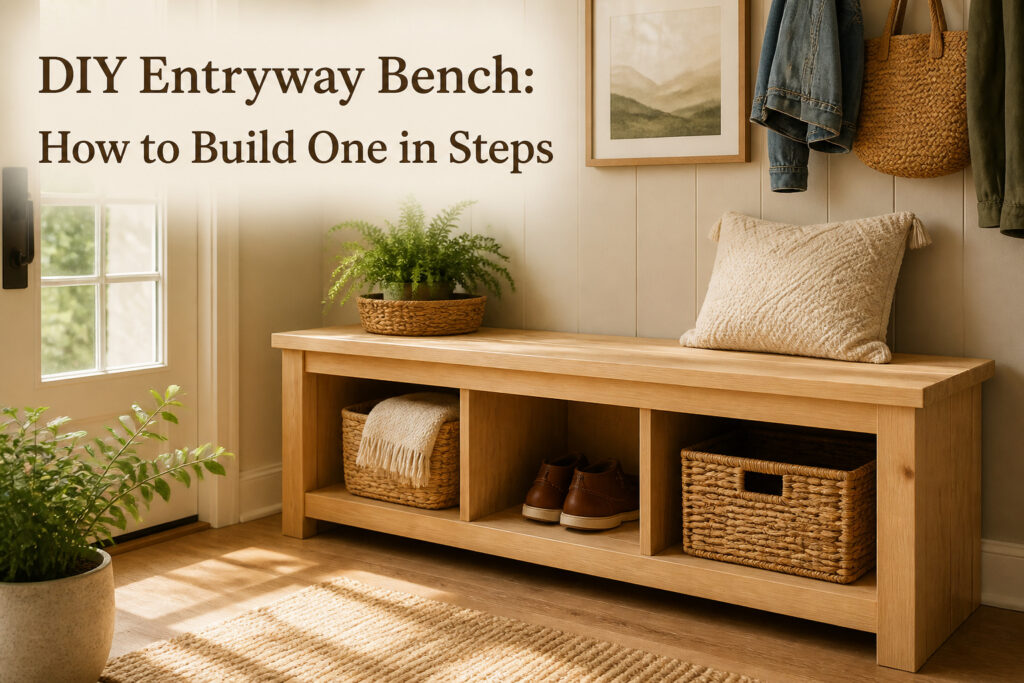
A DIY entryway bench is a storage seat you build yourself to fit the exact width of your hall or nook, with cubbies, a lift-top, or open shelving beneath the seat. The catch is that depth trips up most first-timers: go shallower than 20 inches and you save floor space, but mismeasure by an inch and you block the door swing for years. We start every build with a tape measure and a rough sketch, not a saw, and a single 8-foot 2×12 gives you a five-foot bench top plus two 18-inch legs if you keep the design simple.
[link-whisper-related-posts]1. Design Your Bench
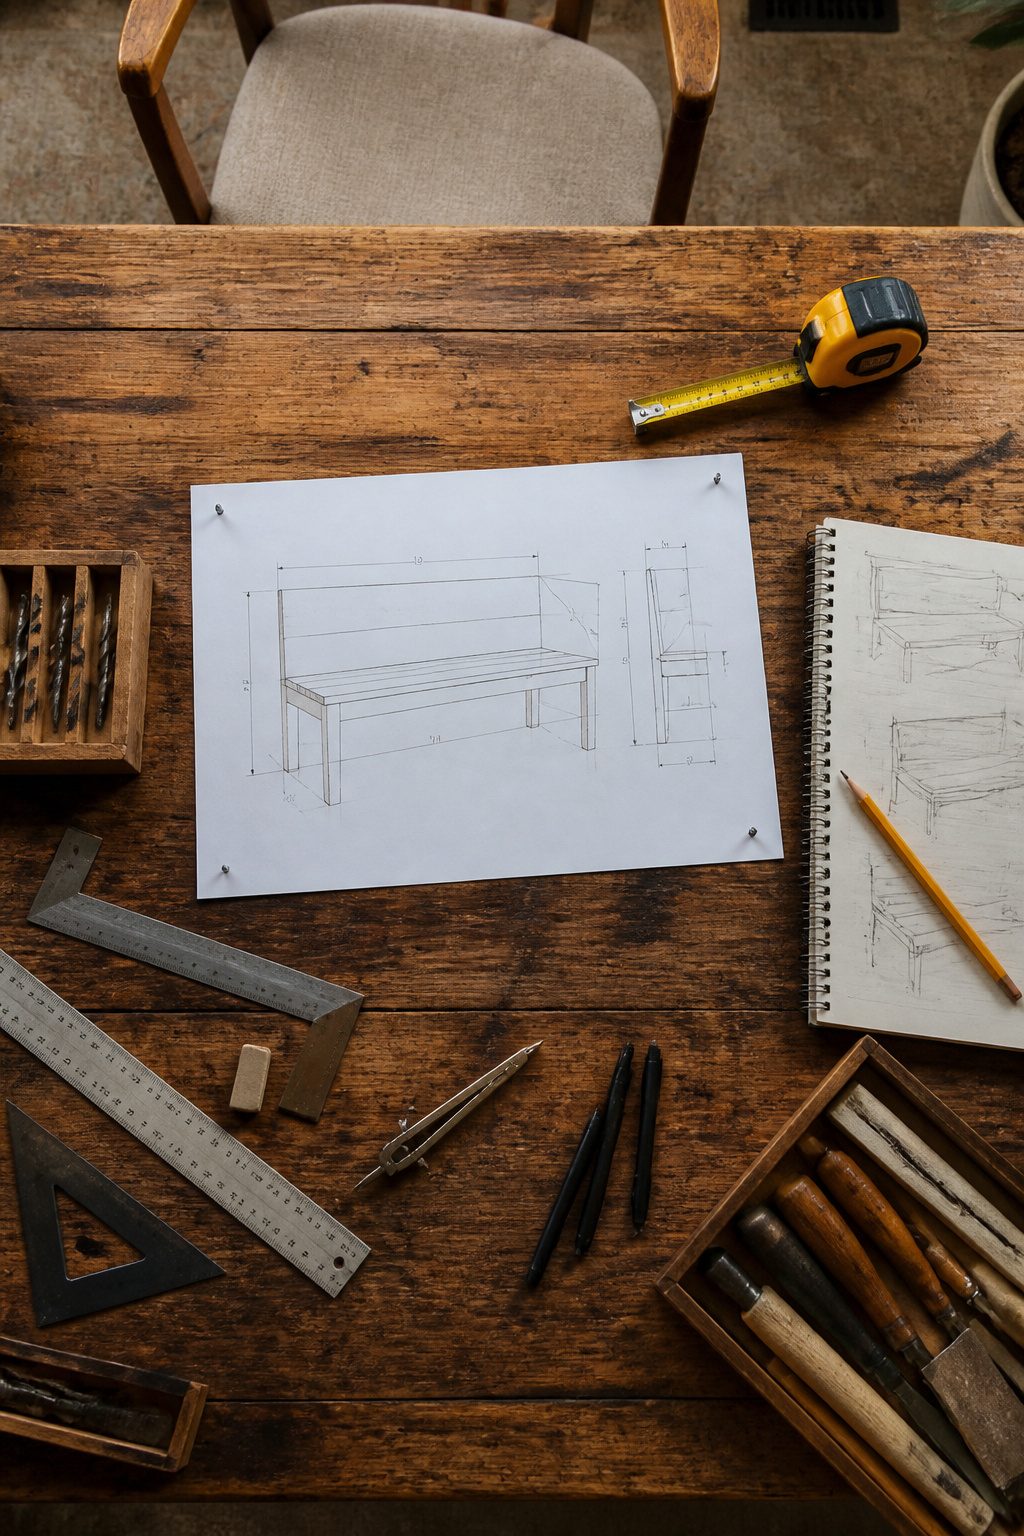
A bench that looks right on paper but blocks a door swing is a bench you will trip over for years. We start every build with a tape measure and a rough sketch, not a saw. Measure your entryway first, accounting for door swings, light switches, and any heating vents that sit low on the wall. The depth is where most first-timers guess wrong. A depth of 20-1/4" or 23-1/4" is workable, though 15-1/4" will do if you are tight on floor space. Width can stretch to 90", but keep any single bay under 36" or the top will sag no matter how careful your joinery. Height around 18" hits the mark for most adults, and leaving 2-1/4" beneath the bottom shelf gives you room for 1×3 base trim later. For small or awkward entryways, an L-shaped bench turns a corner into usable seating, while a taller, slimmer unit buys back floor space in a narrow hall. Sketch what you actually store: open cubbies for daily shoes, a lift-top for gloves and hats, or a tall back with hooks if coats never seem to land in the closet. A free configurator tool can spit out a cut list once your dimensions are locked, but paper and pencil work fine if you prefer to see it before you commit.

Entryway Bench with Lift Top Storage: When you lift the top of the bench, the storage is spacious enough to store umbrellas, soft hats, small shoulder bags, purses, keys, and other assorted items. This storage bench is also a perfect addition to your entry area. And it holds the perfect amount of shoes and is sturdy enough to sit down and tie their shoes before going out.

Entryway Bench with Lift Top Storage: When you lift the top of the bench, the storage is spacious enough to store umbrellas, soft hats, small shoulder bags, purses, keys, and other assorted items. This storage bench is also a perfect addition to your entry area. And it holds the perfect amount of shoes and is sturdy enough to sit down and tie their shoes before going out.

Shoe Storage Bench with Lift Top Storage: When you lift the top of the bench, the hidden storage is spacious enough to store umbrellas, soft hats, small shoulder bags, purses, keys, and other assorted items. It can also hold a nice throw blanket or keep socks easily accessible. This storage bench is the perfect addition to any entryway, providing both a comfortable seat and a stylish solution for shoe storage.
2. Gather Materials
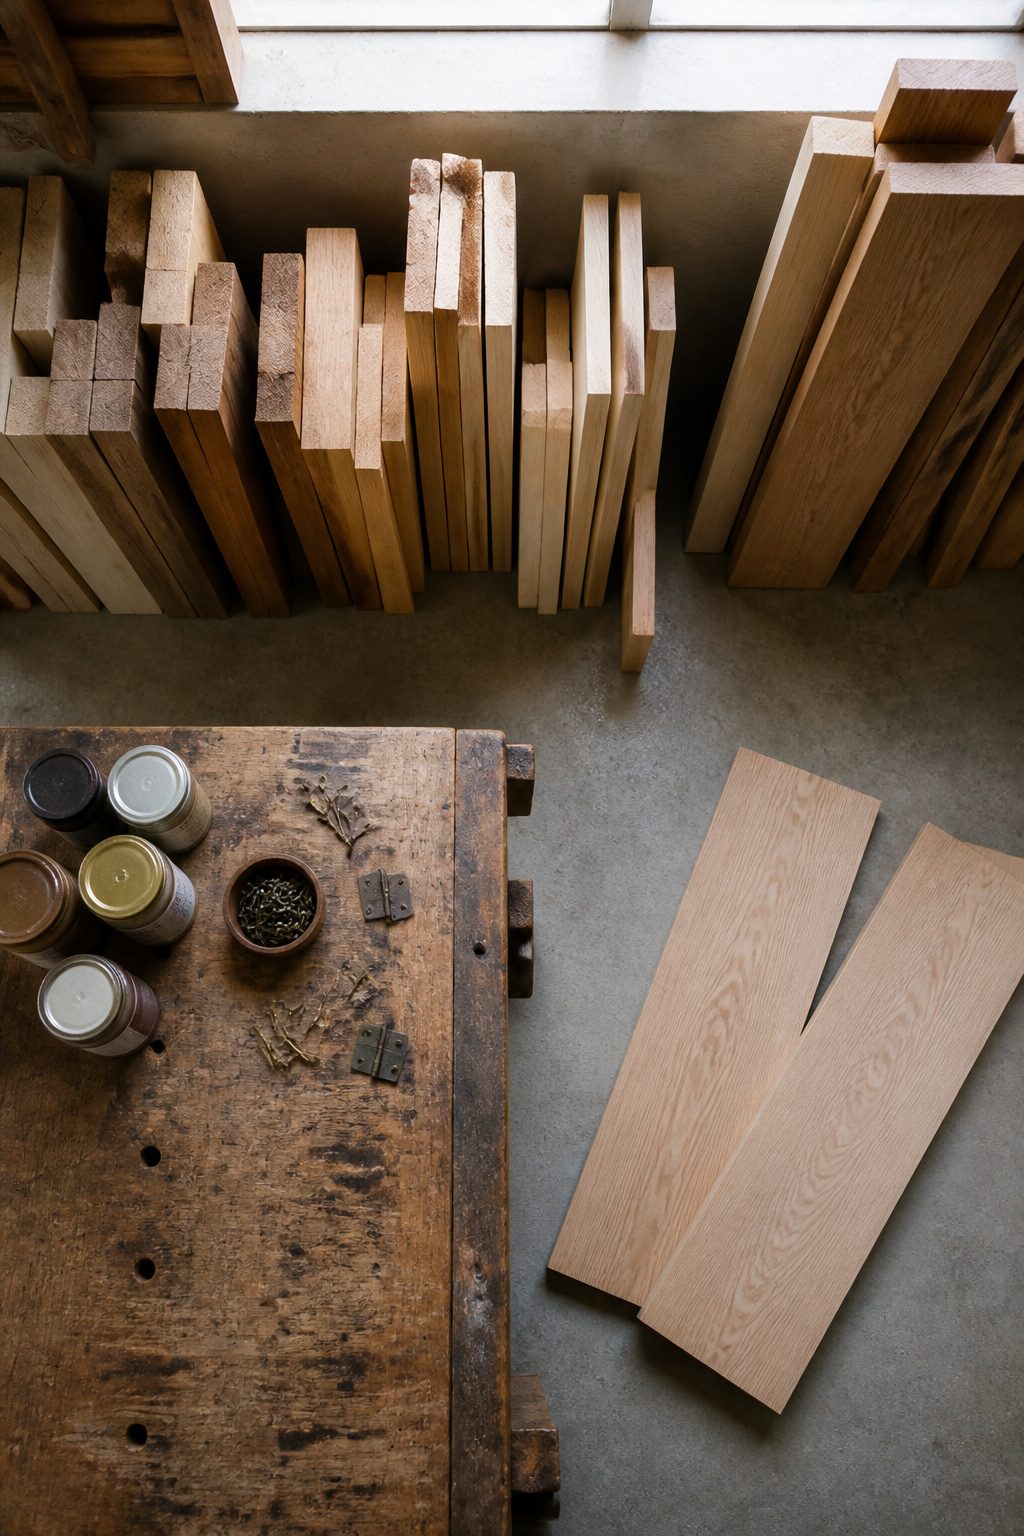
A basic bench built from plywood or poplar runs $150–$300 in materials, though we have seen total builds land anywhere from $40 to $700 depending on how far you push the wood grade and hardware. For the frame and seat, 2×12 boards cut to length do the heavy lifting; one 8-footer gives you a 5-foot bench top plus two 18-inch legs if you are keeping it simple. We like oak when the bench will take daily abuse from boots and bags, since it holds up to dings without complaint. Poplar is the smarter call if you plan to paint, because it takes paint cleanly and costs less per board foot. Maple sits between them for hardness, though it is harder to find at the big-box stores in our area.
You will need screws, a set of hinges if you are adding a lift-top for storage, and a finish that matches your wood choice. Stain on oak lets the grain show through; paint on poplar hides the greenish streaks that sometimes run through the boards. Water-based finishes dry fast and wash up with soap and water, which matters when you are working in a garage that still holds the cars. Oil-based goes on tougher, so we use it for benches that will see wet coats and muddy shoes. Whichever route you take, thin coats beat one thick coat every time. We learned that after watching a first attempt dry tacky and collect dust for three days.

【16-Cube Open Storage for Shoe Organization】This shoe rack bench with 16 spacious open cubbies, each measuring 10.6" L x 9.25" W x 5.11" H. Store each pair of shoes individually without stacking or crowding, keeping your sneakers, flats, sandals, and more neatly organized and easy to grab when you head out. Whether you need a bench with shoe storage for your family’s daily footwear or extra space for guests’ shoes, this design adapts to your needs

【16-Cube Open Storage for Shoe Organization】This shoe rack bench with 16 spacious open cubbies, each measuring 10.6" L x 9.25" W x 5.11" H. Store each pair of shoes individually without stacking or crowding, keeping your sneakers, flats, sandals, and more neatly organized and easy to grab when you head out. Whether you need a bench with shoe storage for your family’s daily footwear or extra space for guests’ shoes, this design adapts to your needs

[6-in-1 Hall Tree Solution] This large hallway tree delivers complete entryway organization with top storage, 4 dual-tier hooks, 3 open cubbies, plus a handy desktop. The hall tree features 2 adjustable shelves for custom height design, making this white hall tree your perfect partner for a clutter-free home.
3. Cut Wood to Size
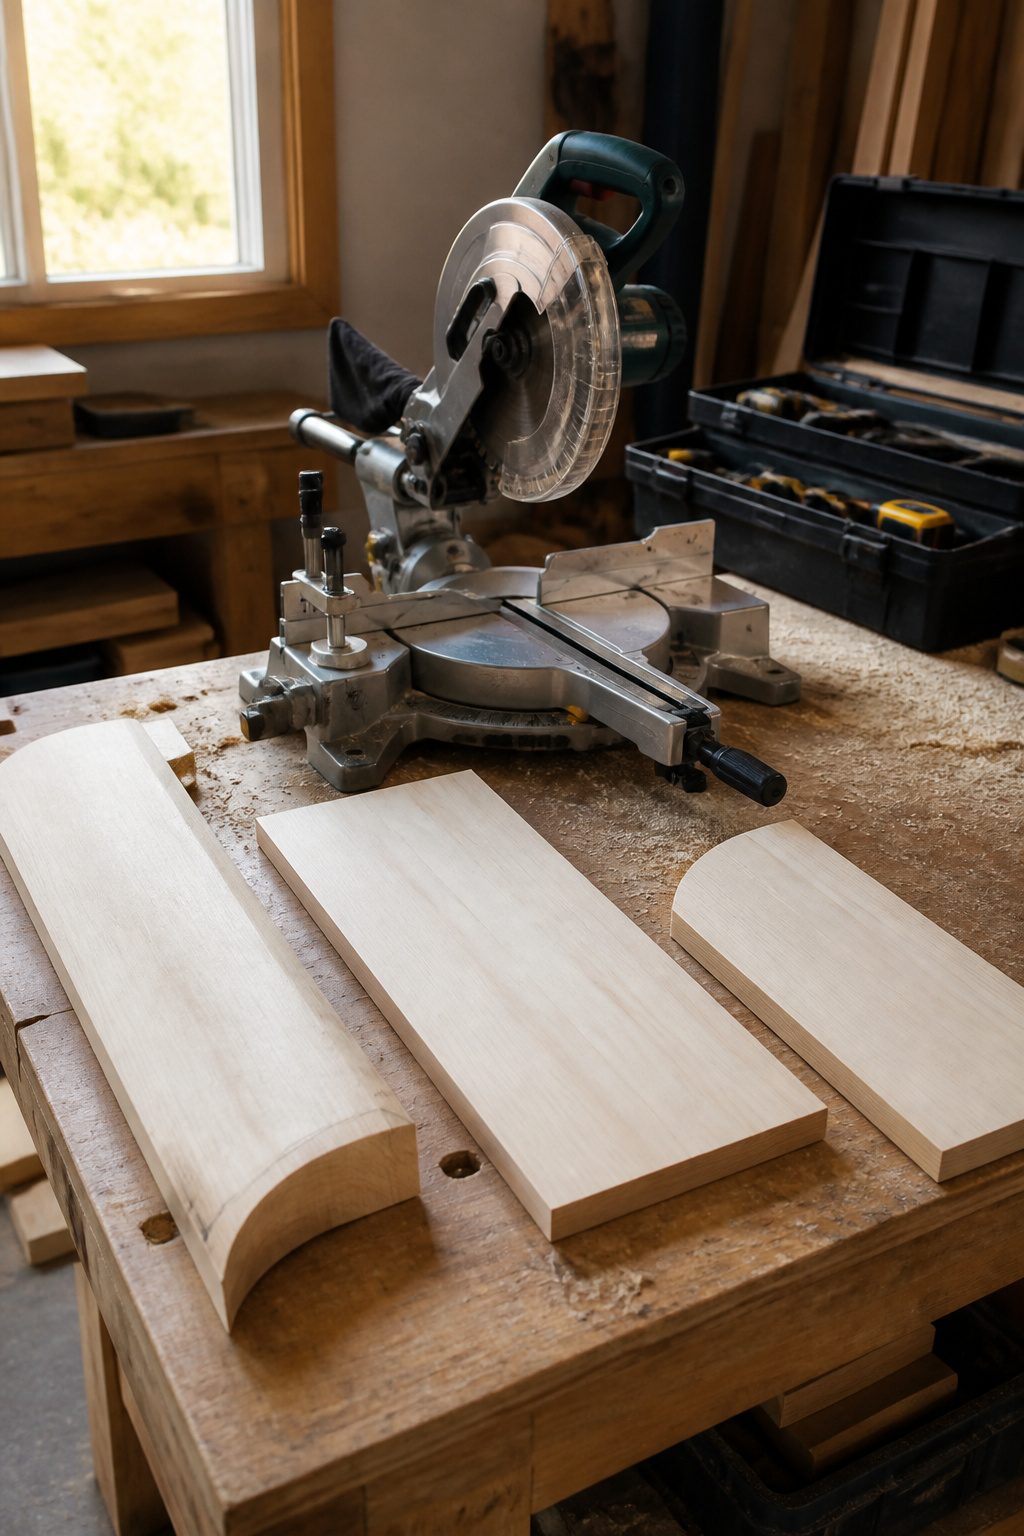
A simple bench for an entryway lands at 37" long x 11" wide x 18" tall, which fits most nooks without eating floor space. We like that size because it leaves room to walk past even in a tight hall, and you can still sit to pull off boots.
The cuts come first, before any glue or screws touch wood. Measure twice against your actual tape, not the marks on the board edge, because a saw blade eats an eighth inch you did not plan for. For this bench you will need two side pieces at 16 1/2" each, one shelf at 26", and the remaining 37" becomes your top. One board does it if you pick straight lumber; a bowed piece will rock on the floor no matter how square your joints are.
A miter saw or table saw handles the work at home. If you do not own one, the home improvement store will cut to your list, and we have done that to save a Saturday morning. Either way, check each length against the next piece before moving on. Fixing a bad cut after assembly starts is nearly impossible without buying new stock.

[PREMIUM MATERIAL]: Crafted from solid parawood, known for its exceptional durability and long-lasting quality. This untreated wood allows you to paint or stain it in any...
4. Assemble the Frame
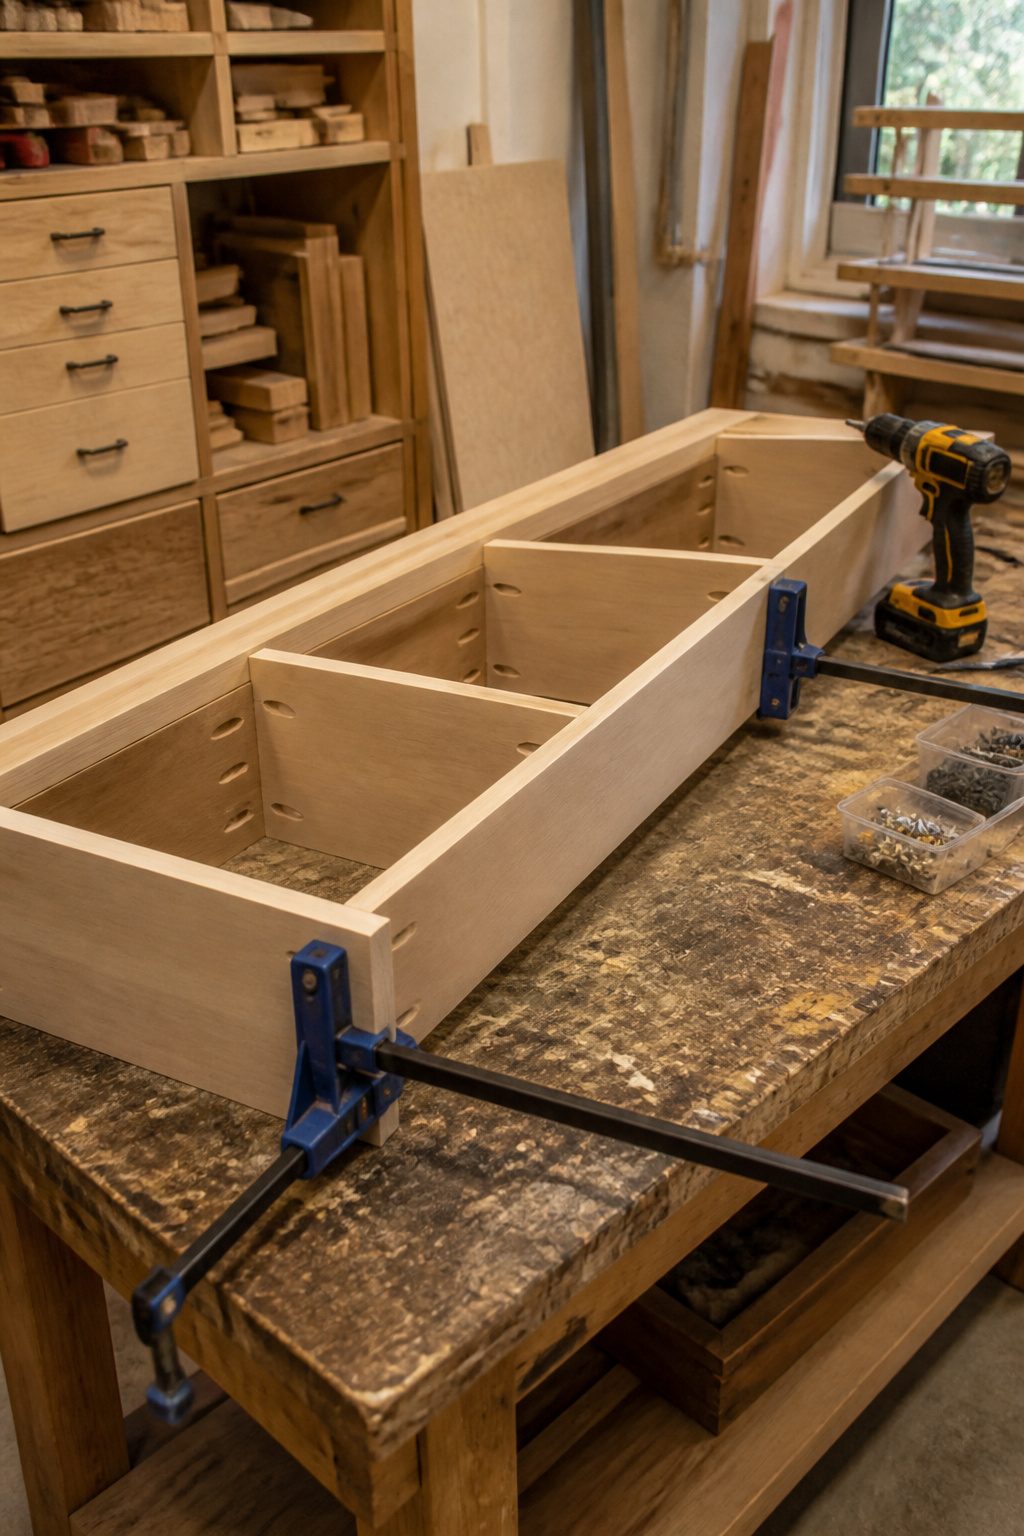
We set the sides on the workbench and drilled two pocket holes in the top of each 16 1/2″ bench side with a Kreg jig. The jig costs about forty dollars and turns a basic drill into a joinery tool; no table saw, no router, no thousand-dollar setup. We added two more pocket holes to each end of the 26″ shelf piece, plus two along its length so we could screw up from underneath later.
Clamps matter more than the screws themselves. We used spring clamps to hold the front and back stretchers flush while we drove the first pocket screws, then flipped the frame and clamped the lower shelf trim exactly 1″ from the bottom of the legs. Without that pressure, the joint drifts. We learned that the hard way on a previous build where the shelf sat crooked for two years.
A circular saw and a drill are enough for this entire stage. The Kreg jig does the angled work; the clamps keep it square. We attached the bottom shelf with 1 1/4″ pocket screws, checked for wobble, and moved on.

【COMPARTMENT DESIGN MEETS OPEN STORAGE】This shoe bench comes from VASAGLE CUSTOS Collection, characterized by the open compartment design that embodies easy-to-blend-in minimalism, while ensuring everything's organized and easily accessible

47.2 Inch Spacious Family Size:Boasting a 47.2-inch size, this upgraded storage bench fits perfectly in entryways, apartments and family rooms with long flat walls. Integrating full-size seating and abundant storage in a frame, this shoe bench with storage allows multiple family members to sit and change shoes simultaneously. This storage bench greatly optimizes your entryway layout, offering comfortable seating and neat storage without occupying extra space.

39.4 Inch Spacious Family Size:Boasting a 39.4-inch size, this upgraded storage bench fits perfectly in entryways, apartments and family rooms with long flat walls. Integrating full-size seating and abundant storage in a frame, this shoe bench with storage allows multiple family members to sit and change shoes simultaneously. This storage bench greatly optimizes your entryway layout, offering comfortable seating and neat storage without occupying extra space.
5. Add Storage Features
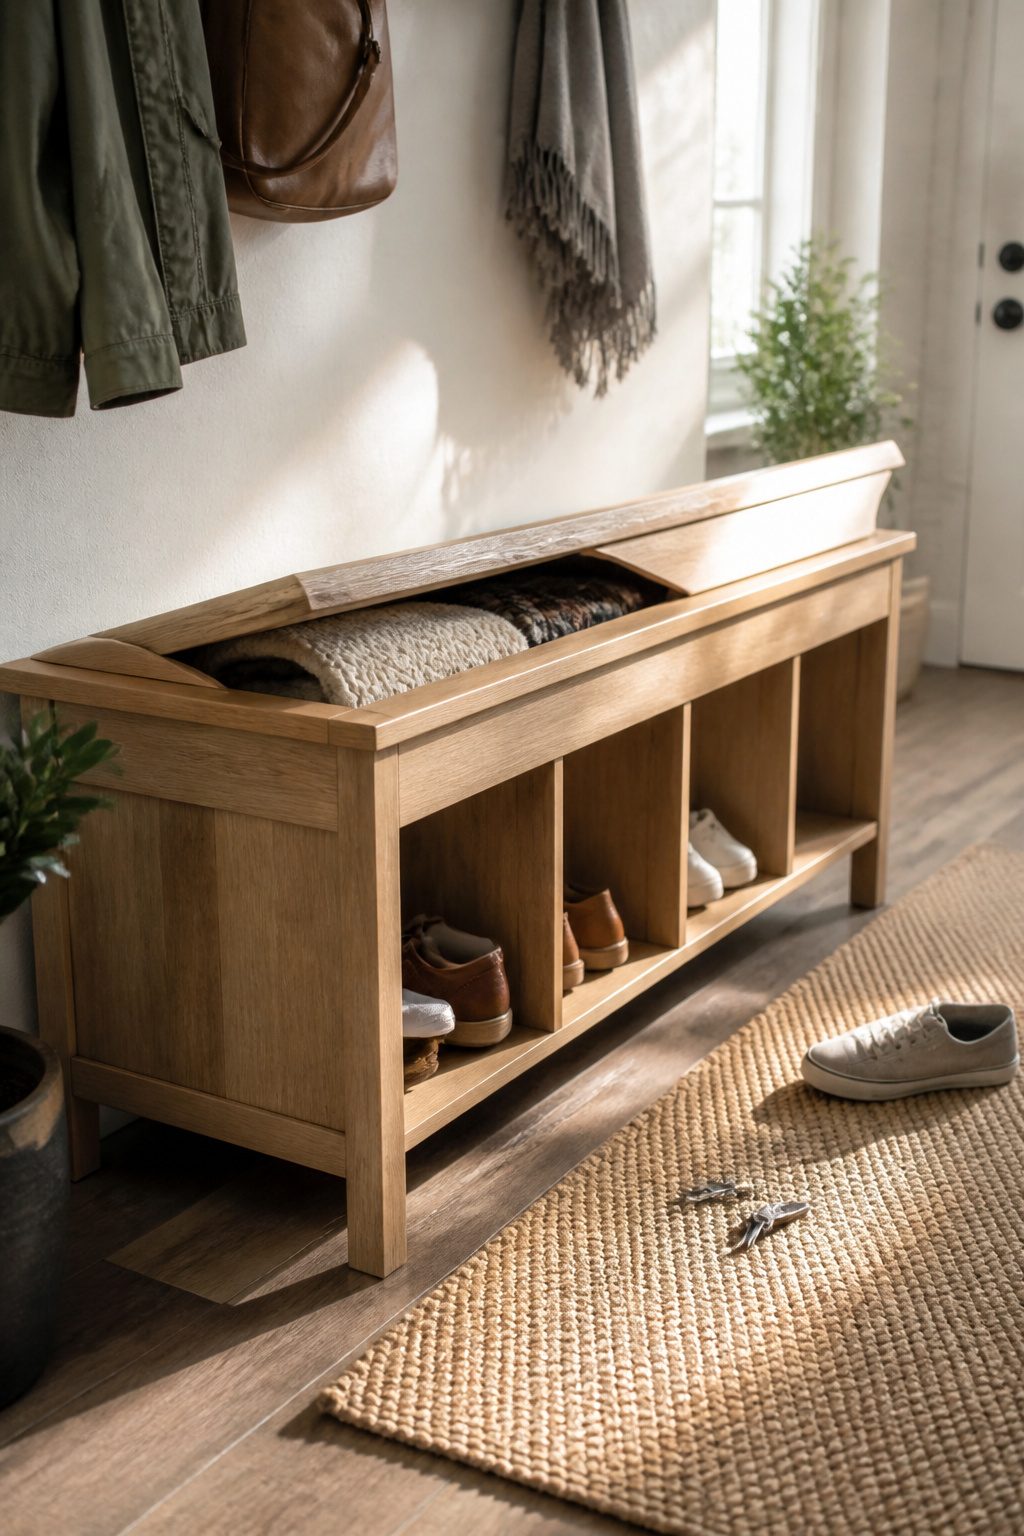
This is where the bench stops being a place to sit and starts earning its keep in your entryway. The storage you choose now will dictate how you actually use the thing every morning.
Open cubbies are the simplest add-on if you already installed dividers during framing. They keep everyday shoes off the floor and within reach, which matters when your household kicks them off the second they walk through the door. A hinged lift-top seat changes the equation entirely, giving you hidden storage for gloves, scarves, or whatever seasonal clutter you do not want sitting out. If you go this route, soft-close hinges are worth the few extra dollars. Nothing ruins the illusion of a clean entryway like a seat that slams shut when your kid drops it.
Drawers take more work but handle the small stuff better. Keys, mail, the dog’s leash, all of it stays out of sight and your bench top stays clear. In a tight space, maximizing storage is what makes a DIY bench worth the weekend you are spending on it.
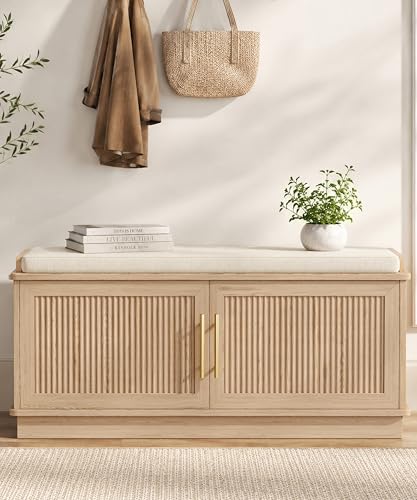
Unique Fluted Design: This shoe bench features an exquisite fluted panel design with smooth curved edges, blending modern minimalism with warm tones — measuring 13.8"D x 39.4"W x 18.1"H, it's sized just right to enhance visual rhythm in your entryway, living room, or bedroom while keeping safety in mind
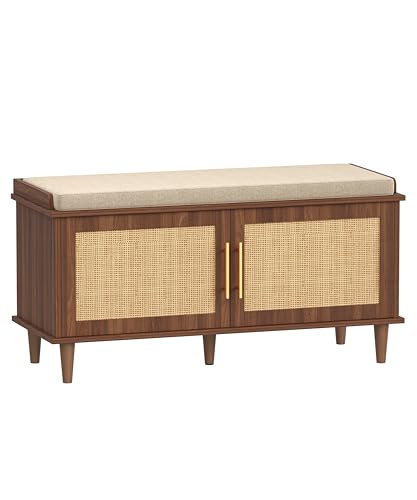
Flexible Storage: The shoe bench features an adjustable middle shelf with three height options (3.9", 6.3", and 11.8"), ensuring that high heels, mid-calf boots, and sneakers all fit neatly without crowding. Additionally, the two-door design provides ample storage space to accommodate 8-12 pairs of shoes, keeping your entryway organized

More Comfortable Shoe Change Cabinet: With a 25 mm sponge cushion on the bench top, you can change shoes by sitting on the bench more comfortable without bending down or squatting
6. Finish the Bench
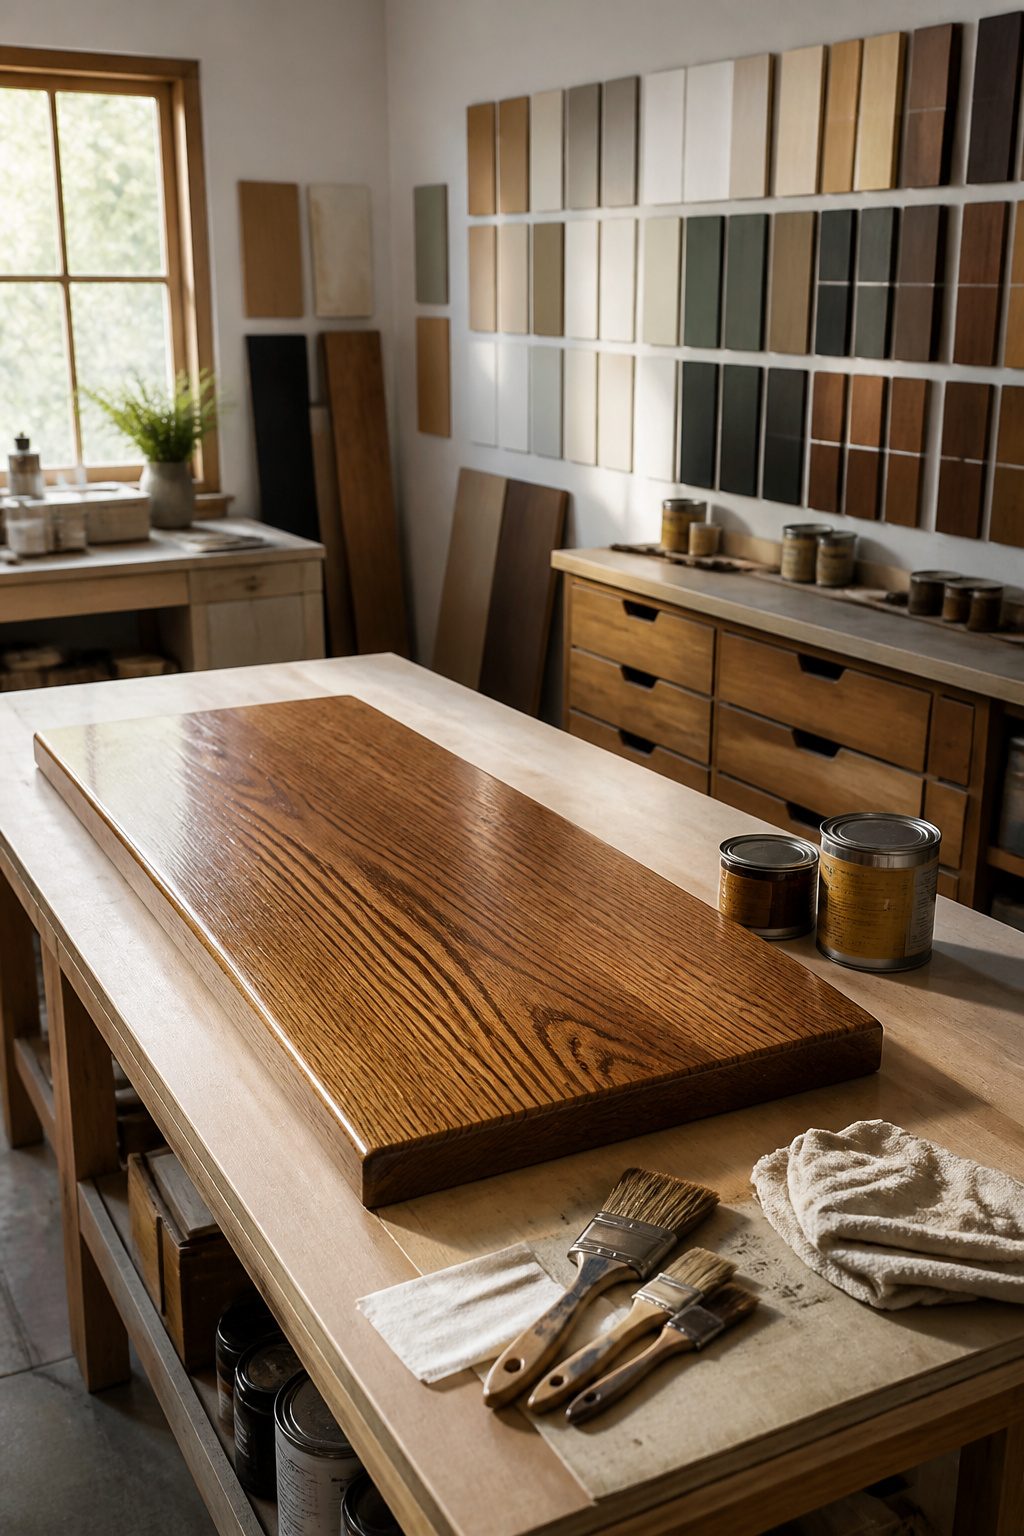
Sanding is where patience pays off or where the whole build shows its rough edges. We start with 120-grit paper to knock down any joints or glue spots, then move to 220-grit until the surface feels smooth under your palm. Skip that second grit and stain will grab unevenly; paint will telegraph every bump.
For stain, we have had good luck with Minwax Pre-Stain Conditioner followed by two coats of Minwax Special Walnut. The conditioner matters more than the color choice. Without it, soft pine soaks stain dark at the edges and leaves the center blotchy. We learned that after one bench that looked tie-dyed no matter how we wiped it.
Sealer is non-negotiable on a piece that takes bags, boots, and wet coats. Minwax Polycrylic in Semi-Gloss dries clear and will not yellow over time the way oil-based finishes can. Polyurethane protects durability; two to three coats, sanding lightly between each one with 220-grit, gives a surface that survives daily scuffing. The mistake we keep making is rushing the recoat. Polycrylic feels dry in an hour but stays soft underneath for several more. We have left fingerprints in a "dry" second coat more than once. Wait until the surface no longer feels cool against your cheek, then sand gently, wipe the dust with a tack cloth, and lay the next coat down. A weekend bench deserves a finish that lasts past the first muddy season.

【Farmhouse Warmth, Modern Function】Add rustic charm and cozy elegance to your entryway or bedroom. This farmhouse shoe bench combines sturdy wood construction and vintage metal accents for a warm, inviting touch that fits any décor style.

LARGE STORAGE: This 47.2"L x 13.7"W x 17.7" H shoe ottoman bench features hidden drawers, a four-door structure , which can assist you in organizing and storing your items. The hidden drawer beneath the seat can be used to store small items such as socks, keys. The double-door cabinet in the four-compartment unit features a detachable and adjustable height divider, provides ample storage space for different types of shoes, clothes, toys with the single-door cabinet. As a shoe storage bench, this shoe bench can accommodate 12 to 14 pairs of shoes.

Extra Long Entryway Bench with Lift Top Storage: When you lift the top of the bench, you'll find spacious storage that can accommodate umbrellas, soft hats, small shoulder bags, purses, keys, and other assorted items. This storage bench is an ideal addition to your entryway. It provides ample space for shoes and is sturdy enough for you to sit down and tie your shoes before heading out.
Types of DIY Entryway Benches
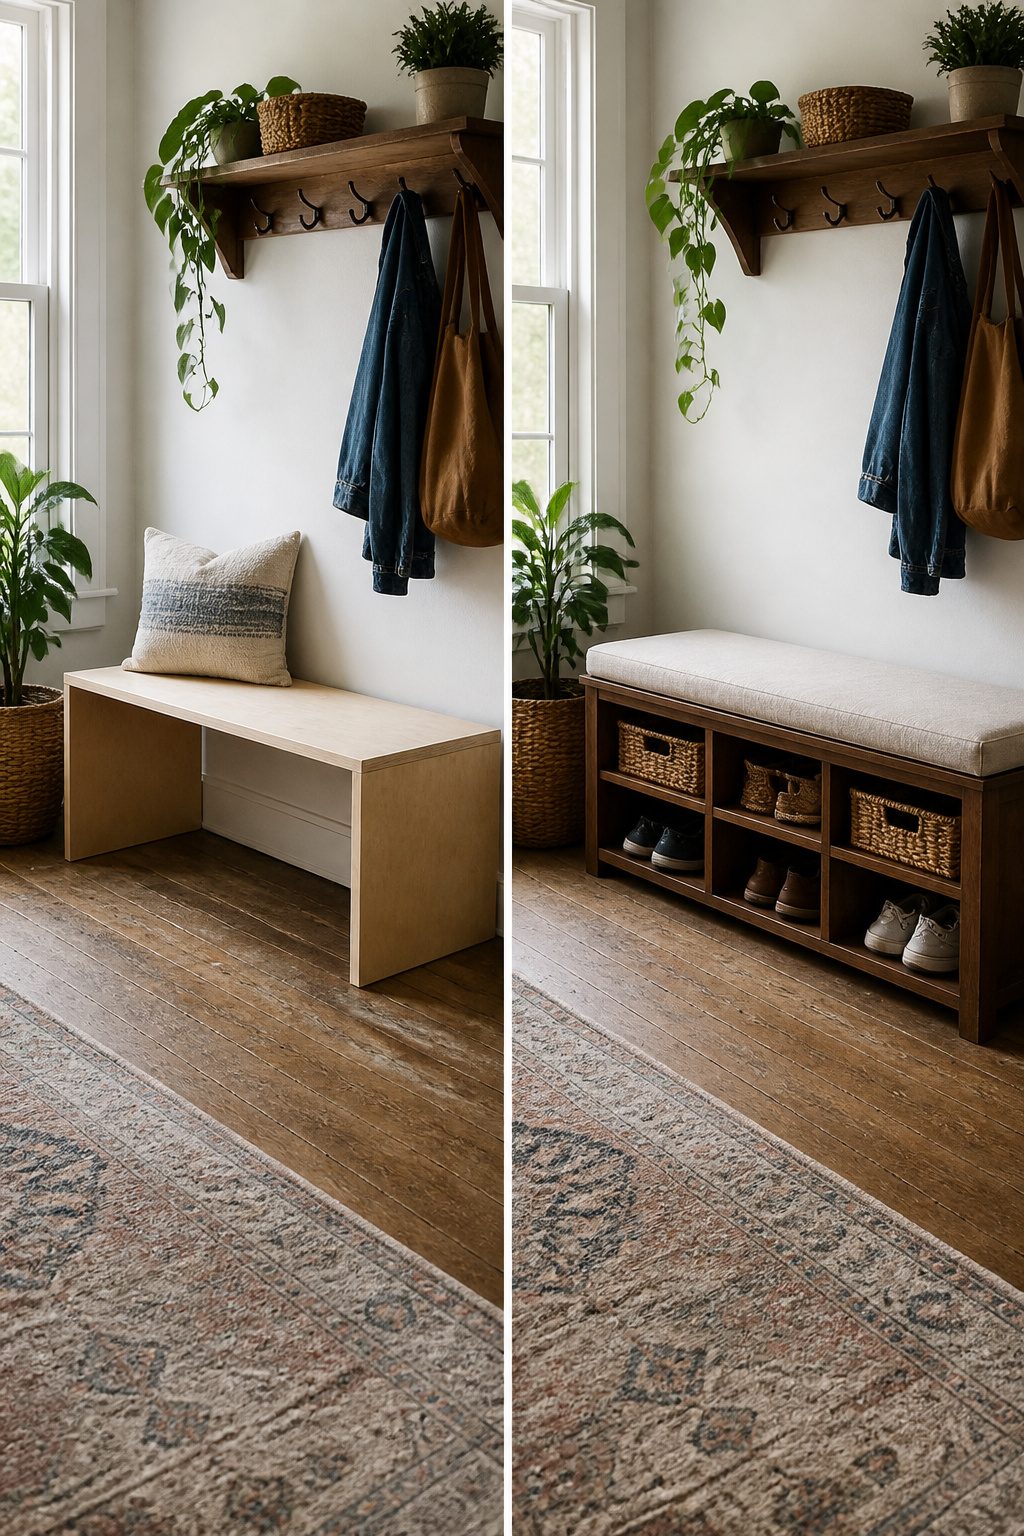
A simple bench built from a single board fits tight nooks and short walls where anything deeper would block traffic. Angela Marie Made built hers about 37 inches long, 11 inches wide, and 18 inches tall for under ten dollars, and that footprint is about right for a rental where you need seating today and an easy patch job tomorrow.
If shoes are the problem, the open cubby bench is the harder-working piece. A plywood carcass trimmed with 1x3s gives you compartments you can size to your family’s boots or baskets, and the clutter stays visible so nobody forgets to put it away. This is the build to choose when the entryway is also the mudroom and the closet is somewhere else.
The lift-top bench hides storage beneath the seat, which sounds tidier until you live with it. You will need four hinges rated for the weight, and you will lift that top every time you want what is inside. We think this works best for seasonal items you grab monthly, not daily.
Built-in benches are custom-fit to a wall or alcove and demand more time and more precise cuts. They are worth the trouble if you own the wall and the space is genuinely awkward, but for a renter or a first project, the freestanding options give you ninety percent of the function with a fraction of the commitment.

[Farmhouse Style] Enhance your entryway with this wonderful coat rack and shoe bench! It adds a touch of farmhouse charm into your home, suitable for entrance, hall, foyer, hallway, porch, living room ect.

3 OPEN CUBBIES: Three square cubbies compartment for boots, heels, or handbags keep everyday items visible and within reach. Bins shown are for styling only and not included.

【16-Cube Open Storage for Shoe Organization】This shoe rack bench with 16 spacious open cubbies, each measuring 10.6" L x 9.25" W x 5.11" H. Store each pair of shoes individually without stacking or crowding, keeping your sneakers, flats, sandals, and more neatly organized and easy to grab when you head out. Whether you need a bench with shoe storage for your family’s daily footwear or extra space for guests’ shoes, this design adapts to your needs
Materials and Wood Selection
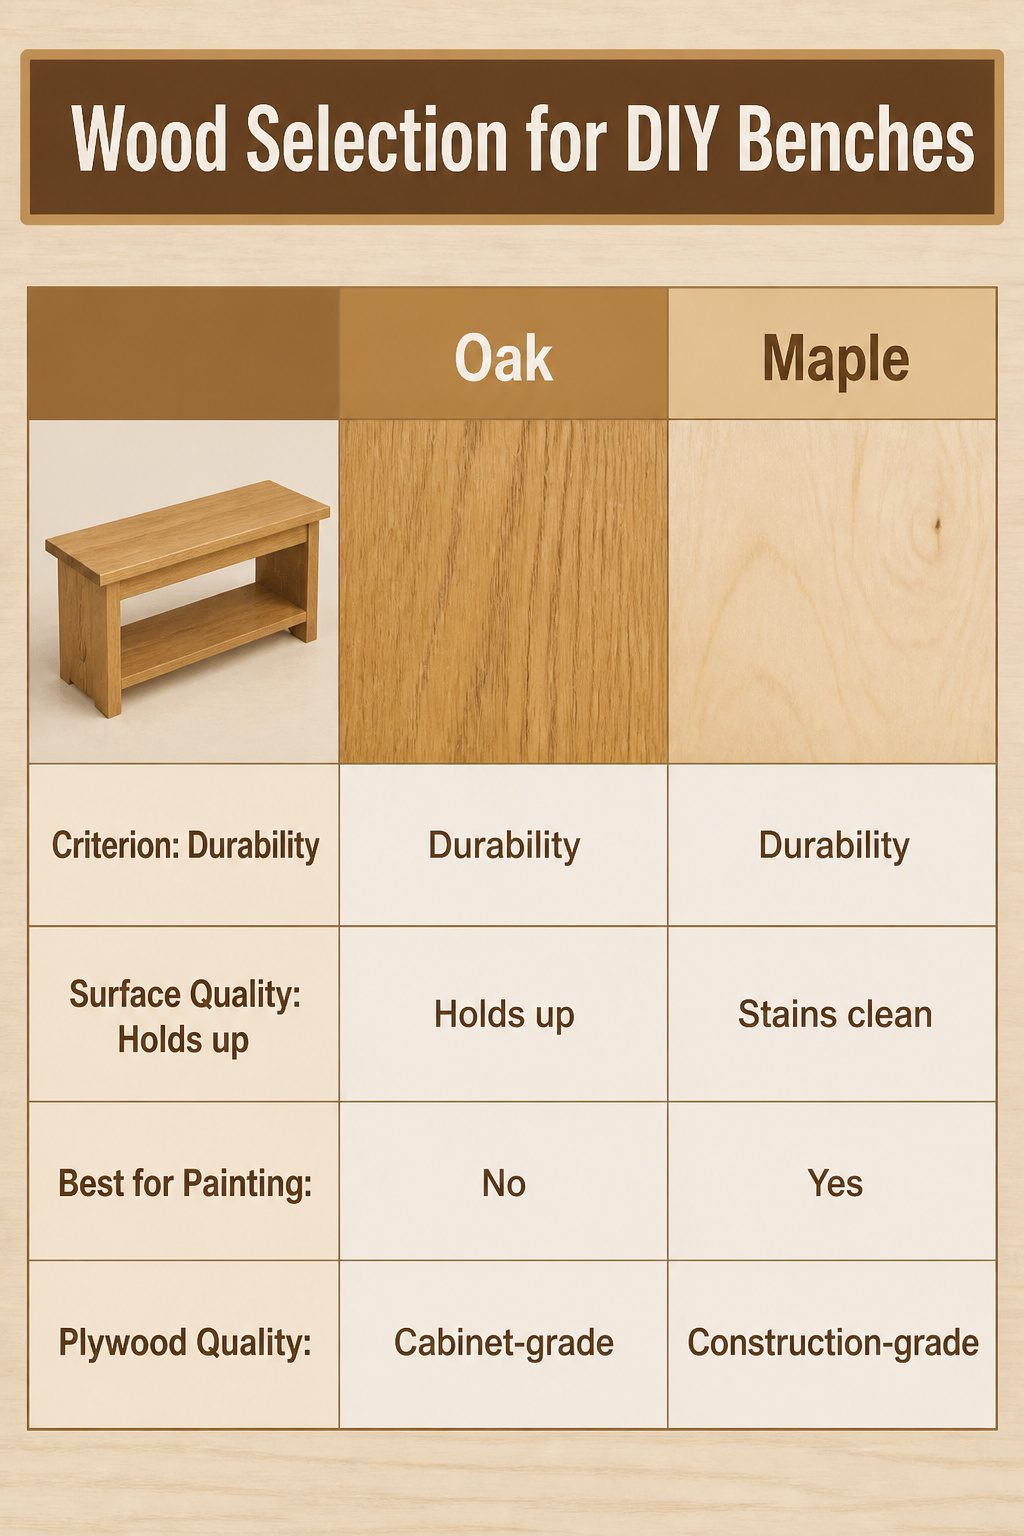
The wood you pick for a bench will either hold up for years or look beat-up by spring. We have built enough of these to know the difference starts at the lumber rack.
Oak or maple is what you want for a bench that takes daily traffic. Both are hard enough to resist dents from boots, kids, and the occasional heavy load of groceries. Oak in particular holds its surface through real use. Maple stains clean or takes a clear coat that shows off the grain without looking busy.
Poplar is the practical call when you plan to paint. It is cheaper than oak or maple, and its grain runs smooth enough that paint sits flat without the blotching you get from more open-grained woods. We have used it for painted benches that still look decent five years later.
For the base, do not grab construction-grade plywood. Cabinet-grade plywood is worth the step up. It stays flat, holds screws without stripping, and does not telegraph every bump through your paint or stain the way sheathing plywood will. The difference in price is real, but so is the difference in how the bench feels when you sit on it.
Tools You Will Actually Use
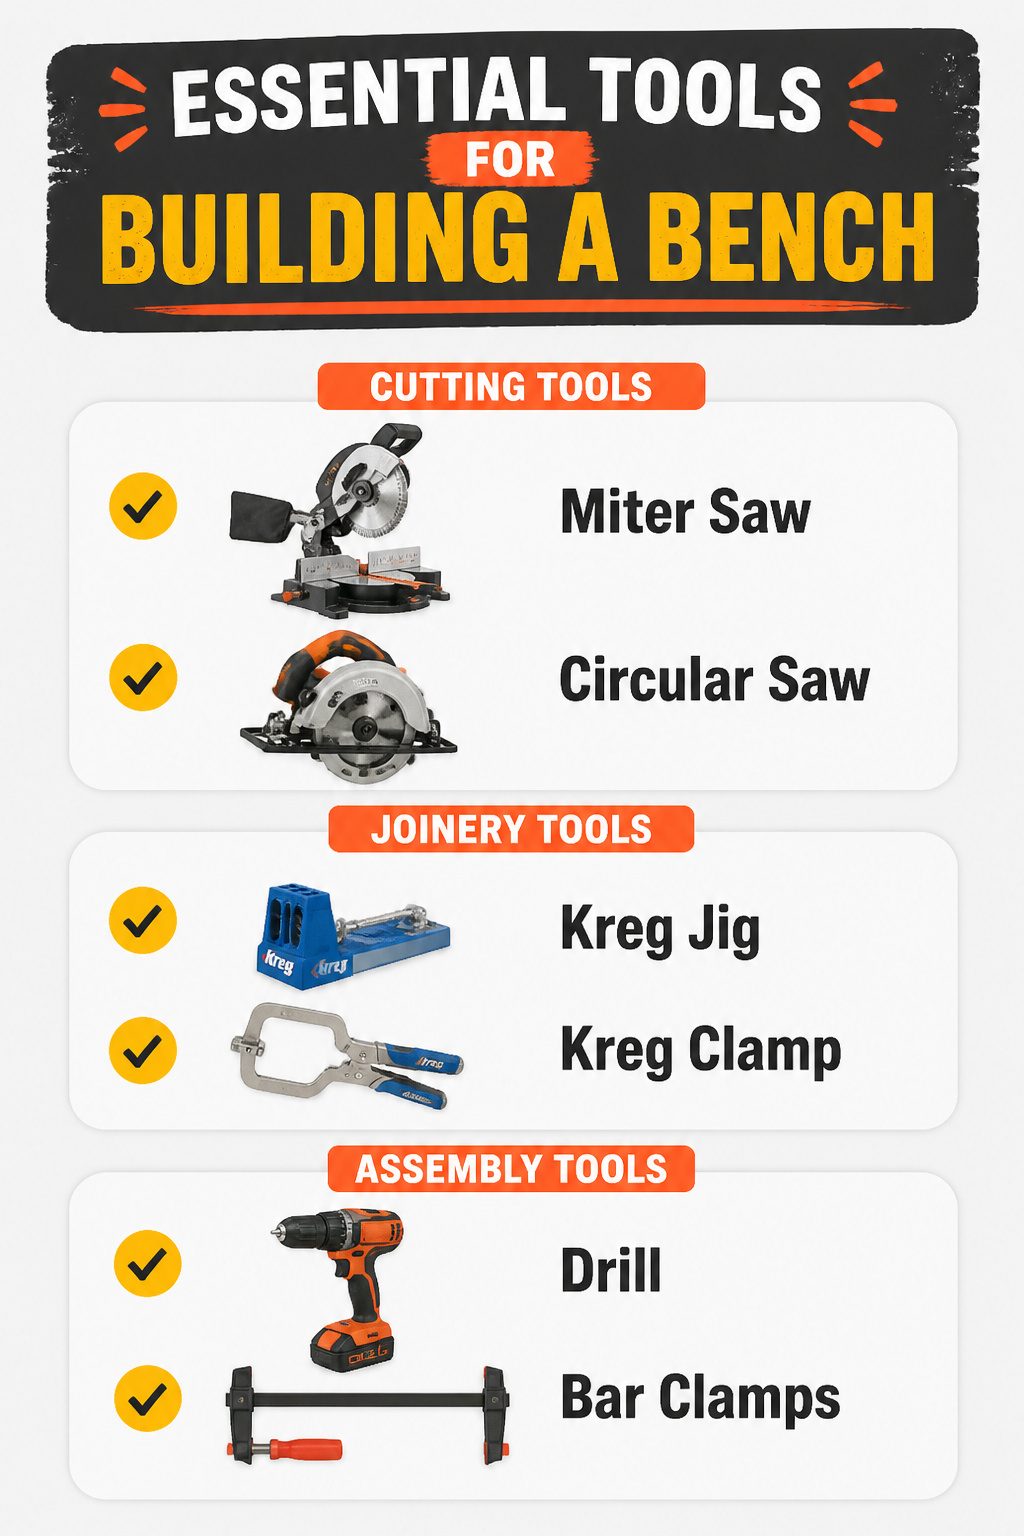
A miter saw or a circular saw will handle every cut for this bench, and either one is enough. We have used both; the miter saw saves time on repeated crosscuts because the fence keeps the board square without fuss, but a circular saw with a speed square will get you the same clean ends if you cut slow and clamp a straightedge. The Kreg Jig or Kreg Jig Jr. is what lets you build this without a full shop; it drills the angled pocket holes that hide your screws and pull the joints tight. You will want the matching Kreg clamp too, since a loose jig shifts mid-drill and ruins the angle. A drill, any drill, drives the screws. Clamps matter more than people expect; we have watched glue joints open up while we hunted for a third hand. Two bar clamps minimum, four is better. That is the list. No table saw, no router, no dust collection system. We have built sturdy benches on apartment balconies with this exact setup and a folding work table.

39.4 Inch Spacious Family Size:Boasting a 39.4-inch extra-long size, this versatile storage bench fits perfectly in entryways, apartments and family rooms with long flat walls. Integrating full-size seating and abundant storage in a frame, this shoe bench with storage allows multiple family members to sit and change shoes simultaneously. This storage bench greatly optimizes your entryway layout, offering comfortable seating and neat storage without occupying extra space.

Fitment: Designed for 2022 2021 2022 2023 2024 2025 2026 F150 models with 40/20/40 split-bench front seat. Not for Console Bucket Seats.

[More Variety] Tall shoes, small shoes, just about all shoes; with 3 adjustable shelves, store shoes big and small—or even your favorite storage boxes—among 6 compartments in this spacious shoe bench designed with variety in mind
Finishing Techniques That Last
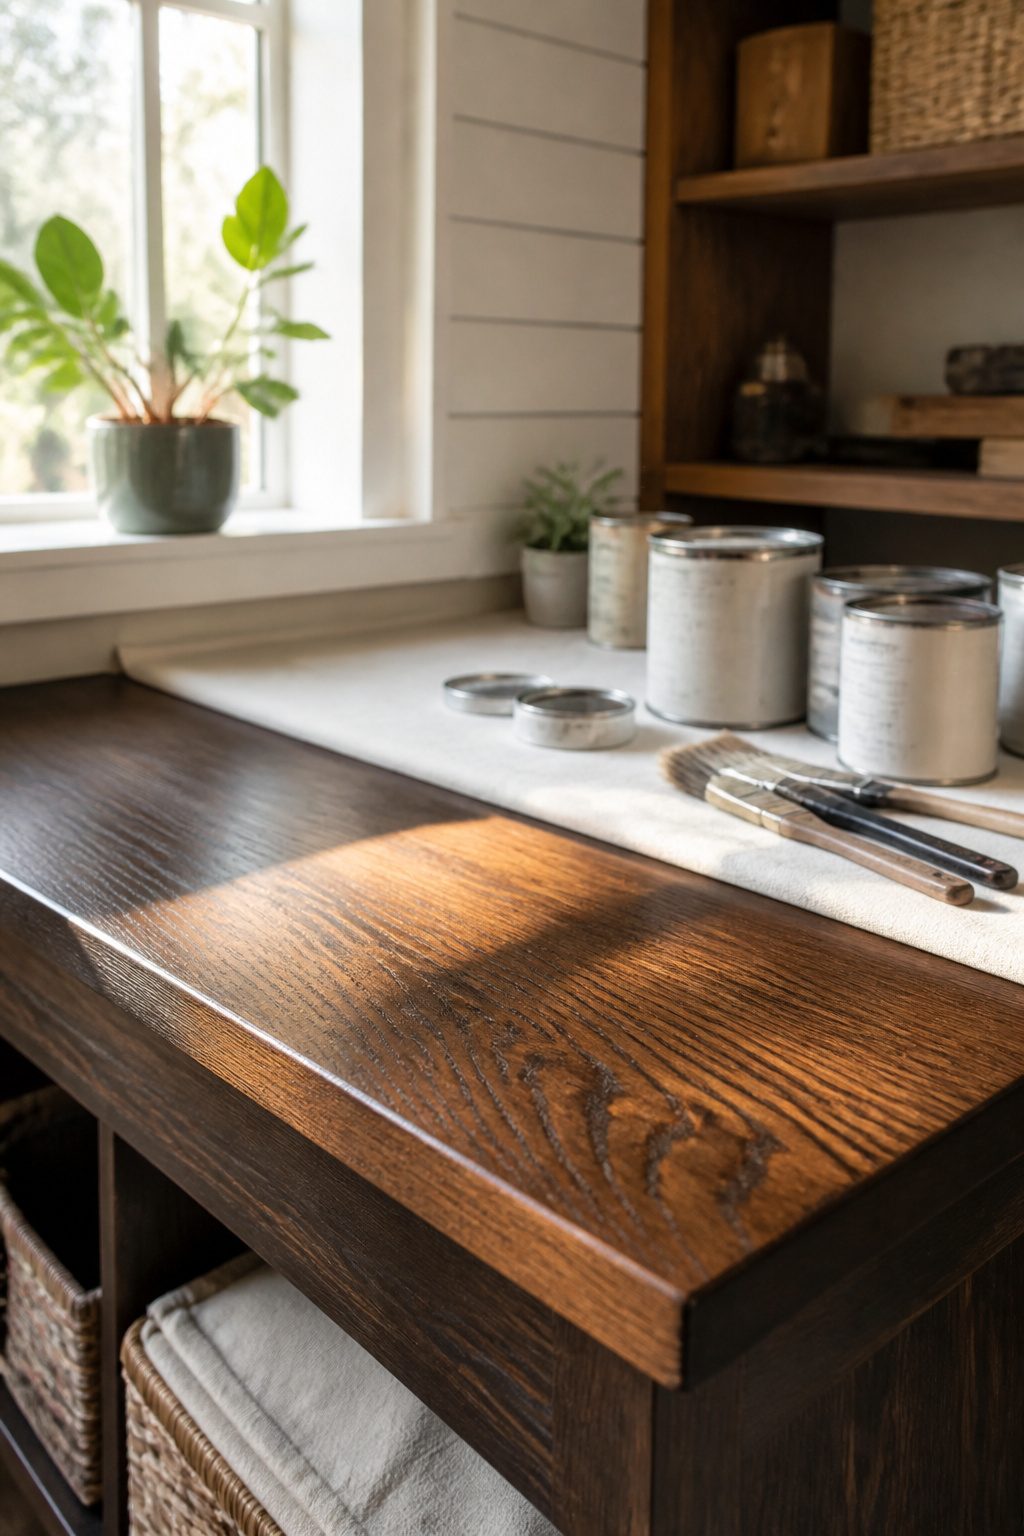
Start with 120-grit sandpaper and work up to 220-grit before any finish touches the wood. Skipping the progression leaves swirl marks that stain will spotlight and paint will only partly hide. We learned that the hard way on a pine bench where 150-grit looked smooth enough until the first coat of stain went down.
Stain shows the grain and forgives the odd ding better than paint, but paint hides mismatched boards or a patch job on the seat. For an entryway piece, the real decision comes after the color is down. Boots drag grit, bags scrape corners, and winter salt rides in on cuffs. A protective topcoat is non-negotiable here.
We reach for Minwax Polycrylic in Semi-Gloss when we want clear protection that will not yellow over time, especially over lighter stains or paint. Two to three coats, sanding lightly between each one, builds a surface that stays smooth through real use. Oil-based polyurethane works over darker stains, but the water-based polycrylic dries faster and keeps the color you chose. Either way, that final film is what stands between your weekend of work and the scuff marks that start on day three.

Flexible Storage: The shoe bench features an adjustable middle shelf with three height options (3.9", 6.3", and 11.8"), ensuring that high heels, mid-calf boots, and sneakers all fit neatly without crowding. Additionally, the two-door design provides ample storage space to accommodate 8-12 pairs of shoes, keeping your entryway organized

More Comfortable Shoe Change Cabinet: With a 25 mm sponge cushion on the bench top, you can change shoes by sitting on the bench more comfortable without bending down or squatting
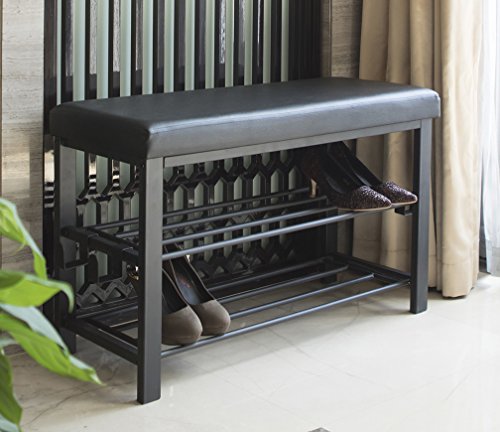
MULTI FUNCTIONAL & EASY TO INSTALL - Perfect height to sit on and change your shoes, put it at your entryway for shoes or your bed end for pillow and blanket. The 2 shelves are easy to access and will not occupy too much room.
Frequently Asked Questions
What is the best type of wood for a sturdy entryway bench?
Oak or maple are the top picks for a bench that takes daily traffic from boots, bags, and kids. Both resist dents and hold their surface through real use. Poplar is the smarter, cheaper choice if you plan to paint, since it takes paint cleanly and its grain stays smooth.
How can I customize the bench for a small or awkward entryway?
Start with a tape measure and a rough sketch, not a saw. An L-shaped bench turns a corner into usable seating, while a taller, slimmer unit buys back floor space in a narrow hall. Keep depth at 15-1/4 inches if floor space is tight, and account for door swings and vents before you cut.
Do I need advanced woodworking tools to build this bench?
No. A circular saw and a drill are enough for the entire build. A Kreg jig, which costs about forty dollars, drills the angled pocket holes that hide your screws and pull joints tight. Clamps matter more than people expect; two bar clamps minimum, four is better.